How to create Canned Messages in AiSensy App?

Bookmark

What are Canned Messages?

 As an agent, there are many general queries to which you have to copy-paste the same answer repeatedly. 

E.g. product pricing, product description, welcome message & more.

NOW, you won’t need to do that!

Instead, you can save your responses through Canned Messages & push them to your users in a single click from the live chatbox. 

Canned messages are responses that you can pre-set and use in your chat repeatedly by using a '/' in the Live chatbox.

Whether it’s a welcome message🤝, about the company🏢, product pricing💶, product description, or more; send it hassle-free, only on AiSensy!

And it doesn’t just need to be a text message!😉

You can also add images📸, files📂, audio🎶 & videos🎦 as canned messages, depending on your use cases.

 You can favourite your most frequently used canned messages to pin them to the top for easy accessibility. 
How to create Canned Messages in AiSensy App?

  • 1

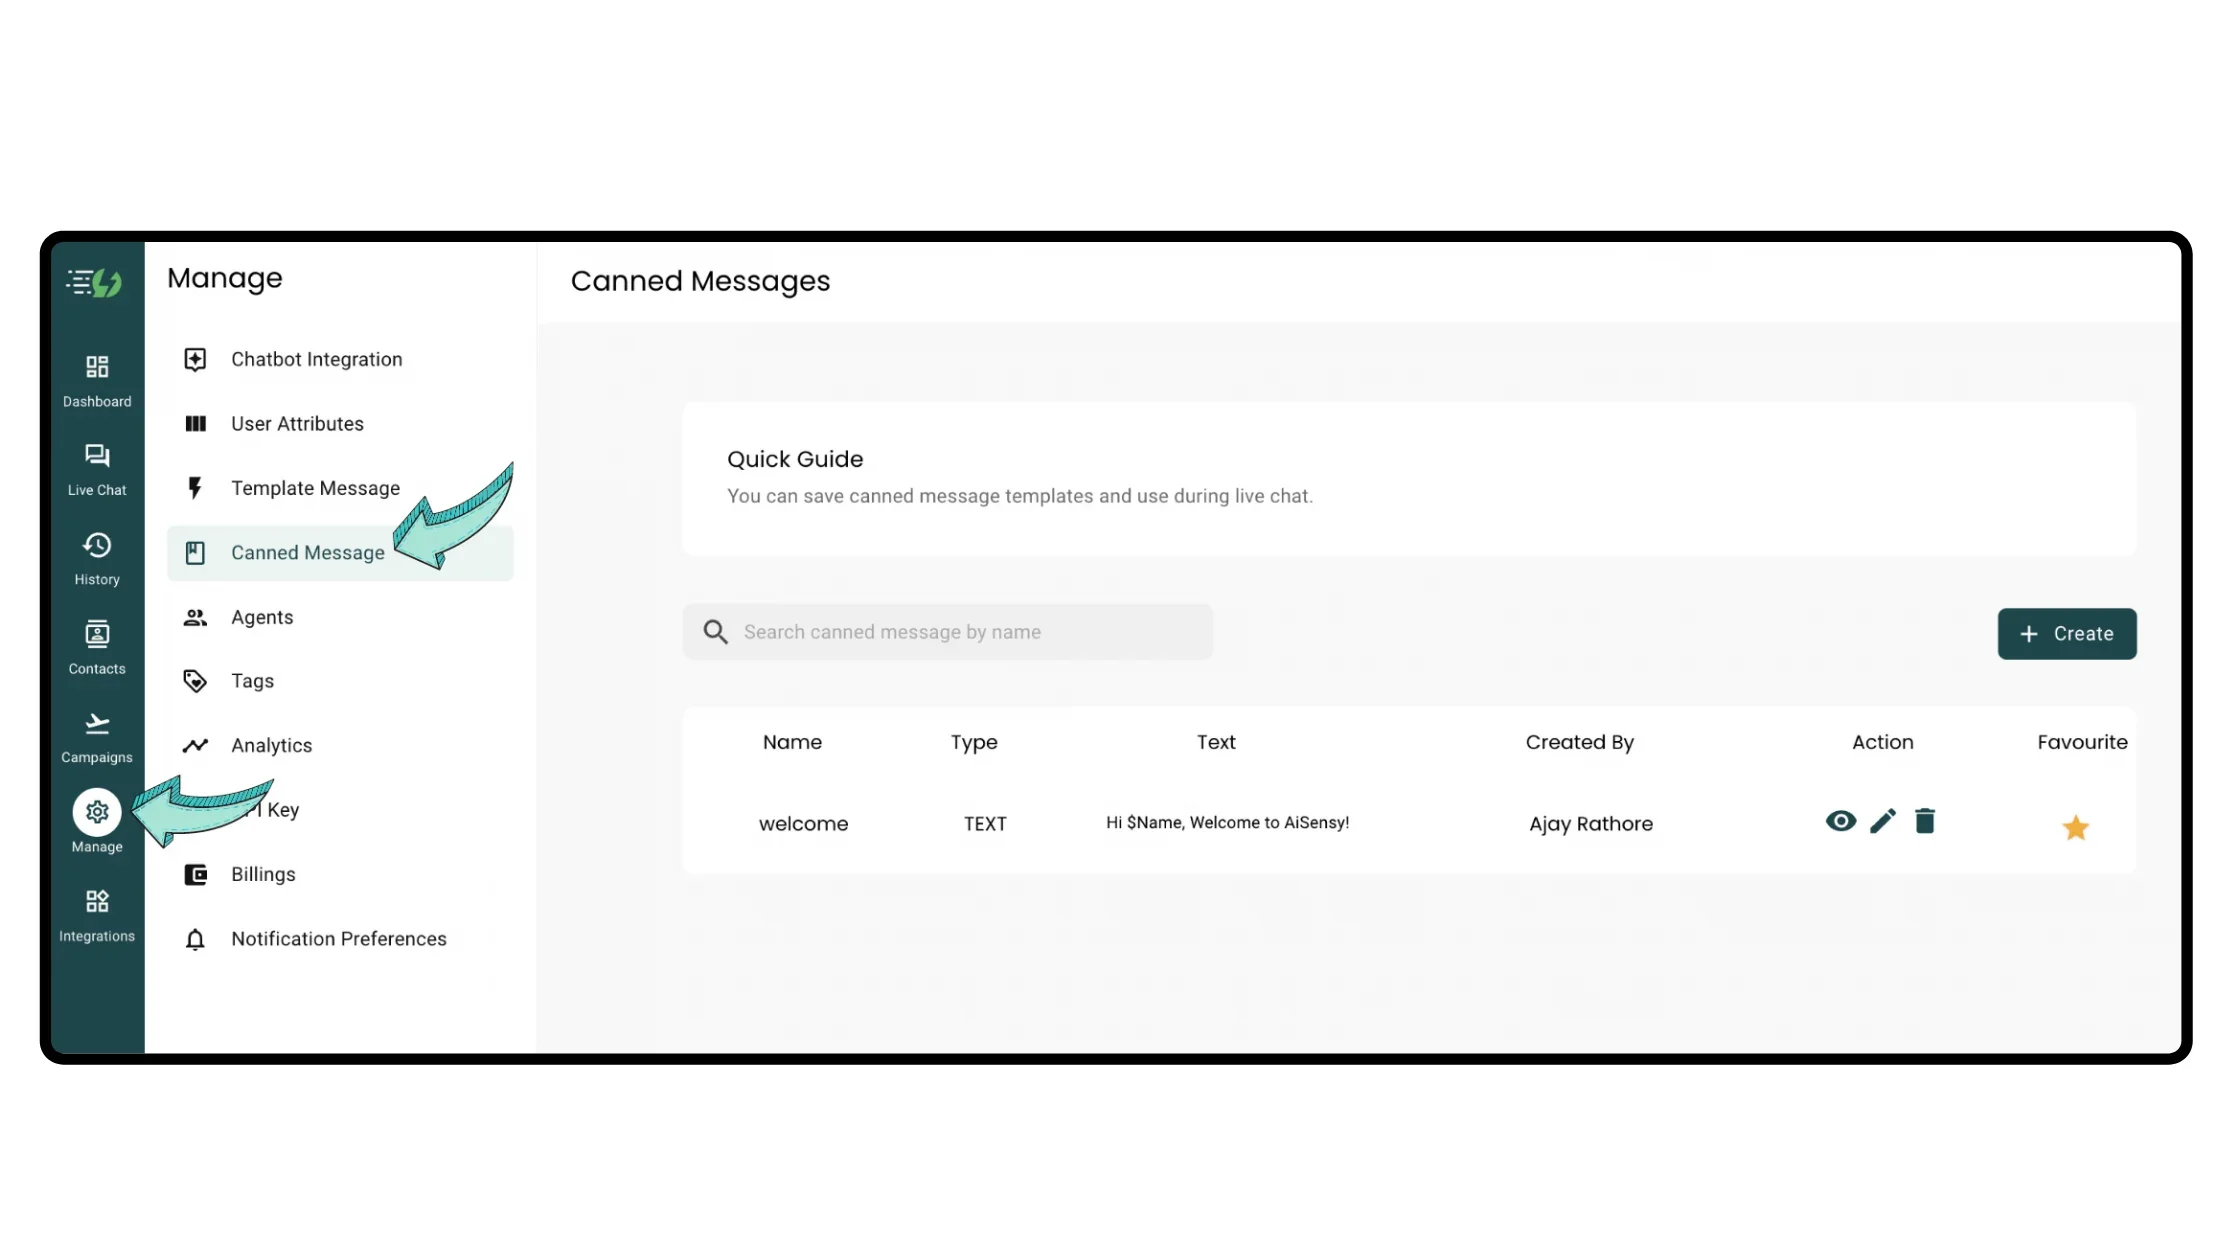
    Reach Canned Messages in Manage Section


    To send canned messages to users, you first need to create them in AiSensy App.

    You’ll find Canned Messages in Manage Section as shown in the image to the left.

    Go to canned messages in manage
  • 2

    Create a Canned Message

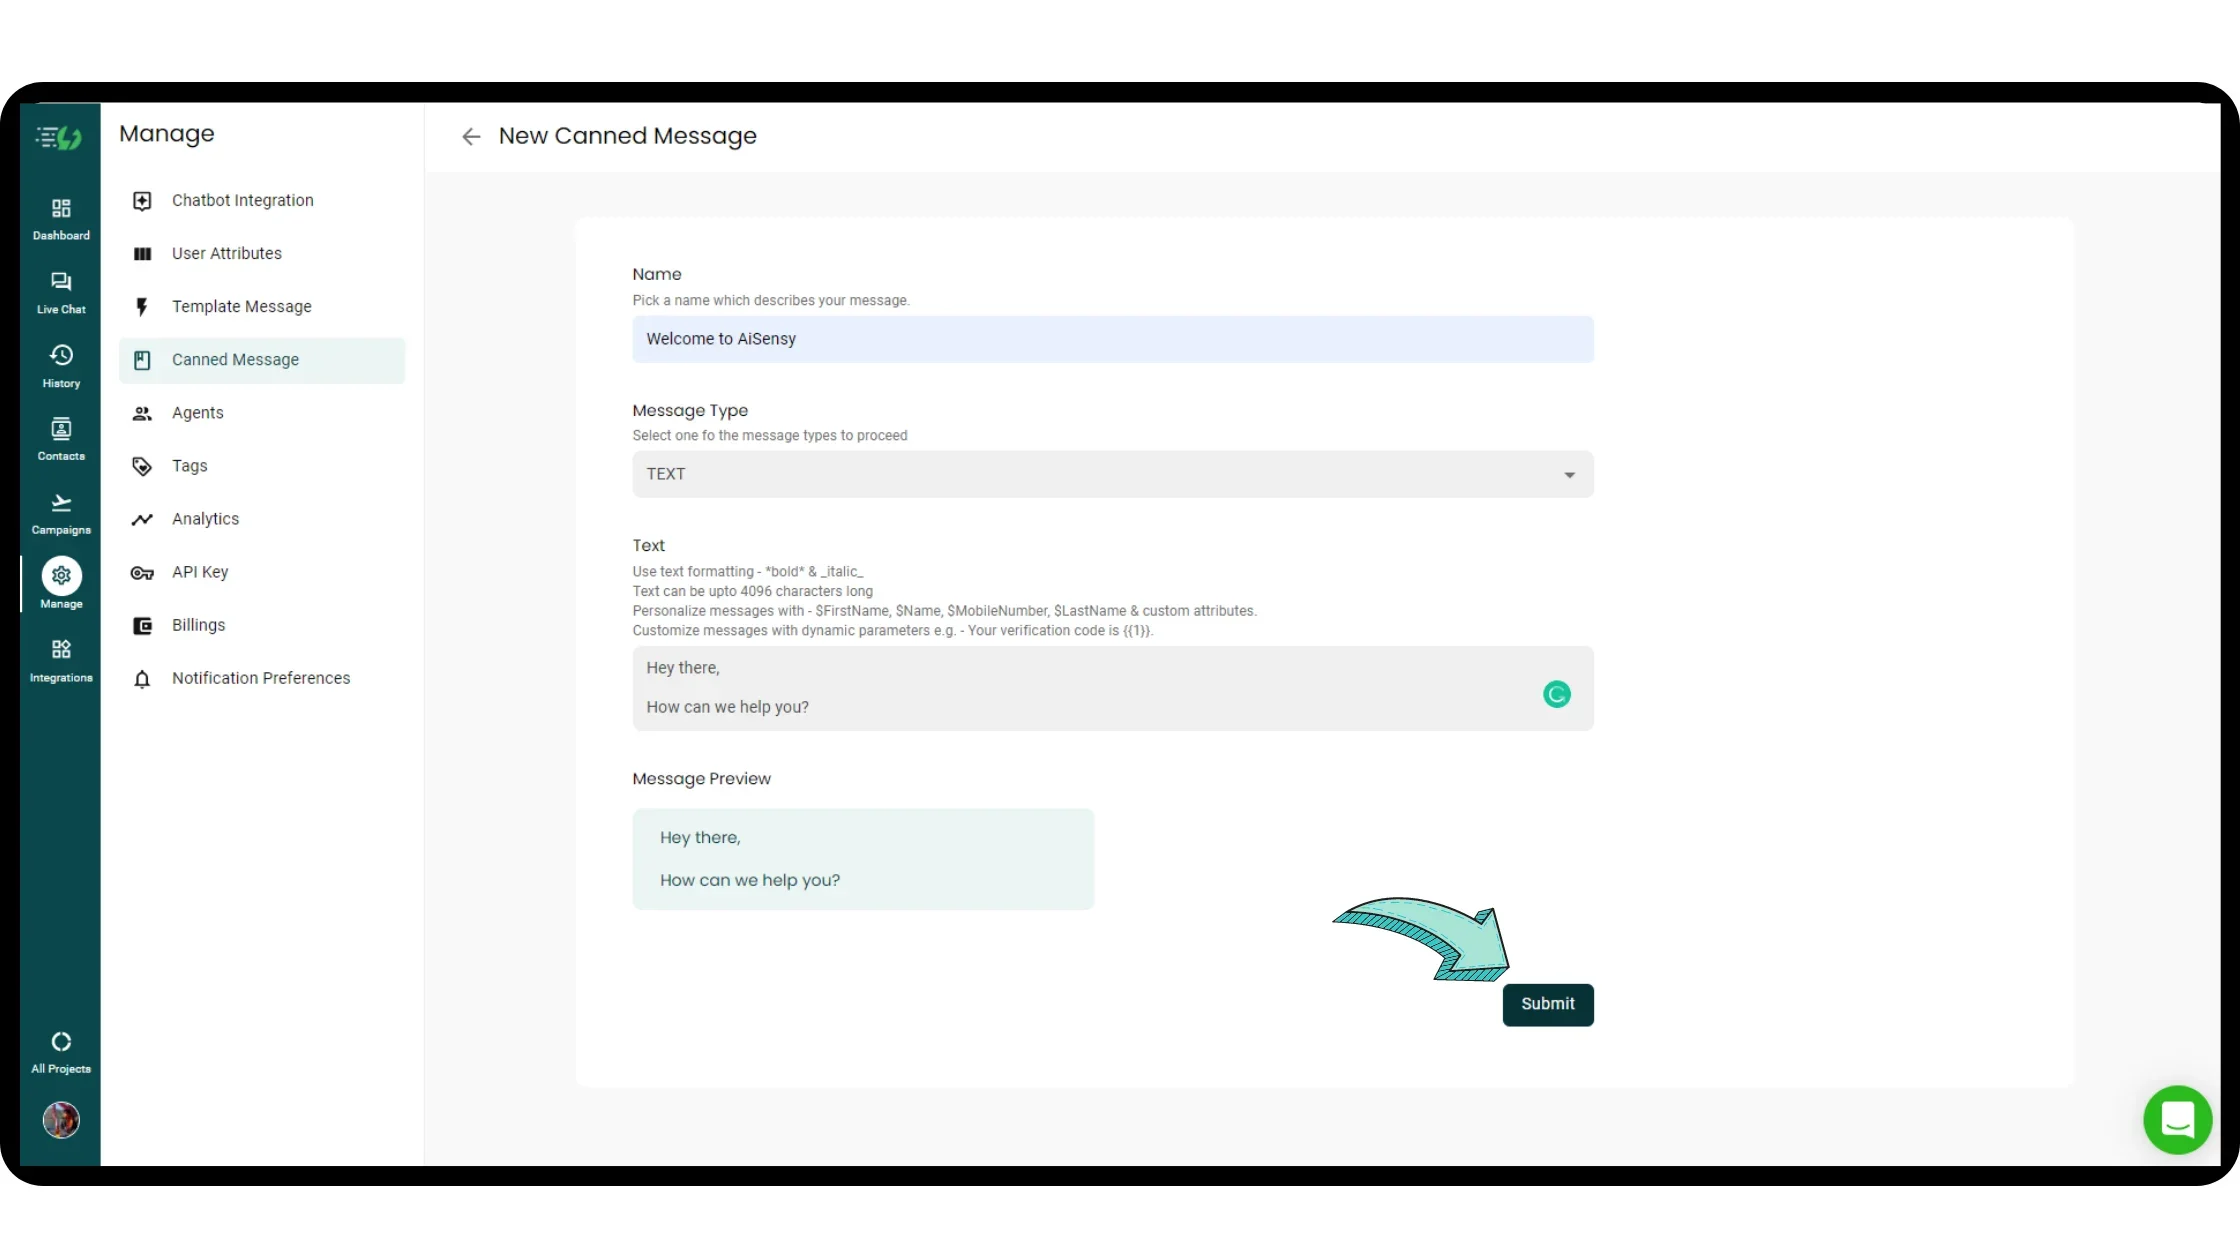
    Now, click on the Create button to add a new canned message. 

    Upon clicking, you’ll get redirected to a create form.


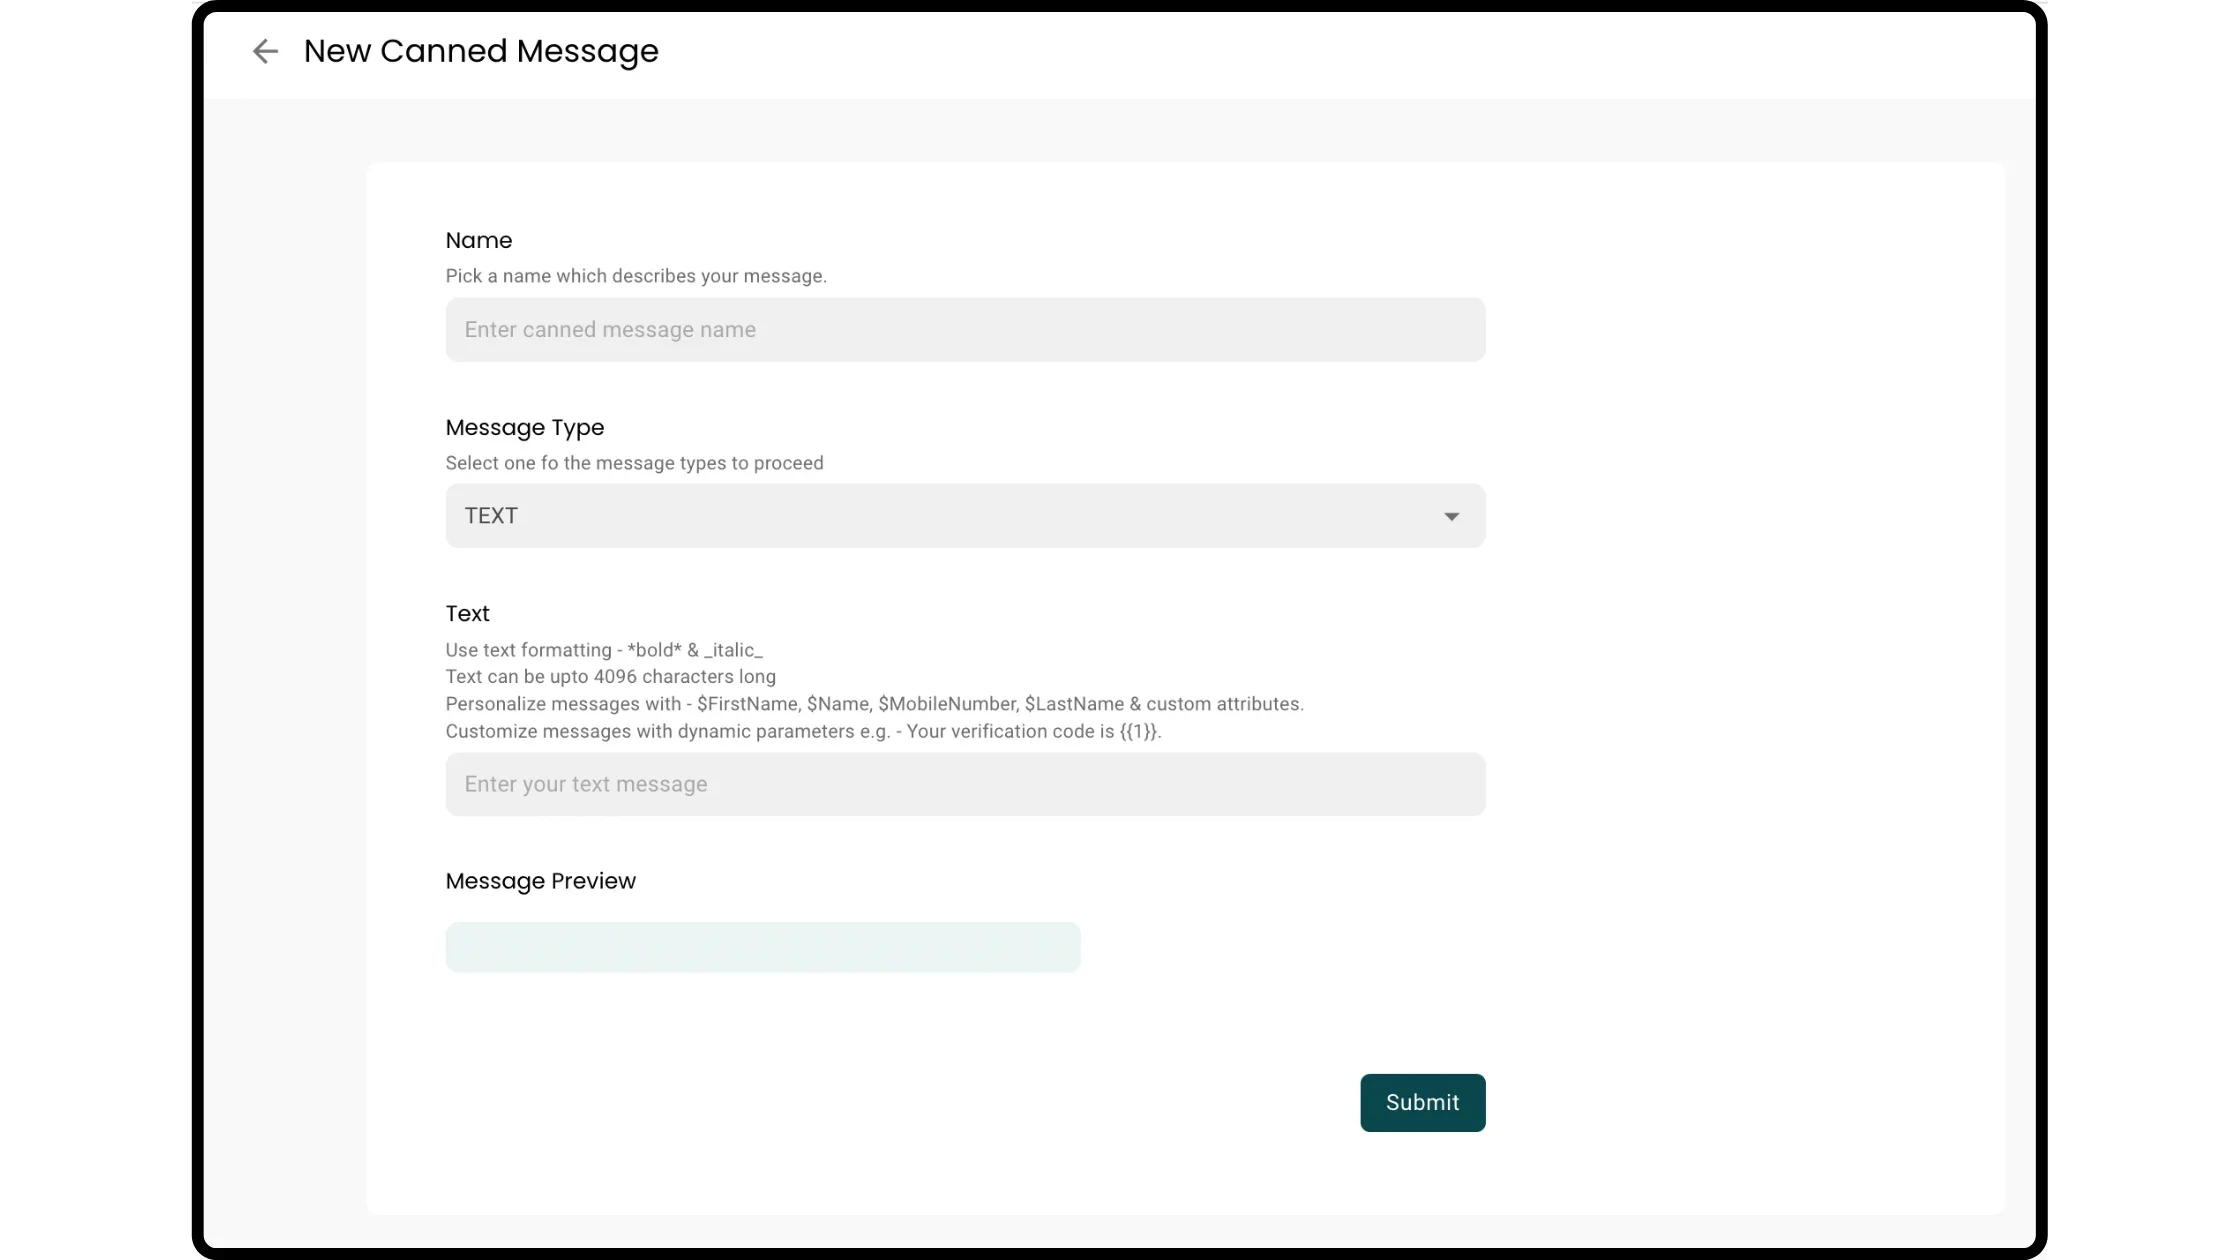
    Here, fill all necessary fields including:
    1. Name 

    2. Message Type

    3. Text (Optional for Media Canned Messages)

    Here's what you must keep in mind while filling these fields 👇 

    Create a canned message
  • 3

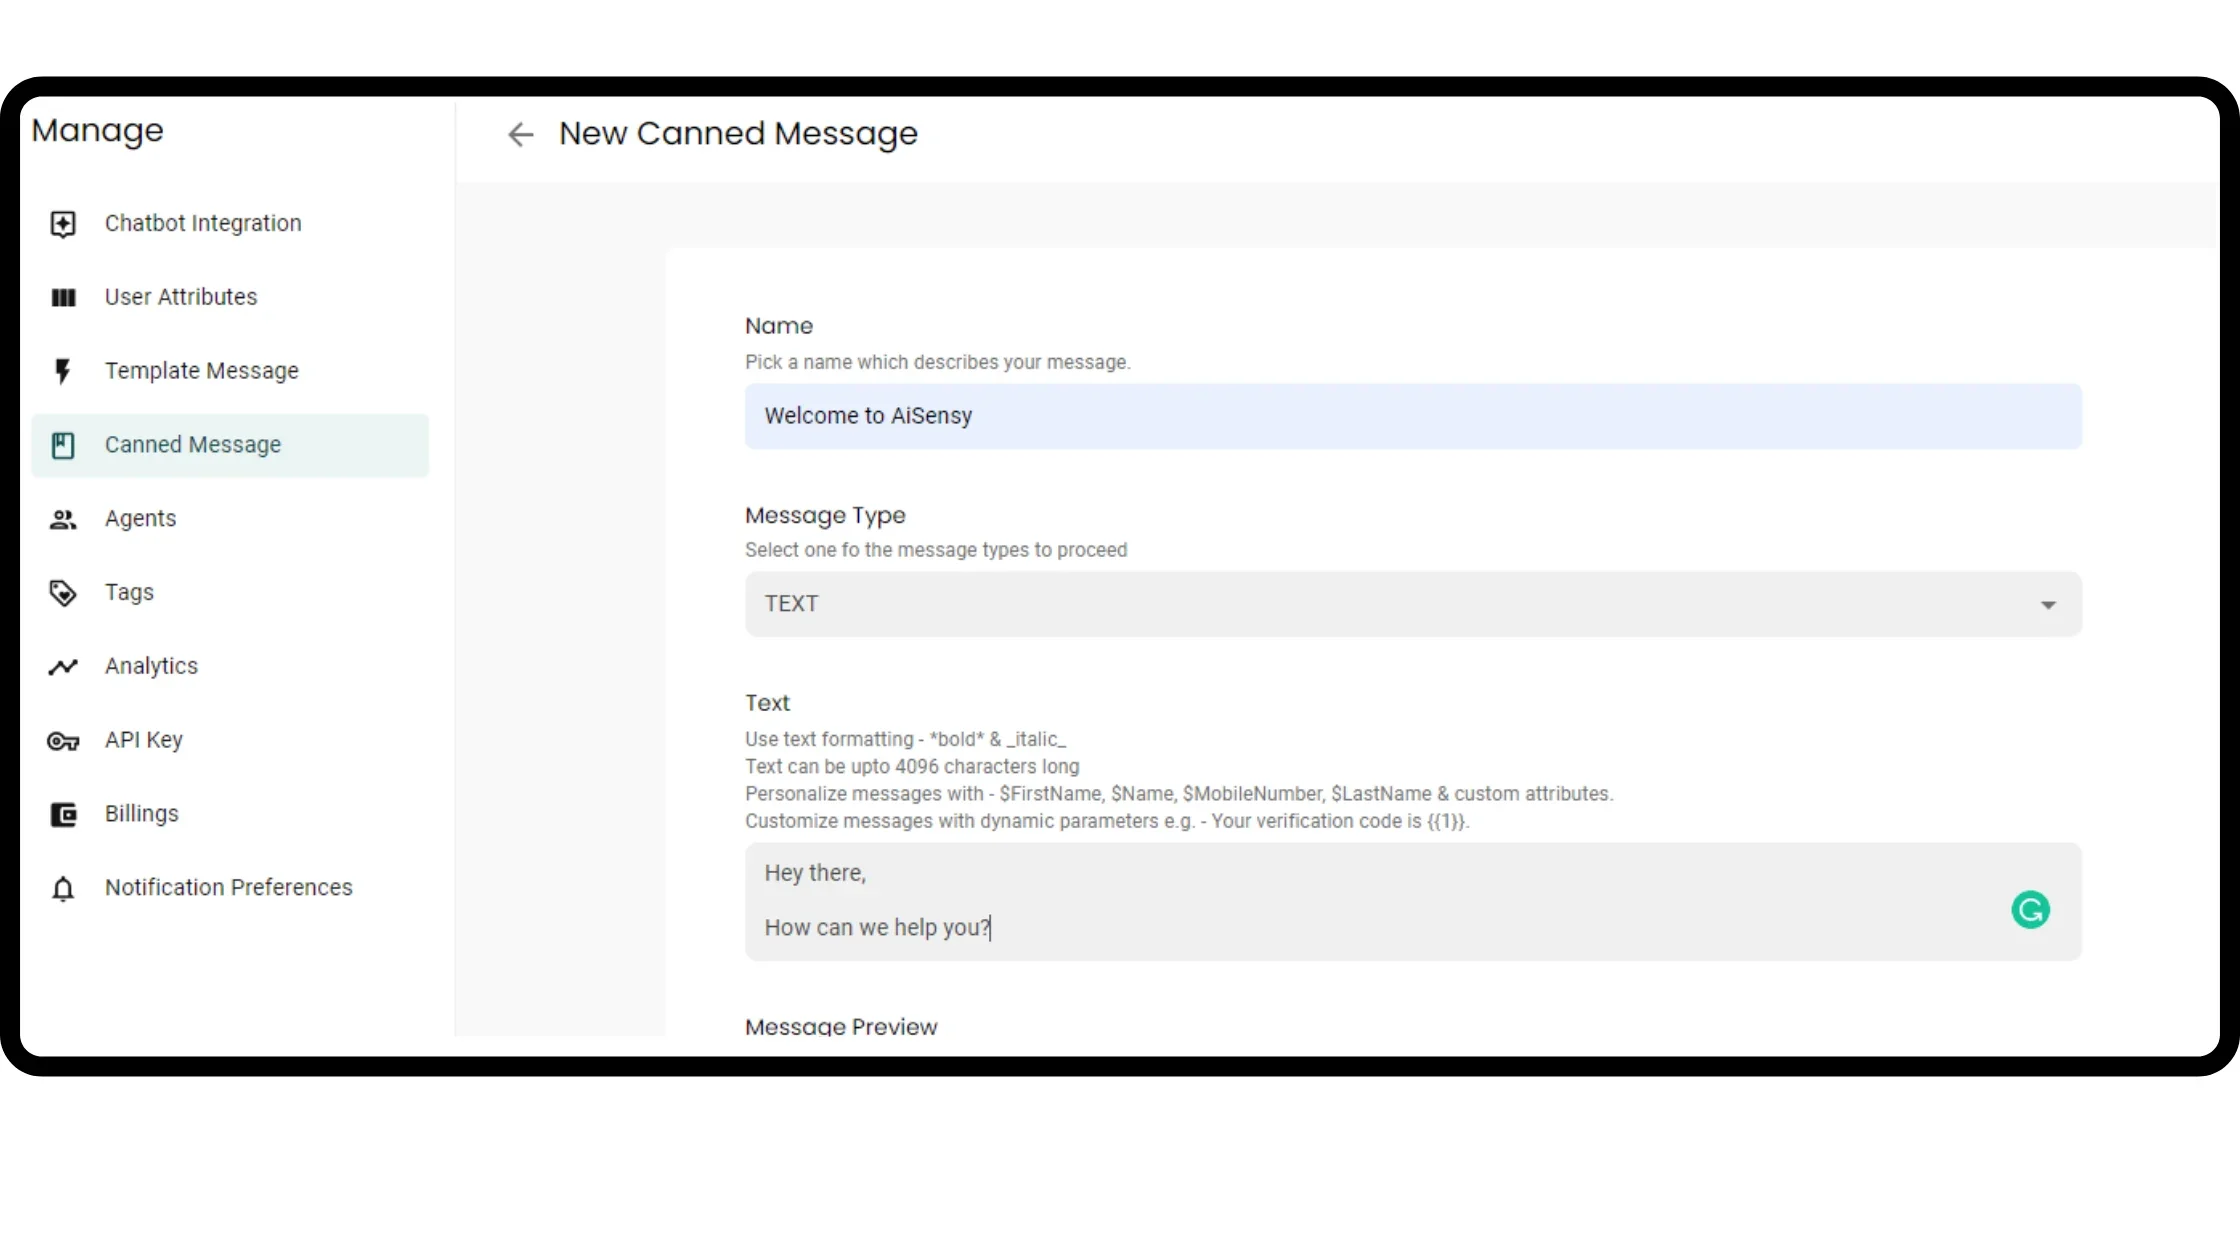
    Name the Canned Message (Required)


    Pick a name that directly resembles the use case around the content, in order to have quick access to the canned message.

    Ex: for text content: "Hello $Name, how can I help you today?"

    The name could be 'Personal Greeting' or a 'Welcome message'.

    Name the canned message
  • 4

    Choose Message Type

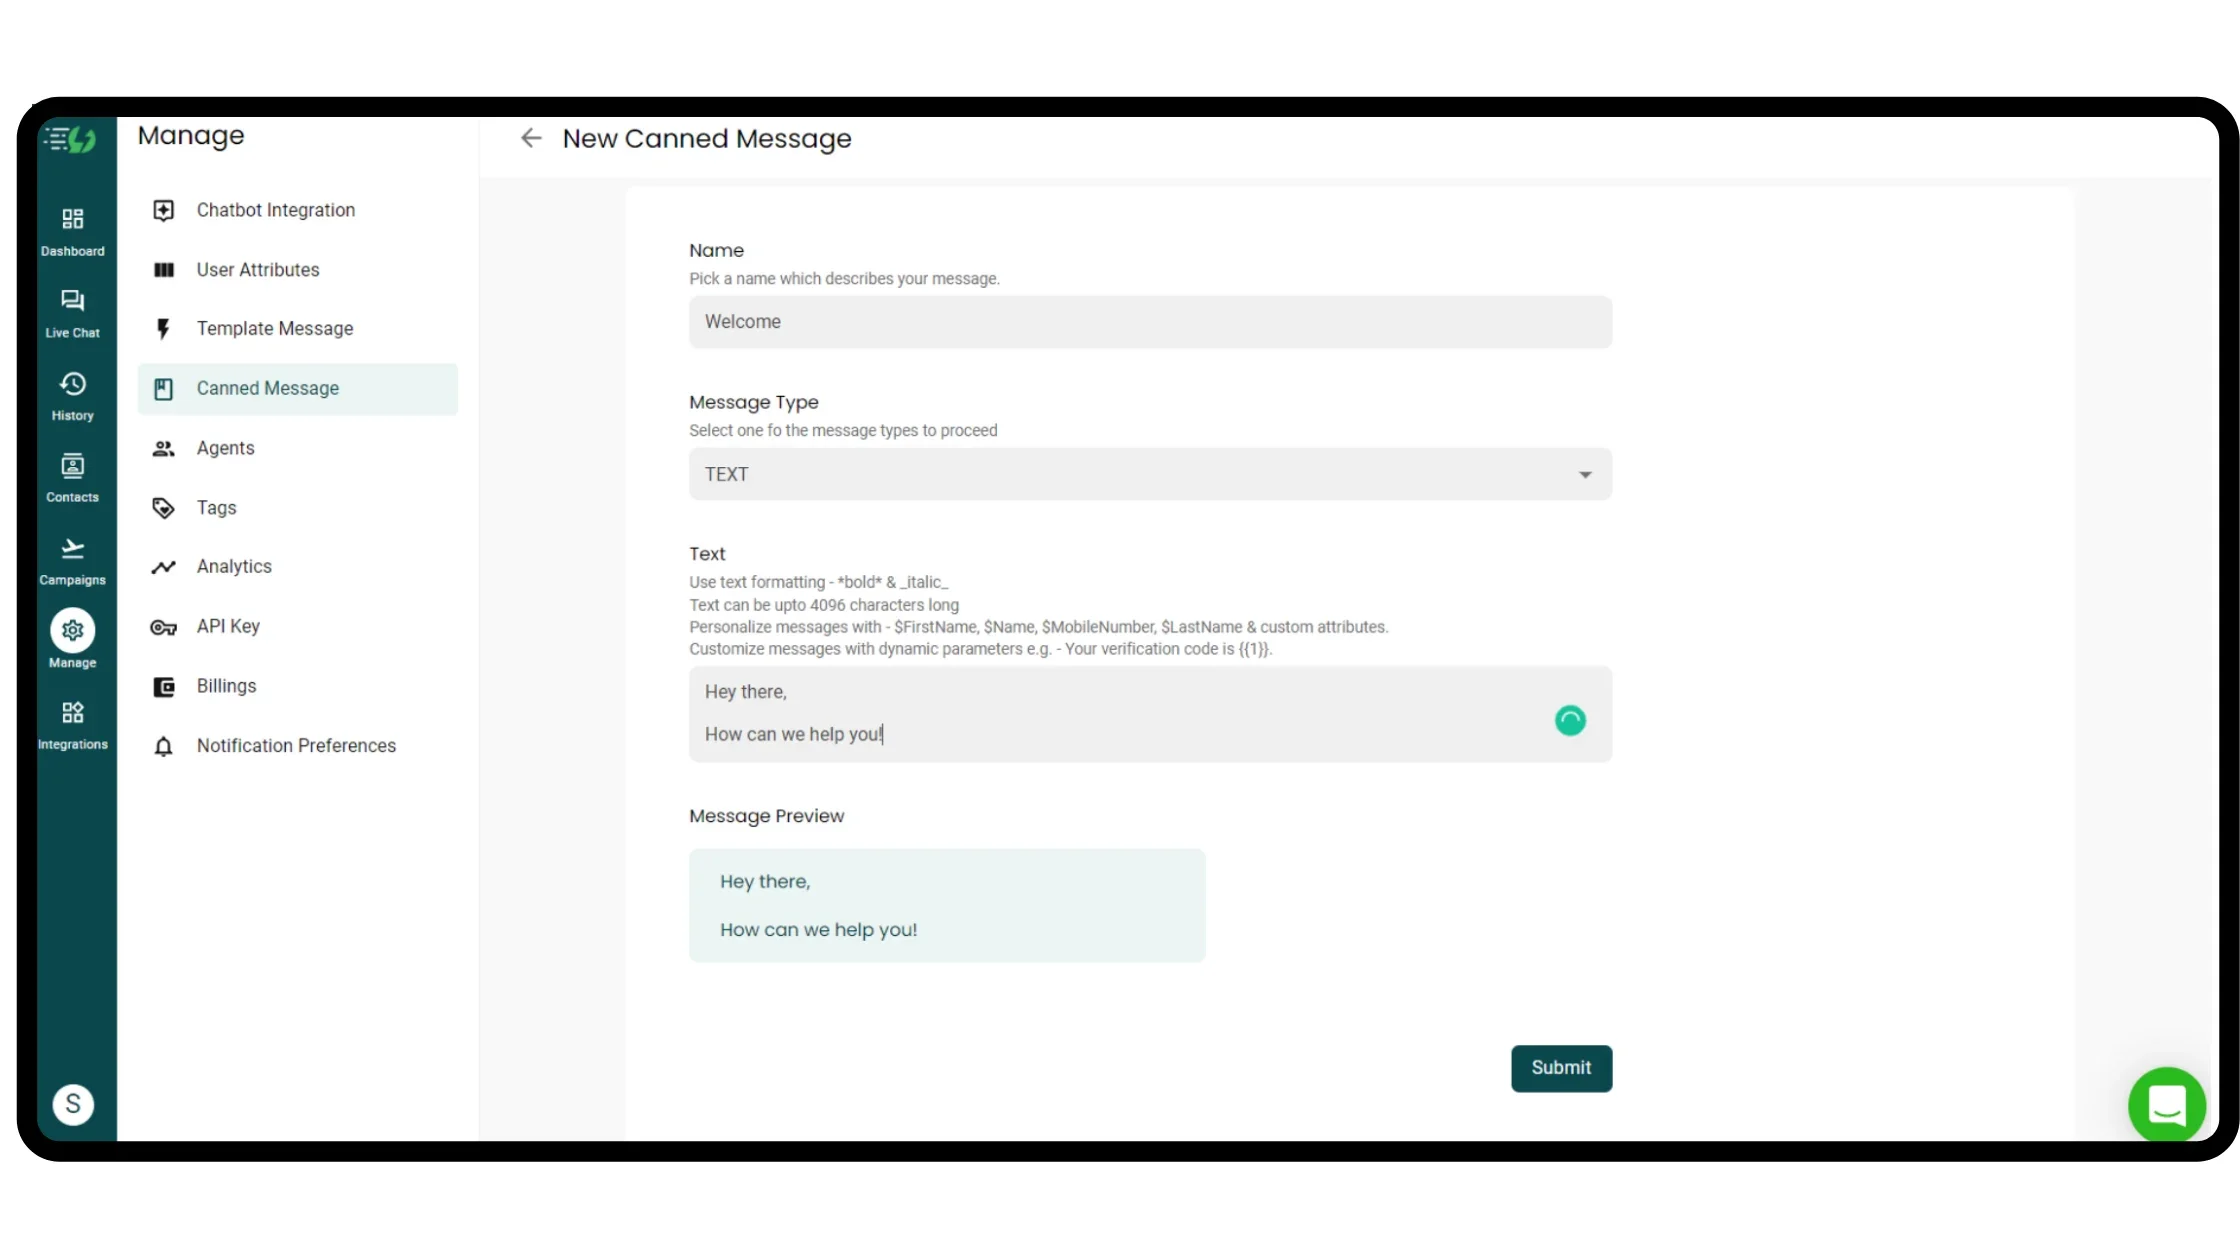
    You can add two types of messages:
    1. Text

    2. Media


    Let's first discuss how to create text canned messages:

    •  Text canned messages can be upto 4096 characters.

    • Use*content* for bold. Use _content_ for italics.

    • Use $FirstName, $Name, $MobileNumber, $LastName & custom attributes to dynamically personalise messages as per user.

    • Use parameters to fill in details information while sending a message.

    • Ex: Hi $Name, your order will be received on {{1}}.  
    Choose message type
  • 5

    Media type Canned Messages

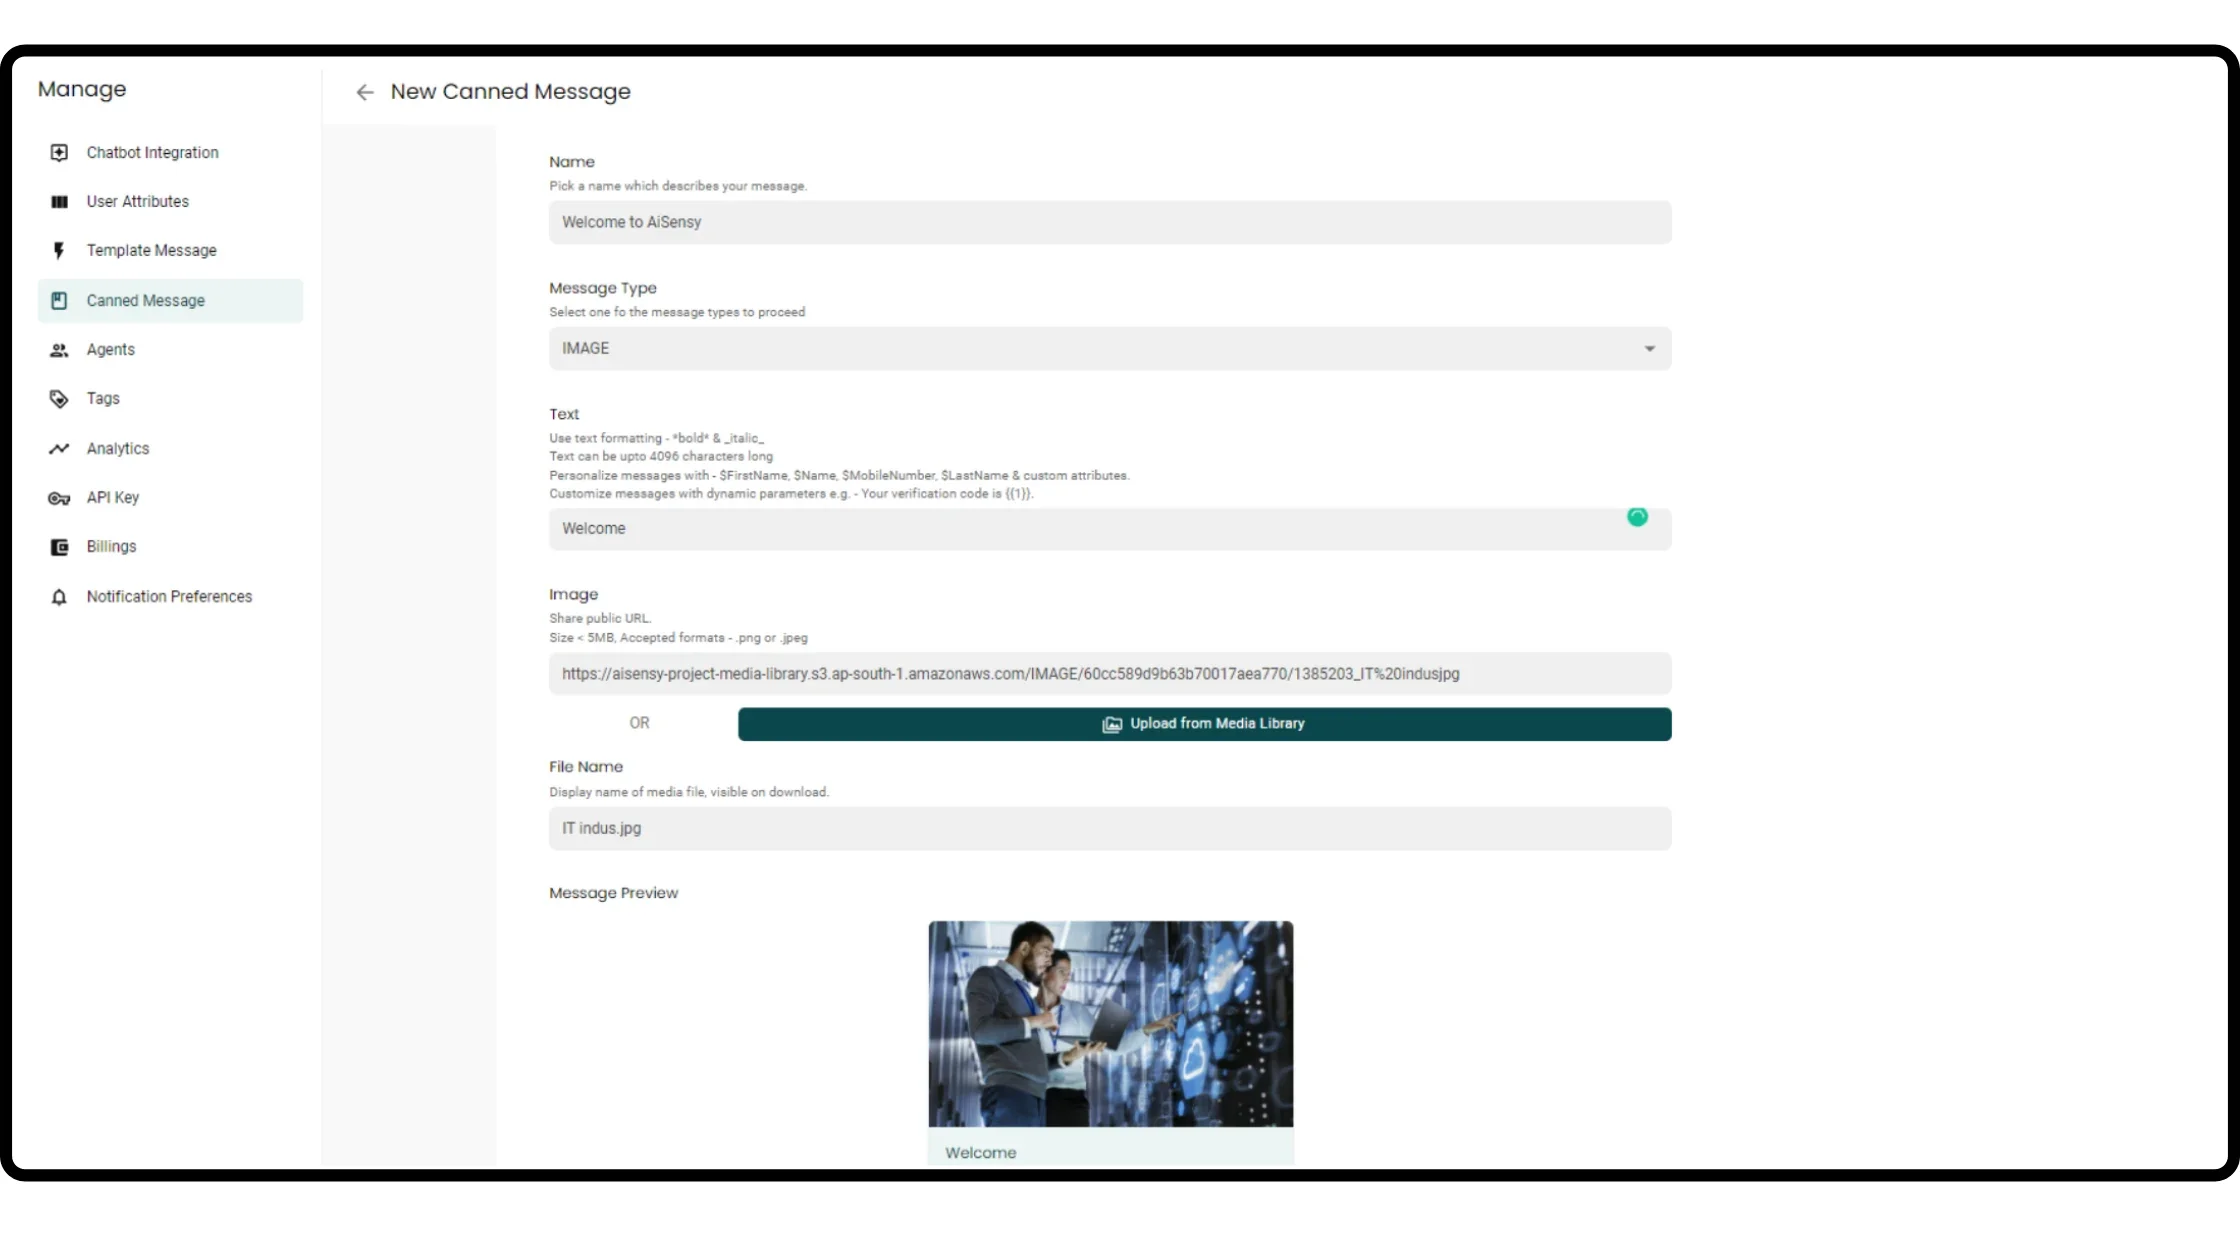
     You can save canned messages of all media types such as Images, Files, Audio & Video.

    The rules for text stay the same, except that it’s optional to add text in media canned messages.

    You can upload the media through a publicly accessible URL or select a file directly from the Media Library.

    Adding a file name to your Media File is optional but needs to be added at the time of sending. 

    Media type canned message
  • 6

    Save your Canned Messages

     After filling in these details, click the “Submit” button to save the message. 

    You can view the canned message in the Message Preview section before submitting it. 

    That's it!

    We've added a Welcome text Canned Message. Let's test it out 👇 

    Save your canned message
  • 7

    Go to Live Chat

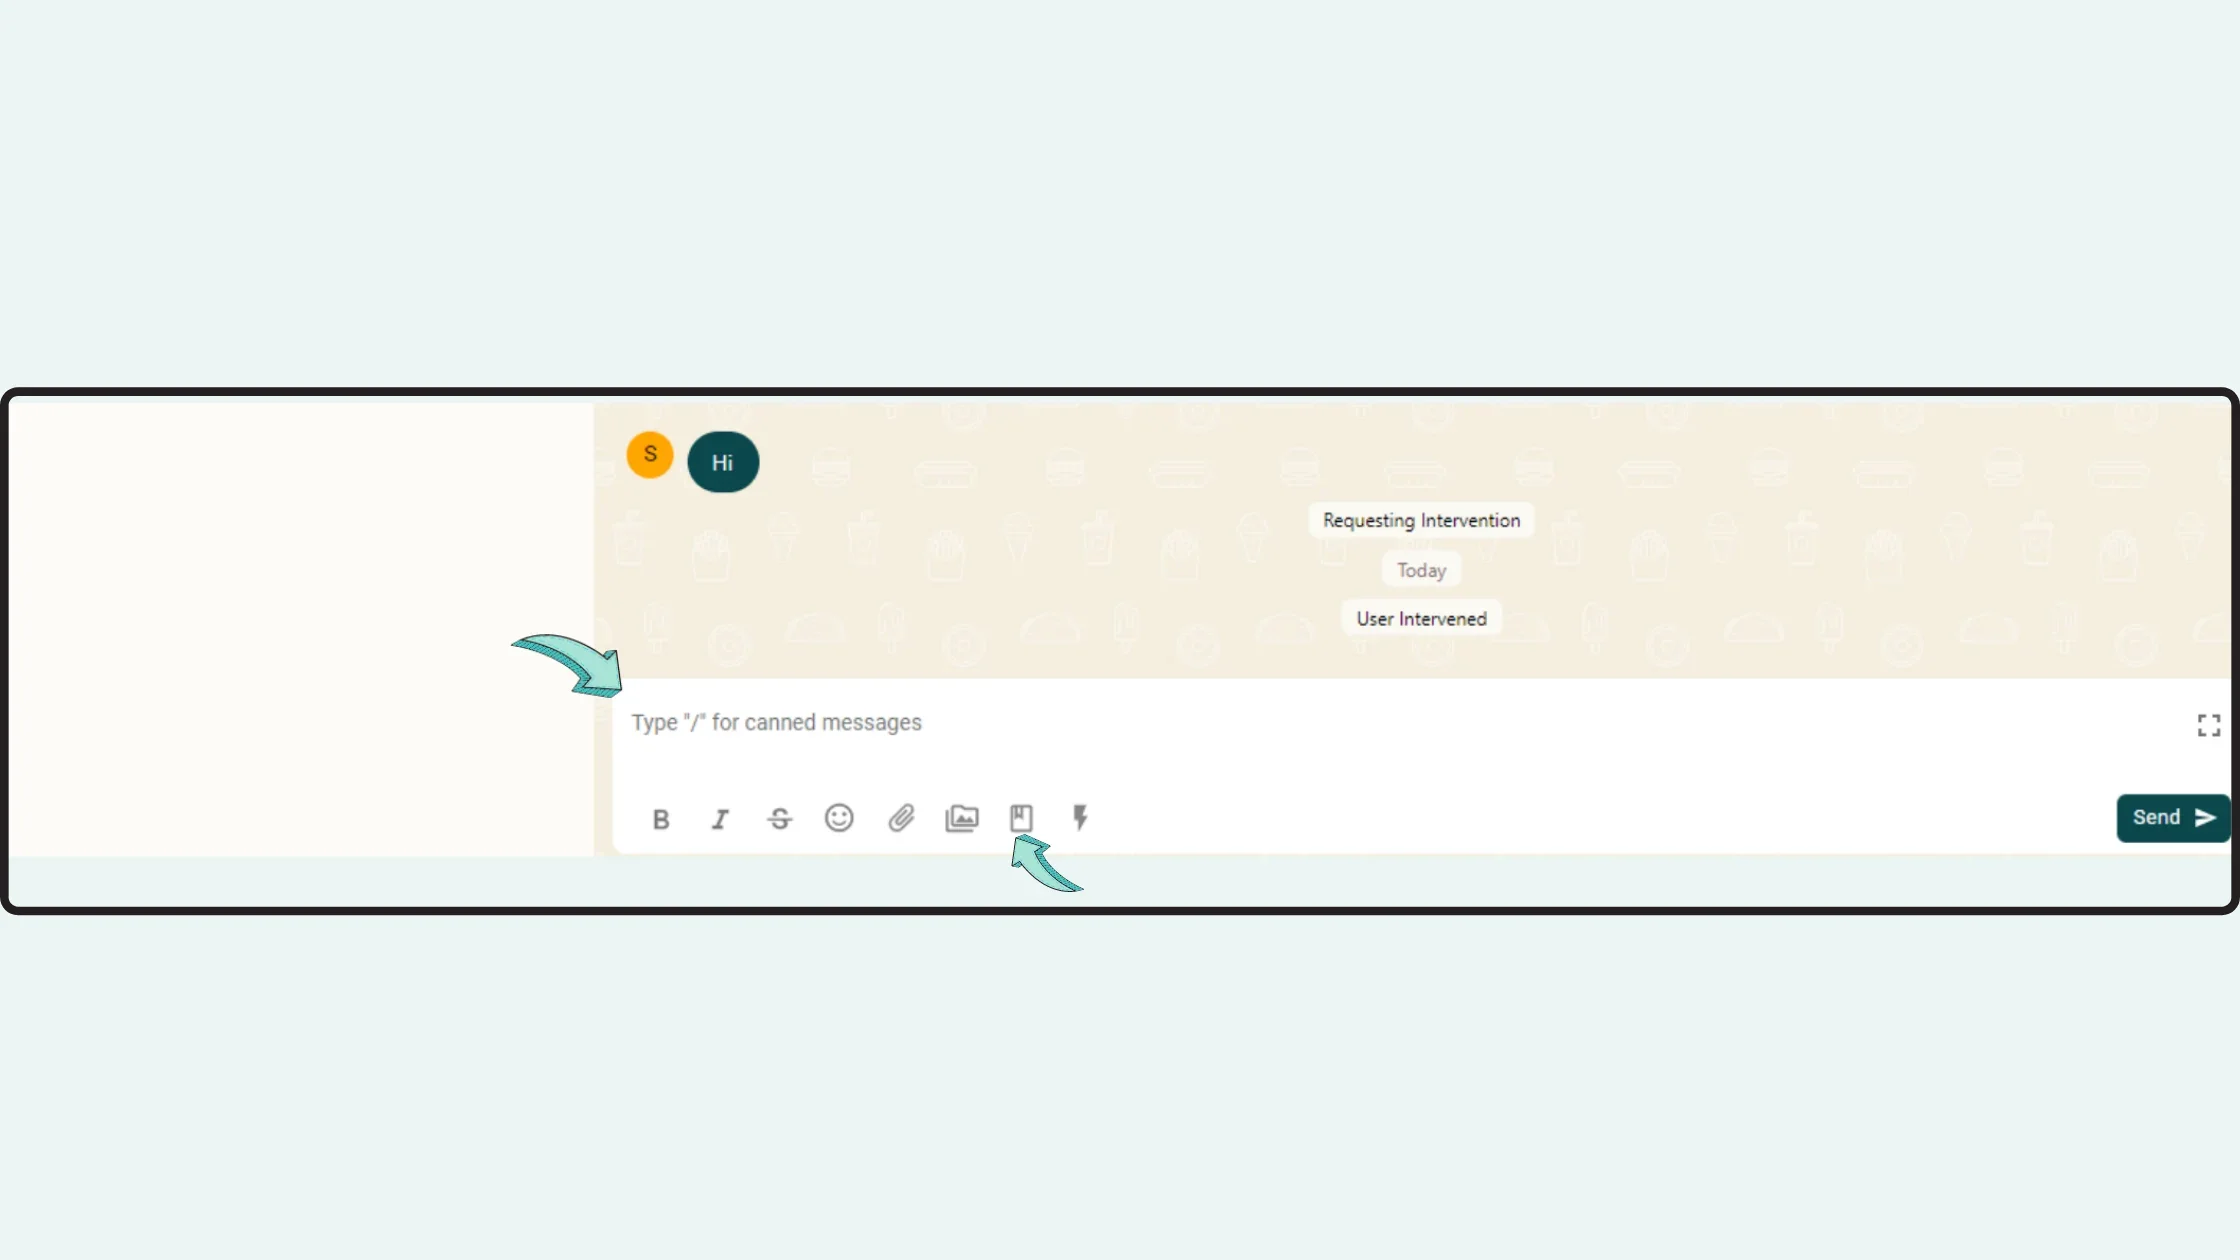
    Go to Live Chat & open the chat that you want to respond to. 

    Type '/' in the chat for quick access to Canned Messages. 

    Or 

    You can click the bookmark icon beside the media library. 

    Go to live chat
  • 8

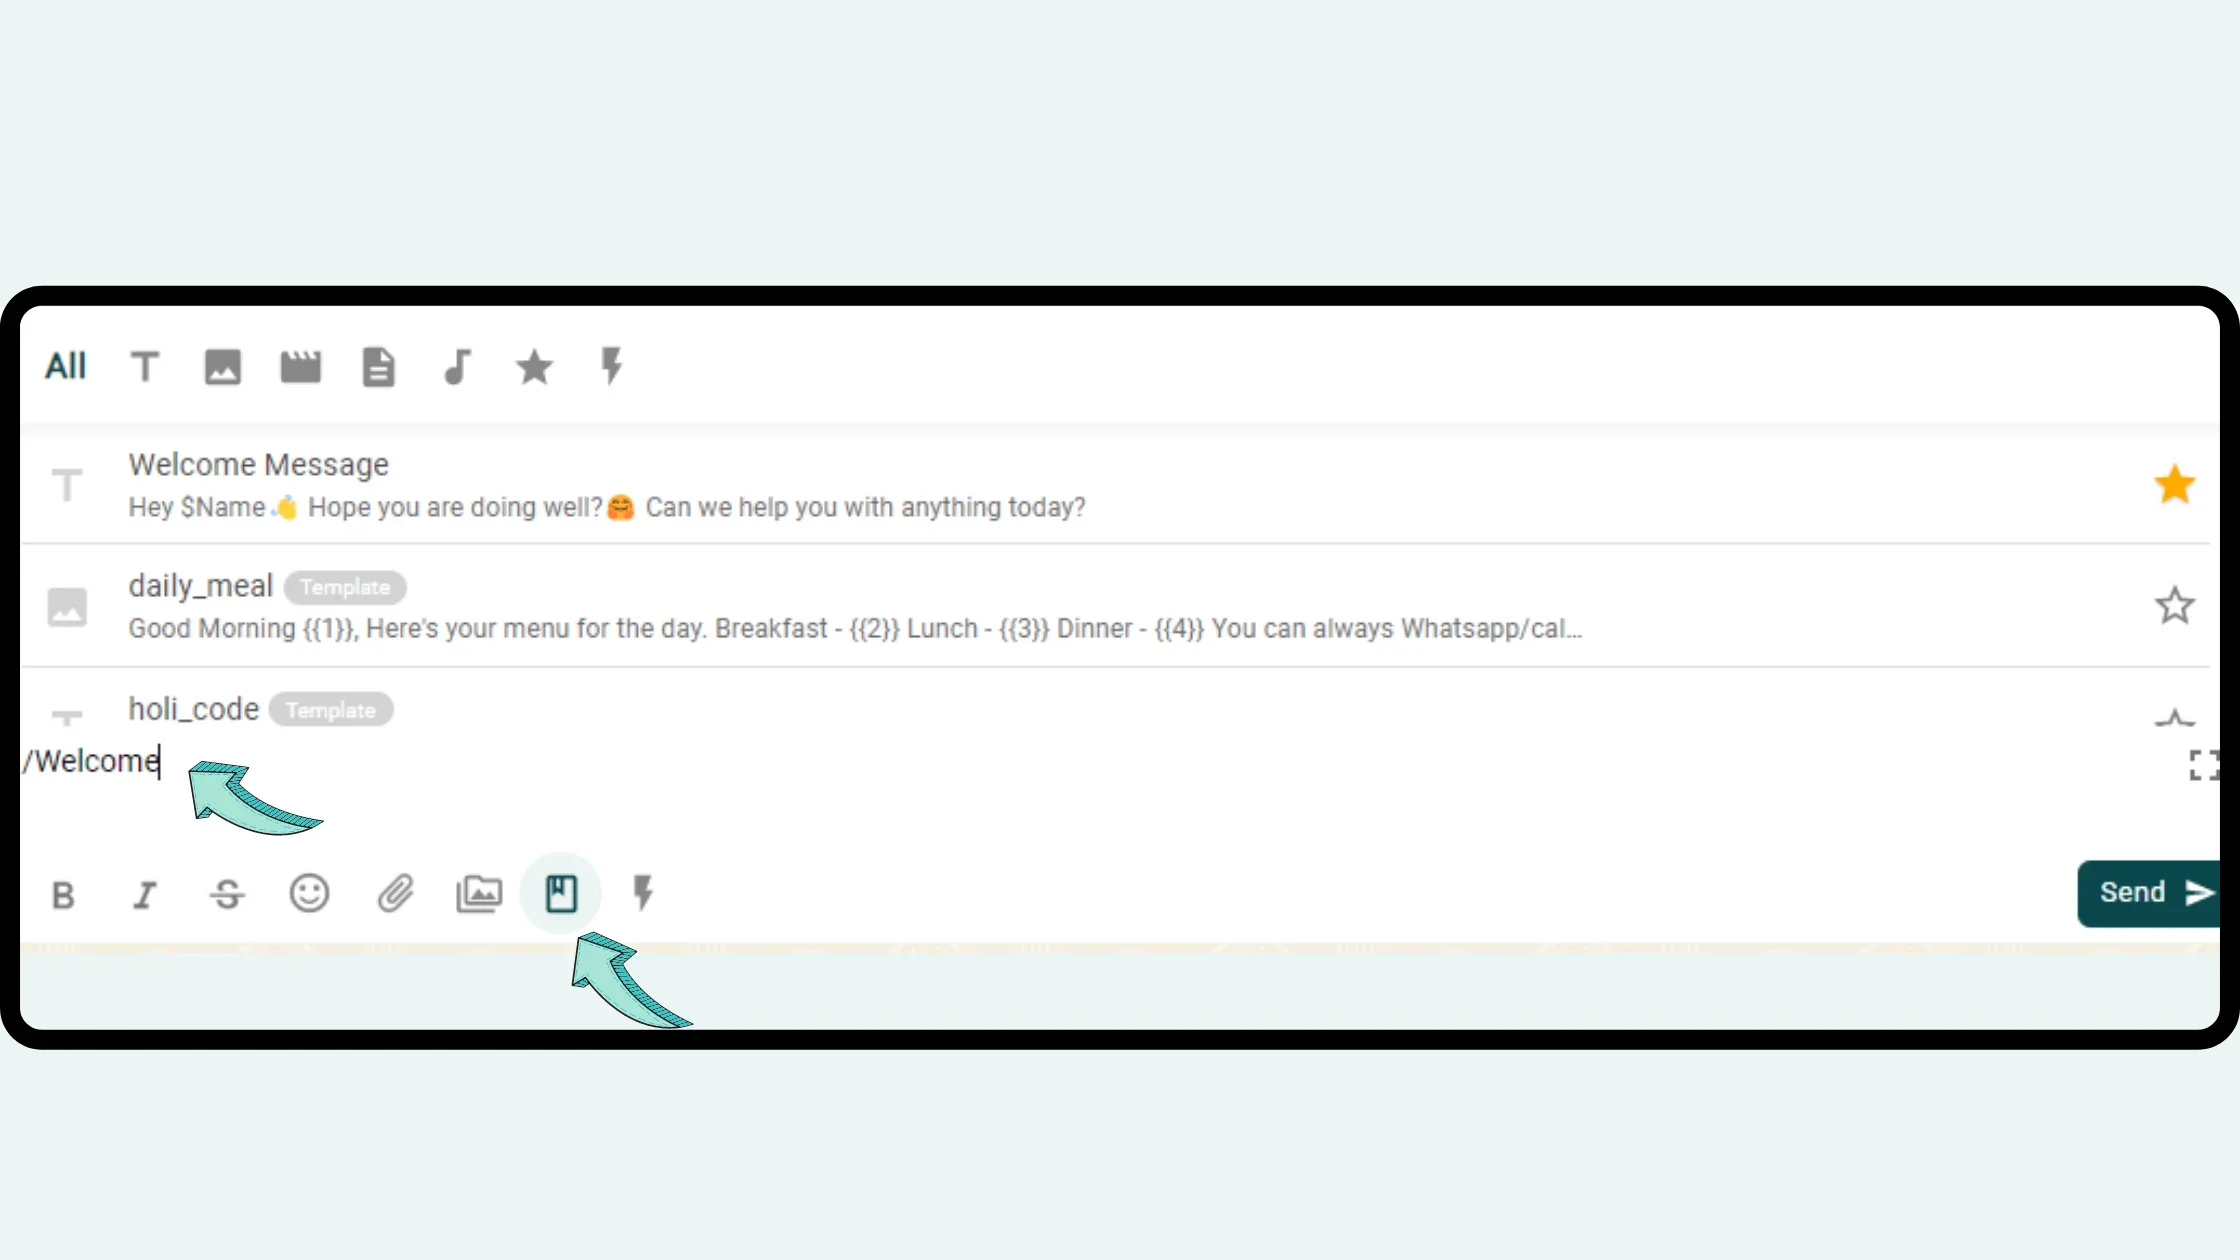
    Choose the preferred Canned Message

    Pick the canned message you want to send. 

    In the image, we've chosen Welcome Canned Message to send to the user. 

    Choose preferred canned message
  • 9

    Press send- That's it :))

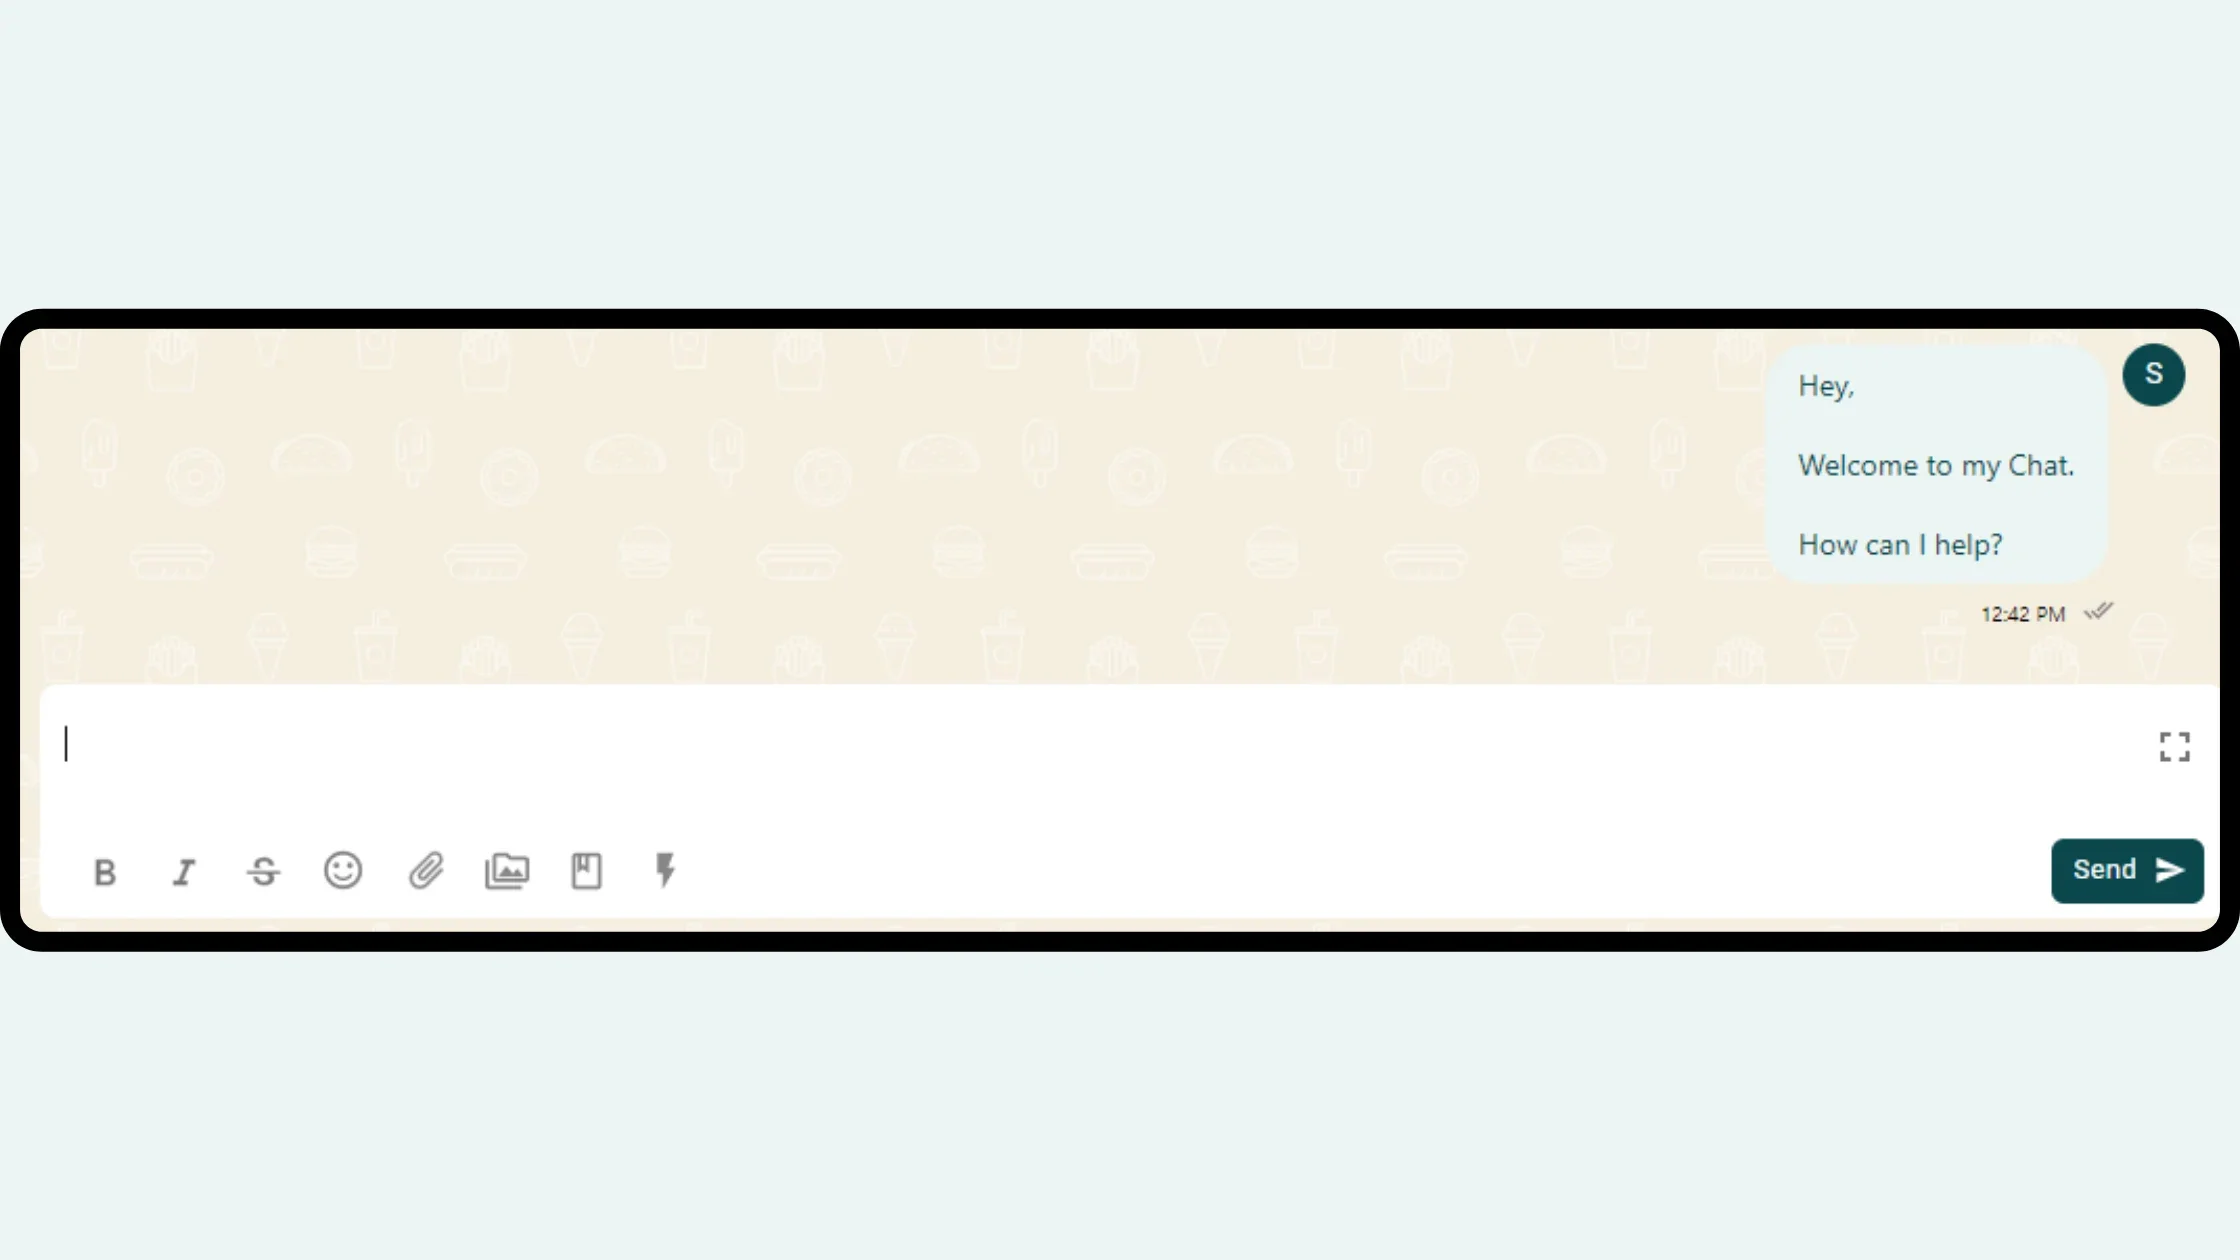
    Now, simply press send!

    The message will be sent to the user in exactly the same format as it showed in the preview. 

    Press send

We Have Answered Almost All Your Questions