How to set up Click-to-WhatsApp-Ads in AiSensy?

Auto reply

Do you wish to run Ads on Facebook/ Instagram that click directly to WhatsApp? 

You can now Create & Run Facebook/ Instagram Ads directly via the AiSensy Platform clicking which will take users to your WhatsApp Business API number. 

With this feature, you can:

✅ Drive 3-5X Leads Instantly

✅ Reduce Cost Per Lead by 60%

✅ Identify & Convert hot leads by Retargeting

✅ Get the user’s Name & WhatsApp number instantly

✅ No more hassle to go to the Facebook Platform for creating CTWA Ads.

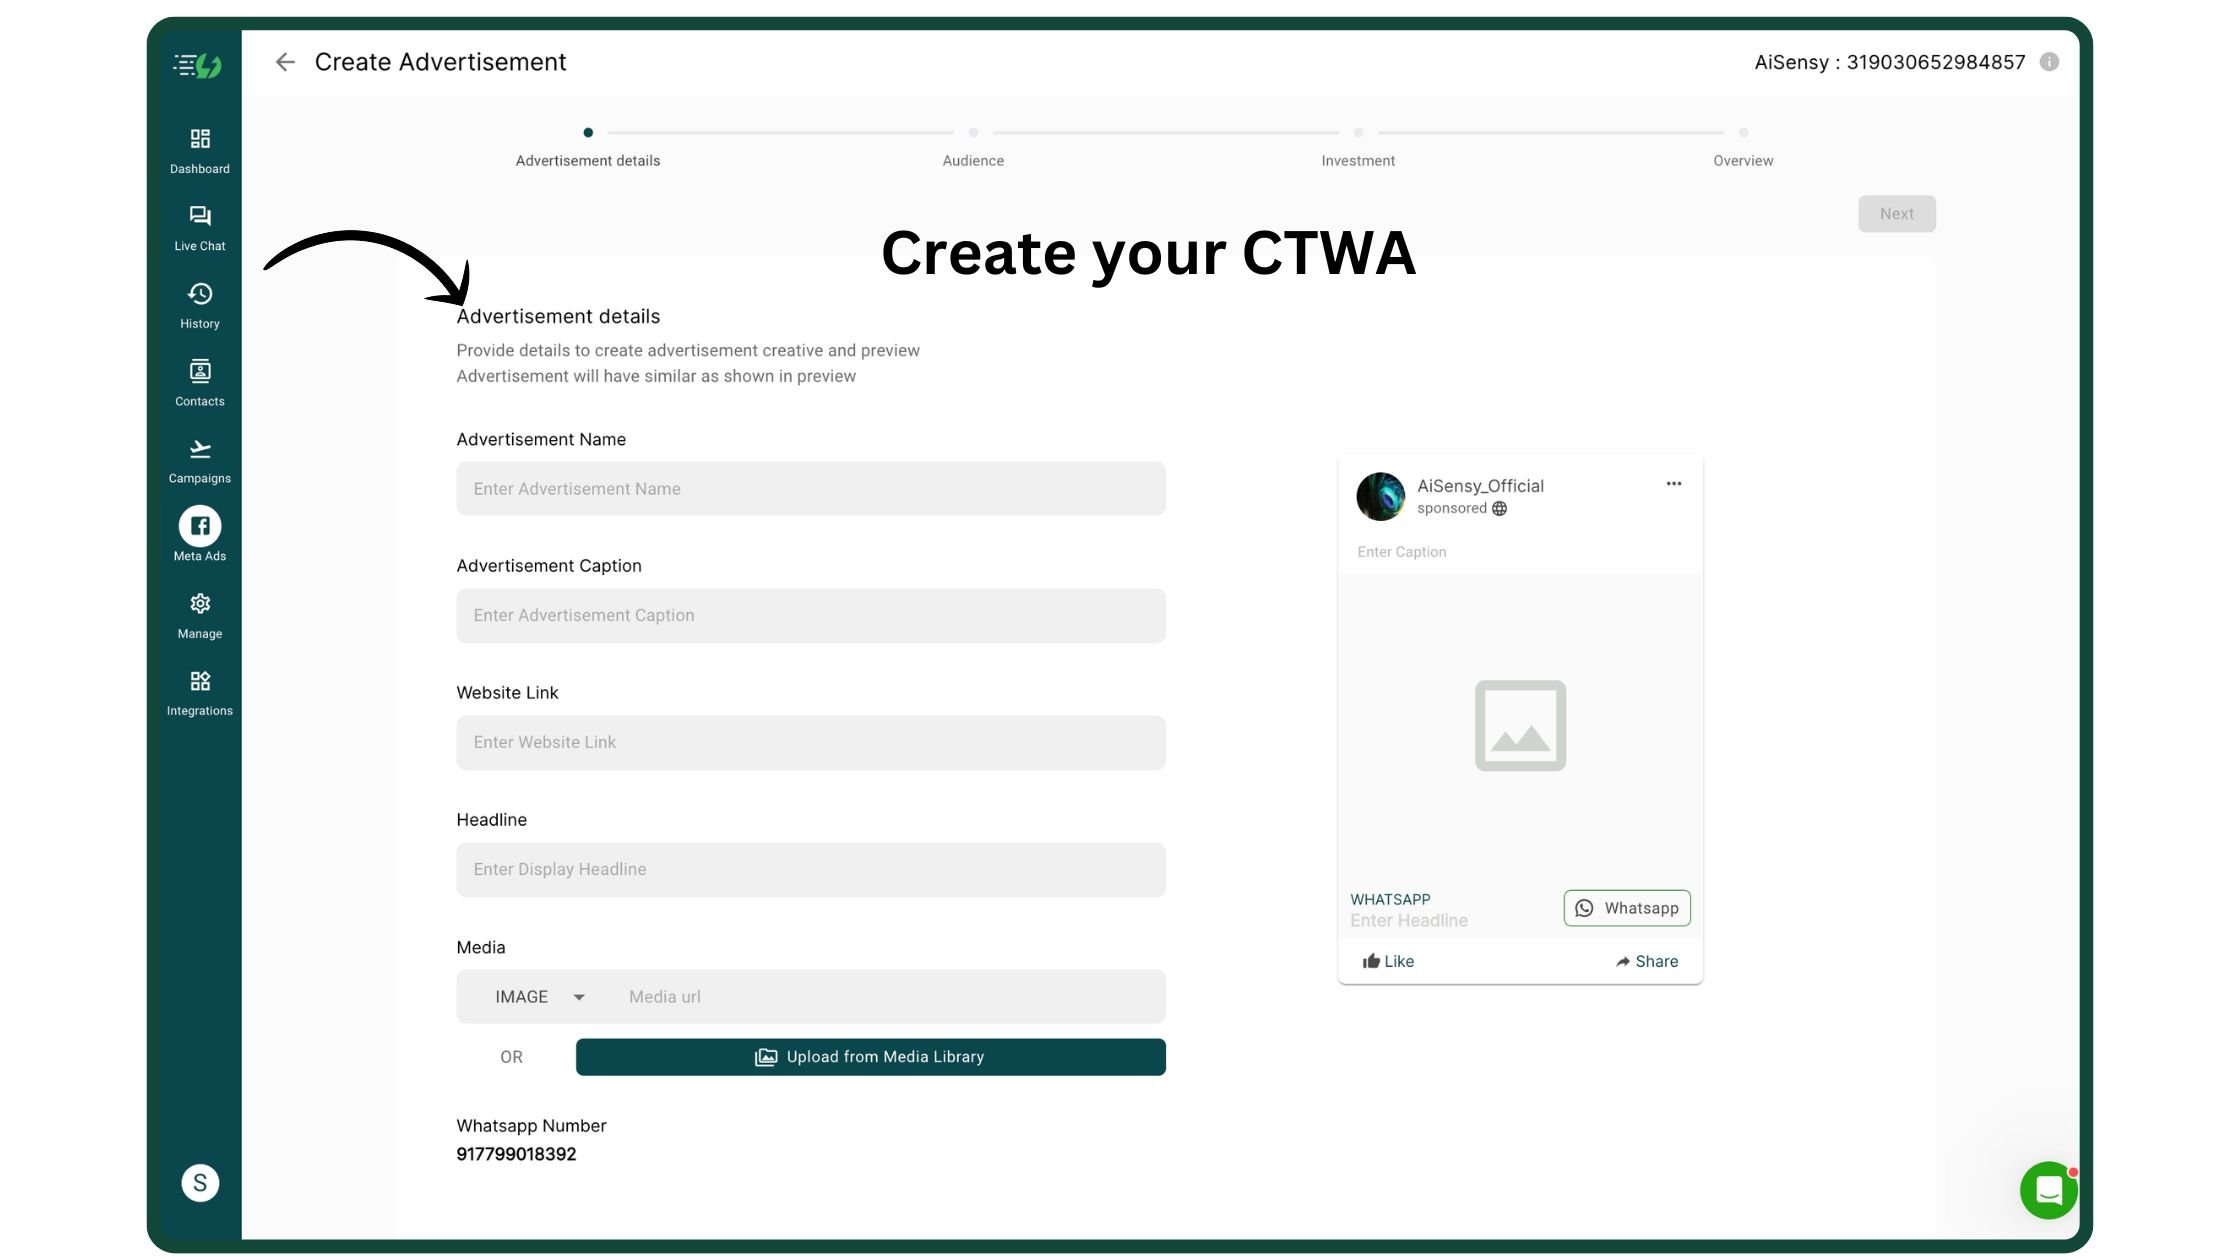
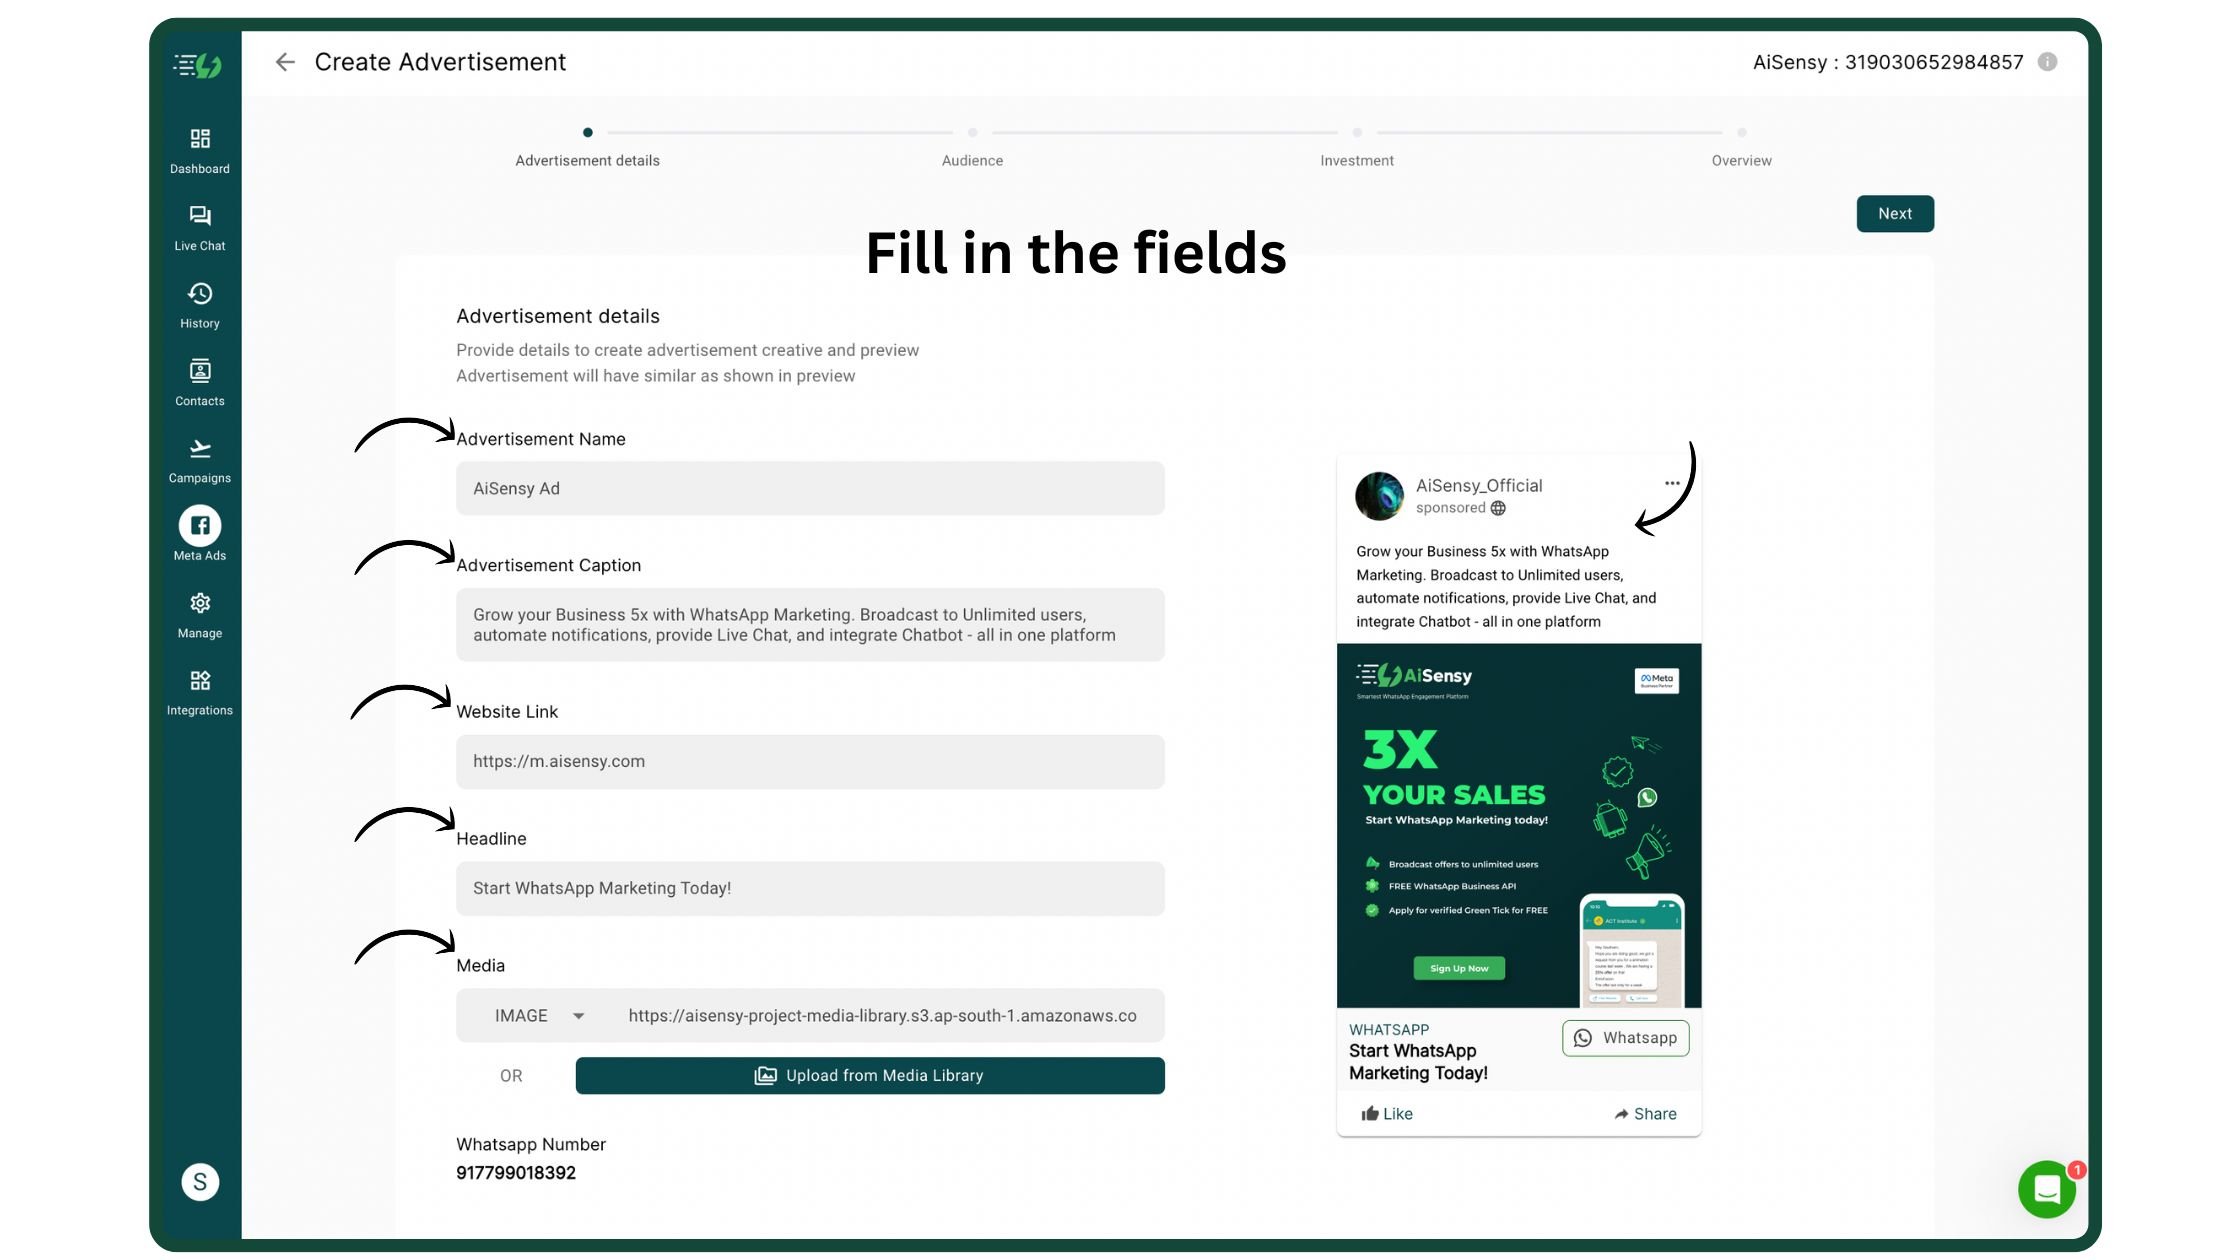
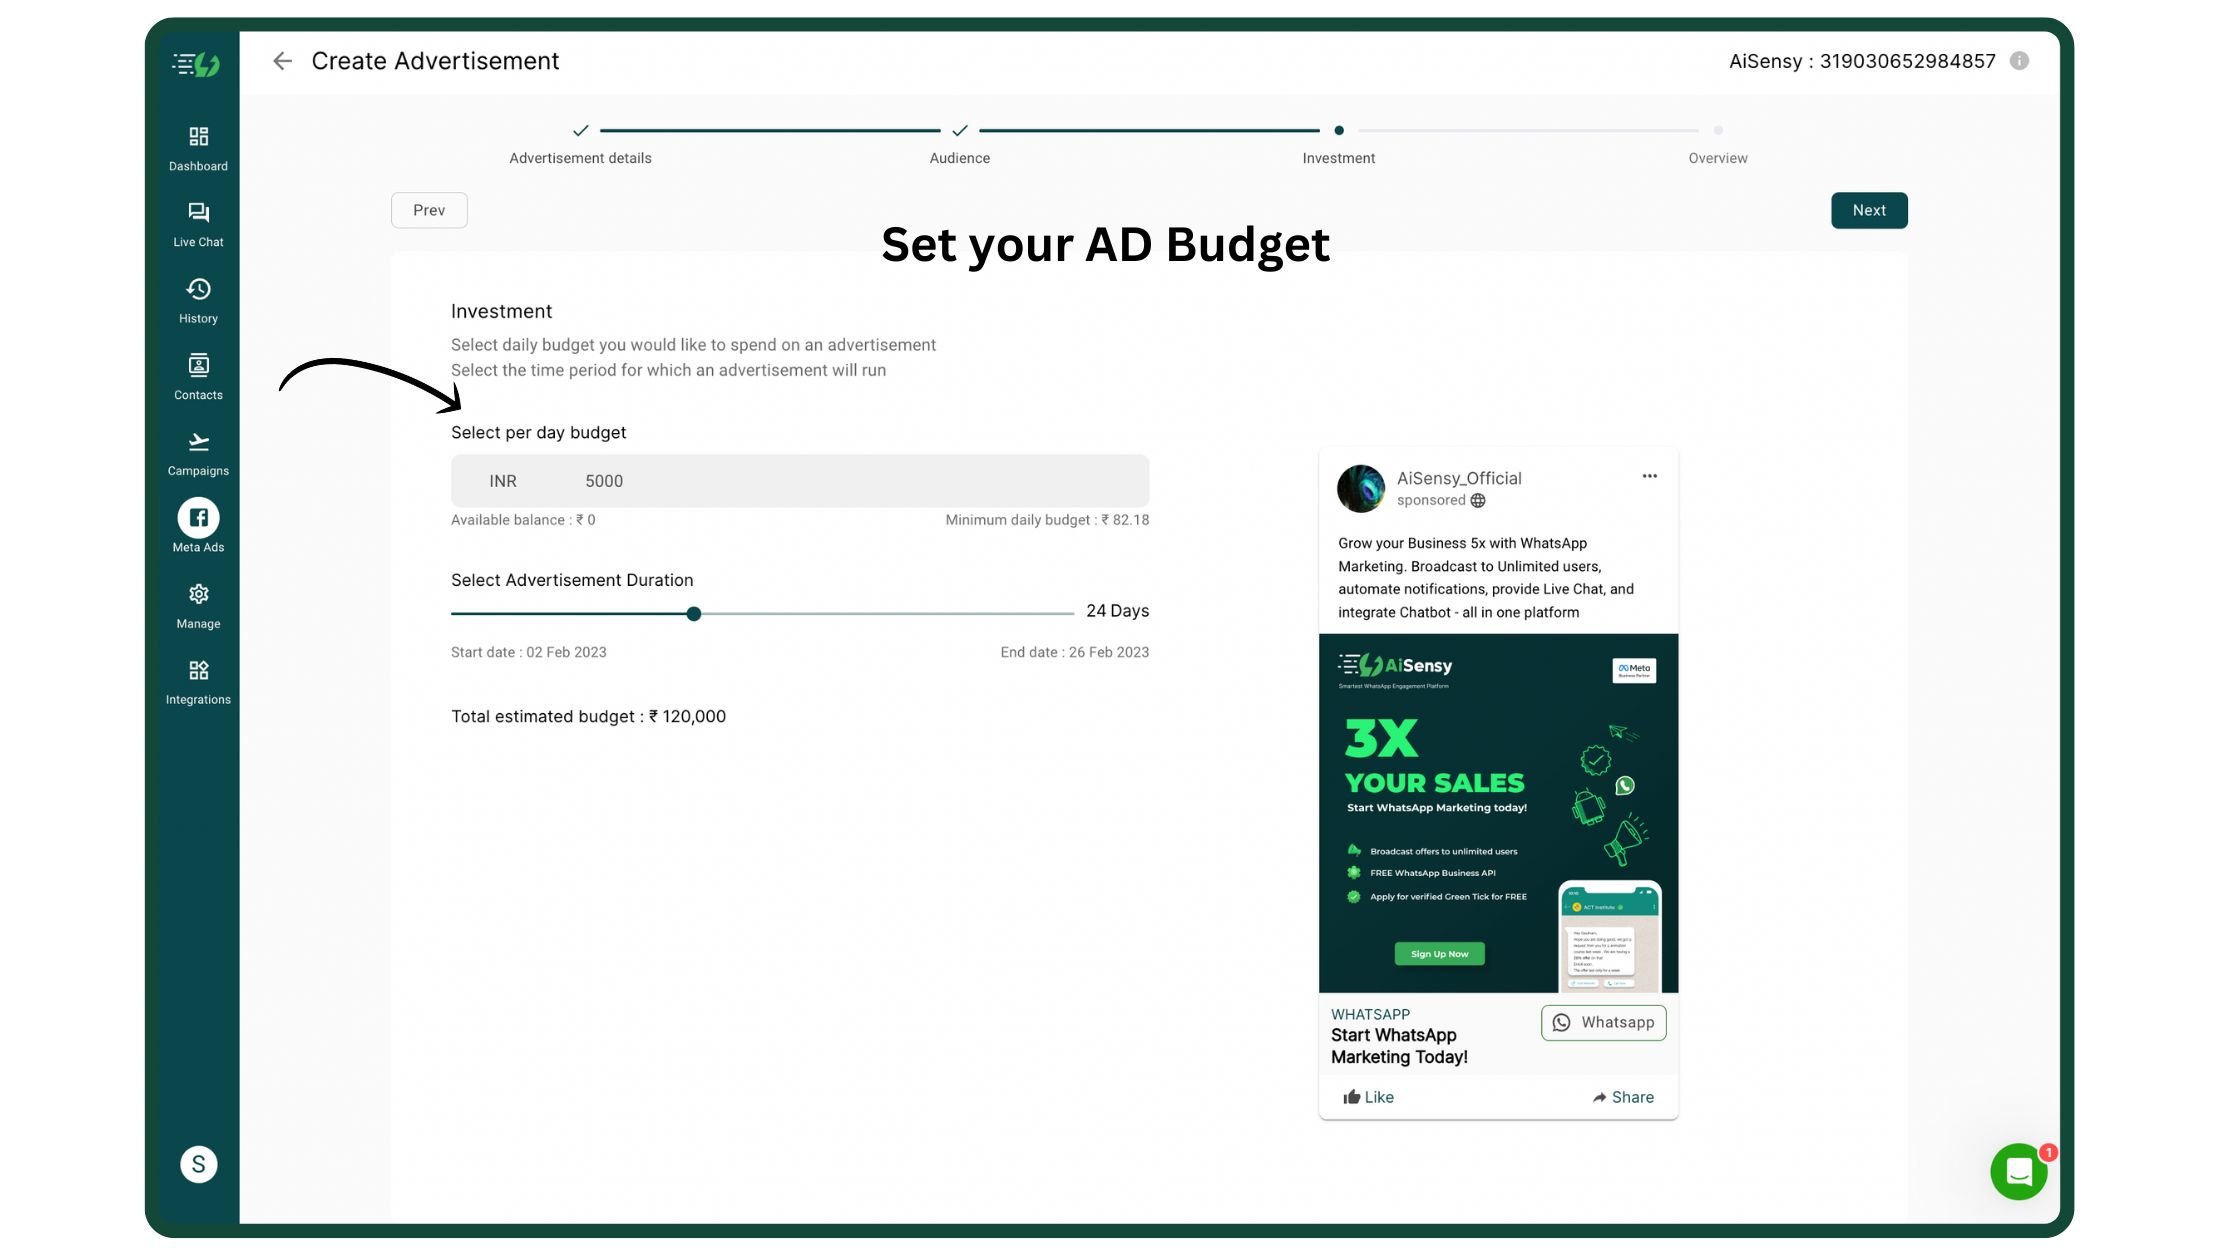
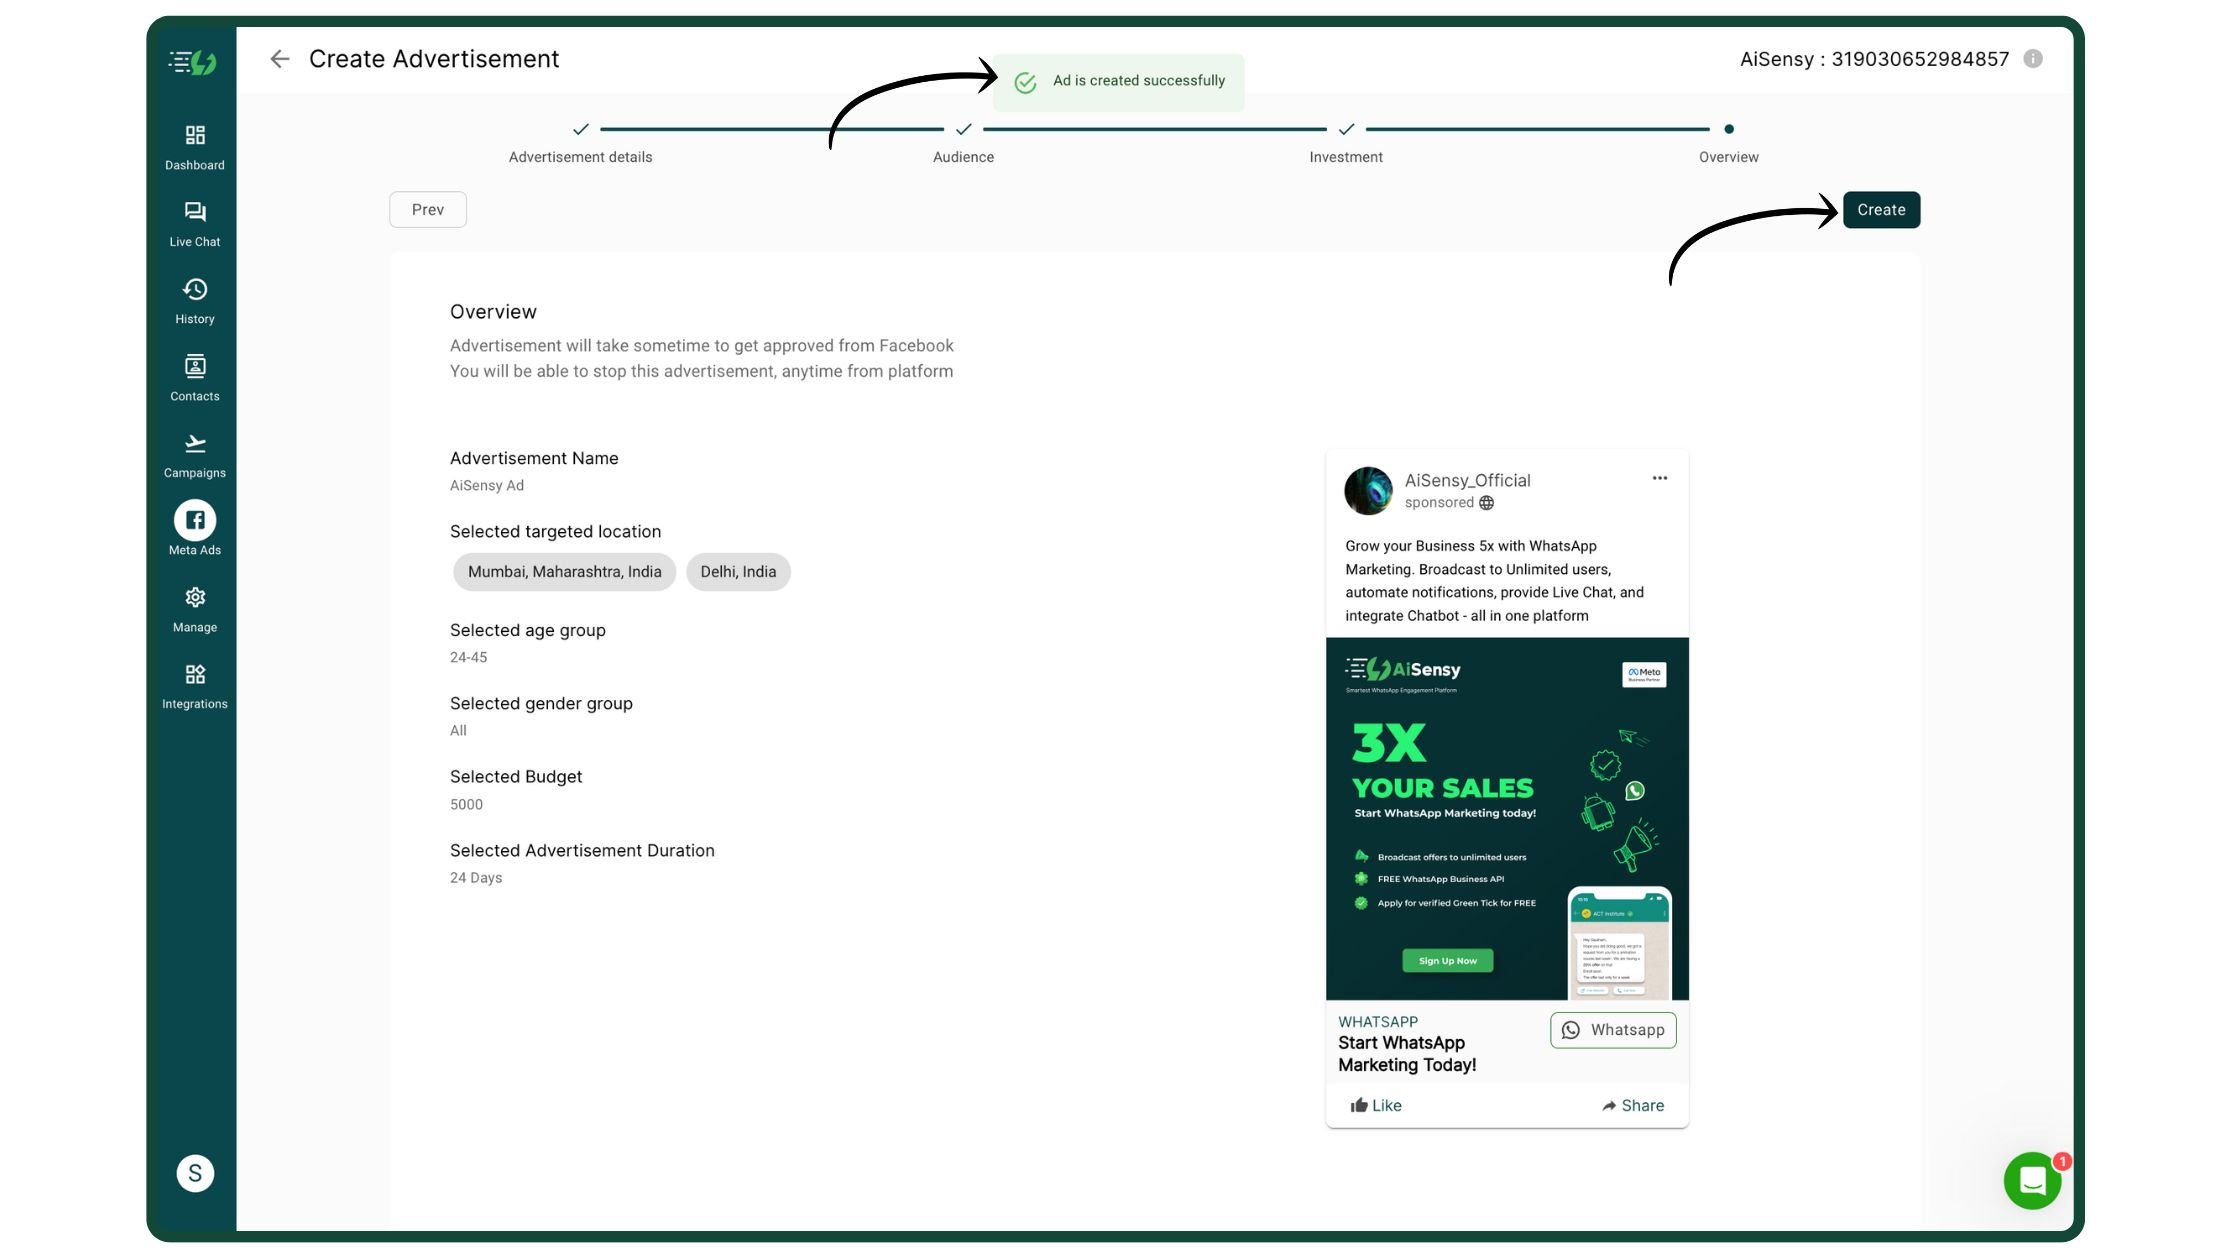
In this tutorial, we'll tell you:

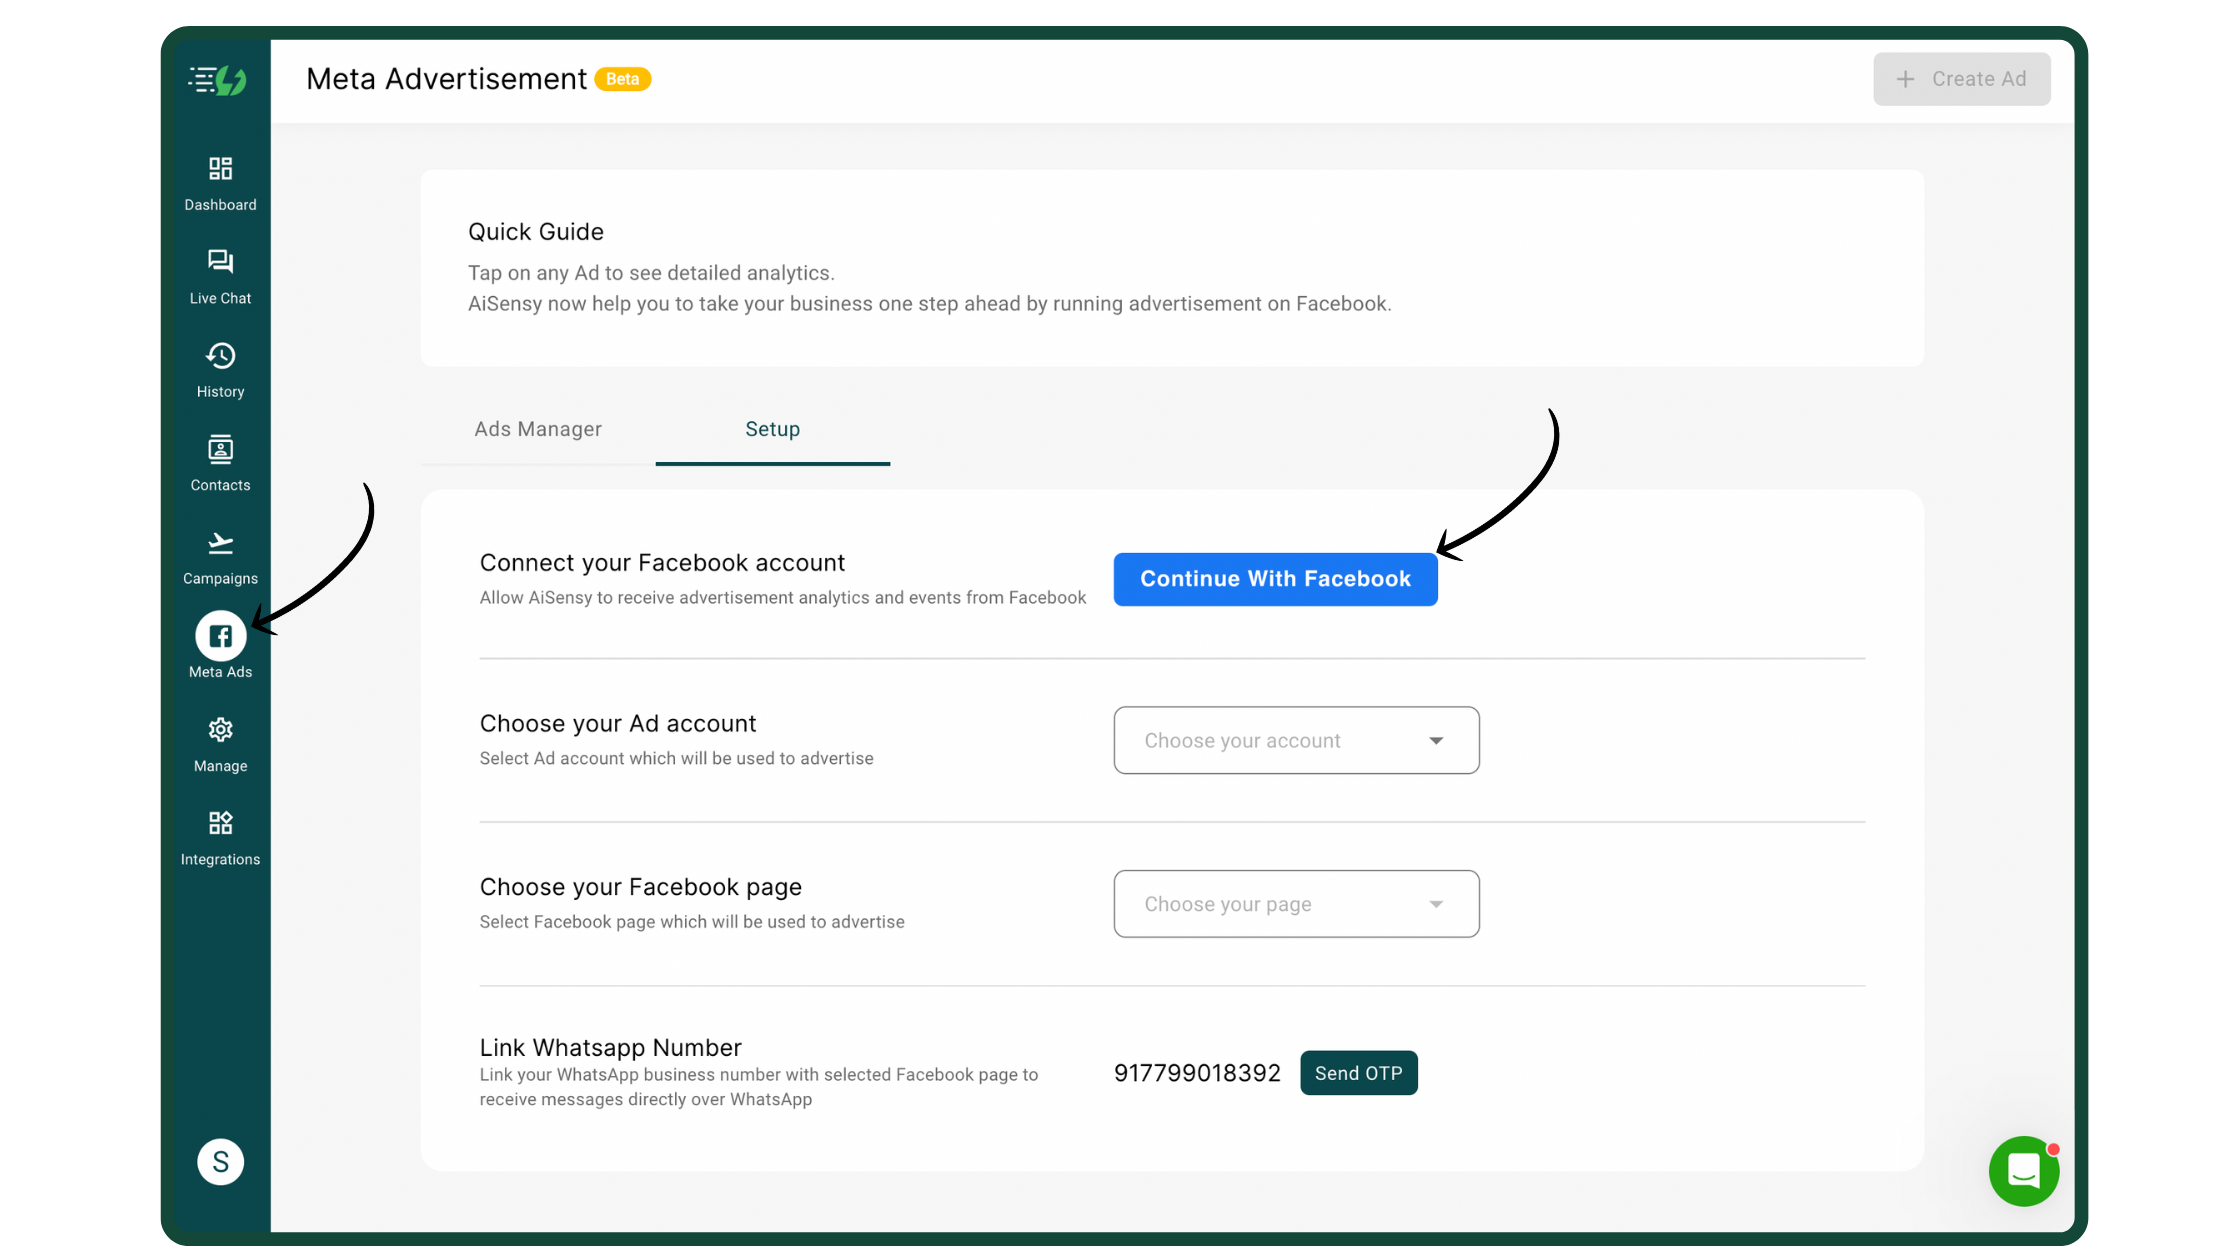
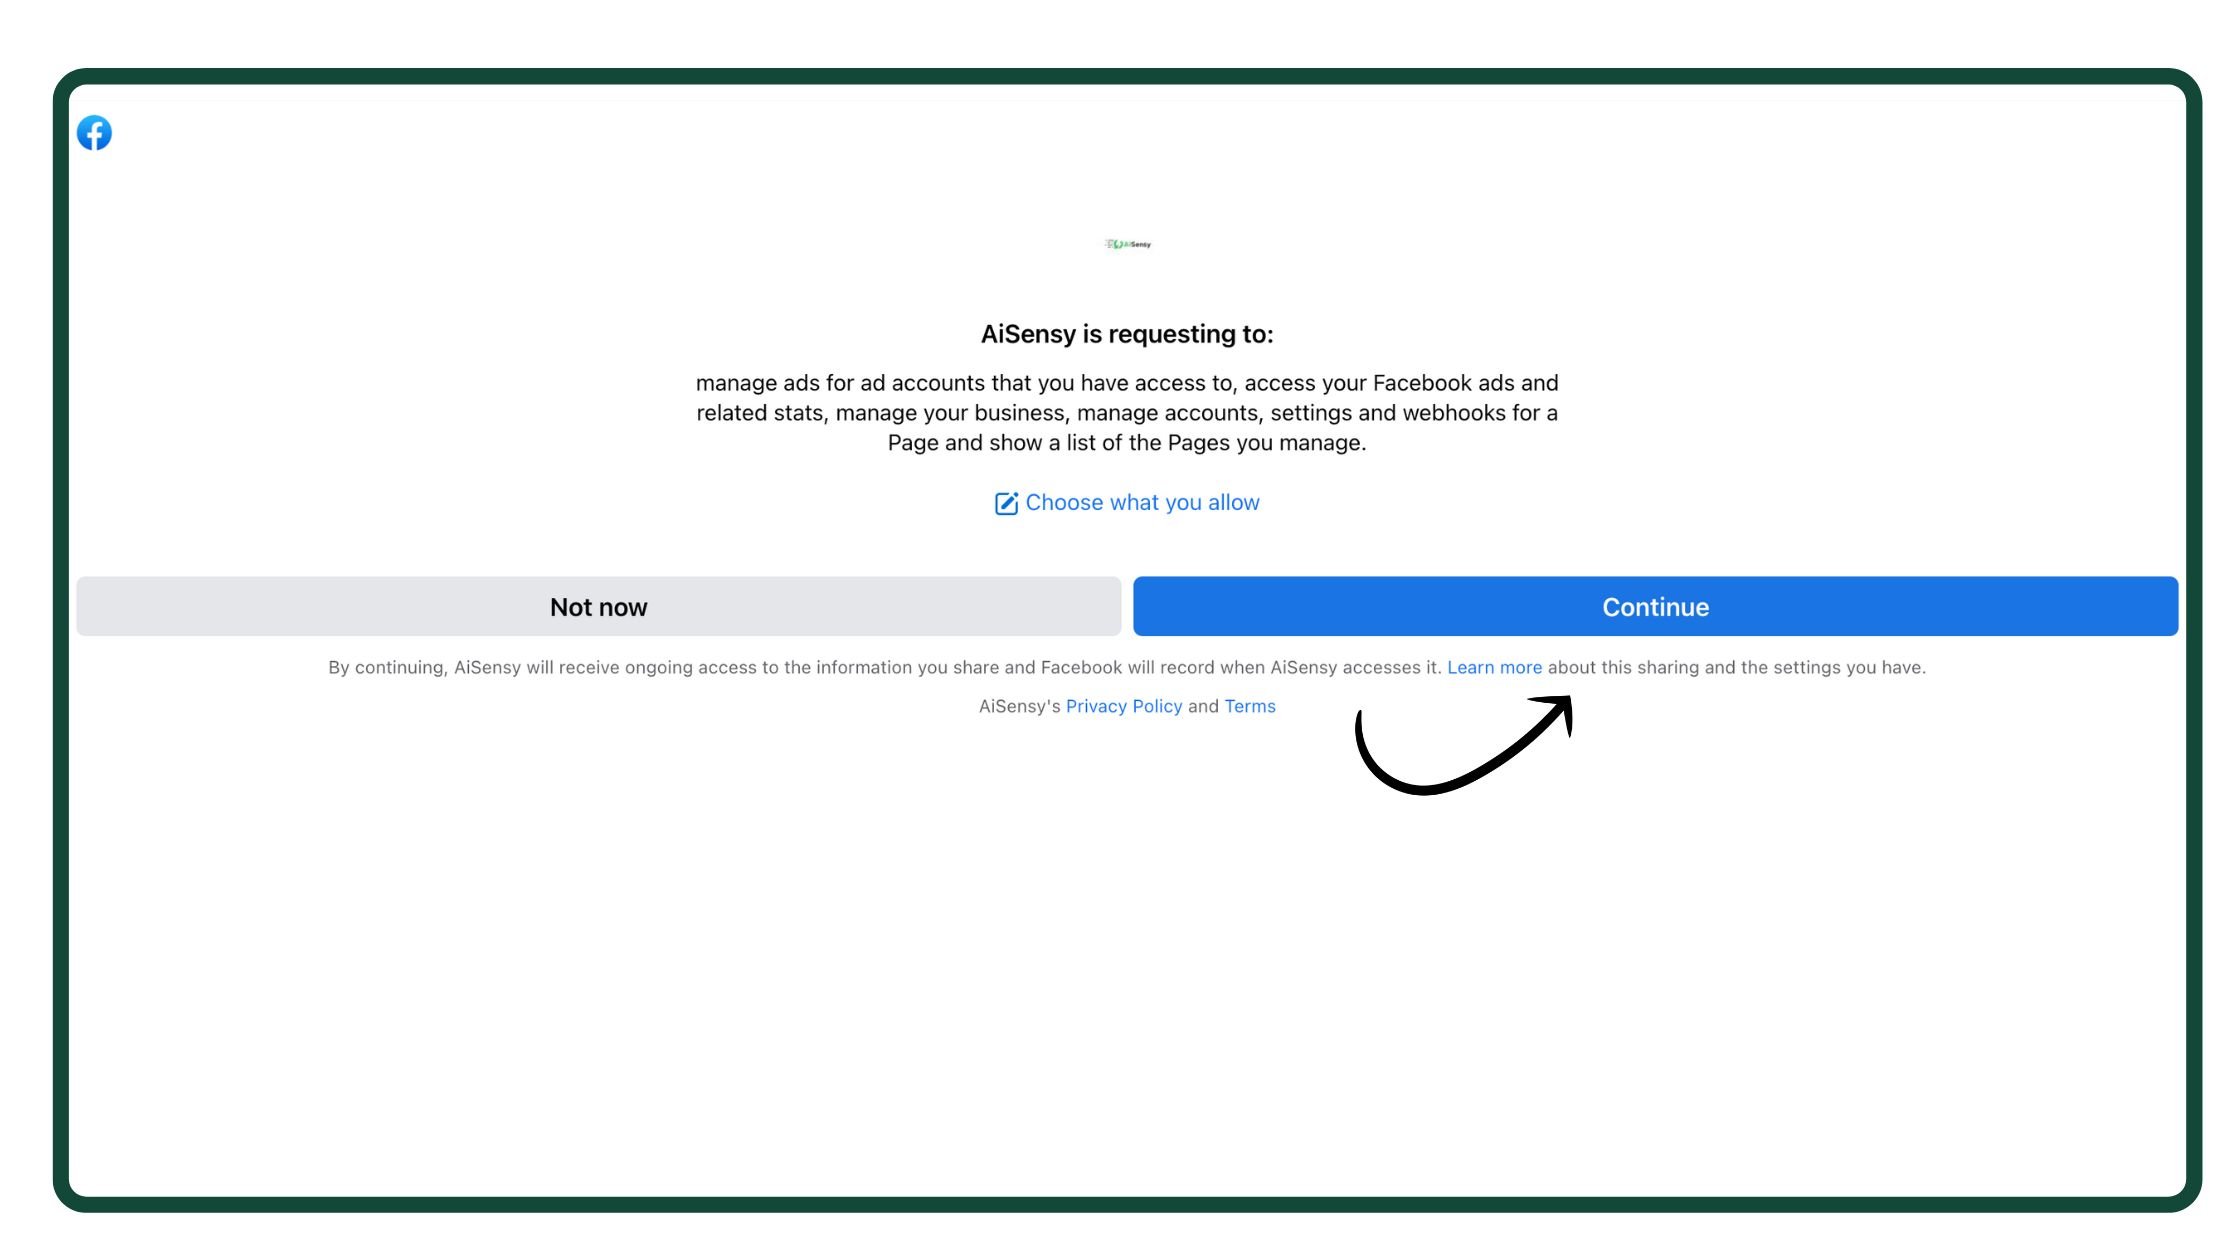
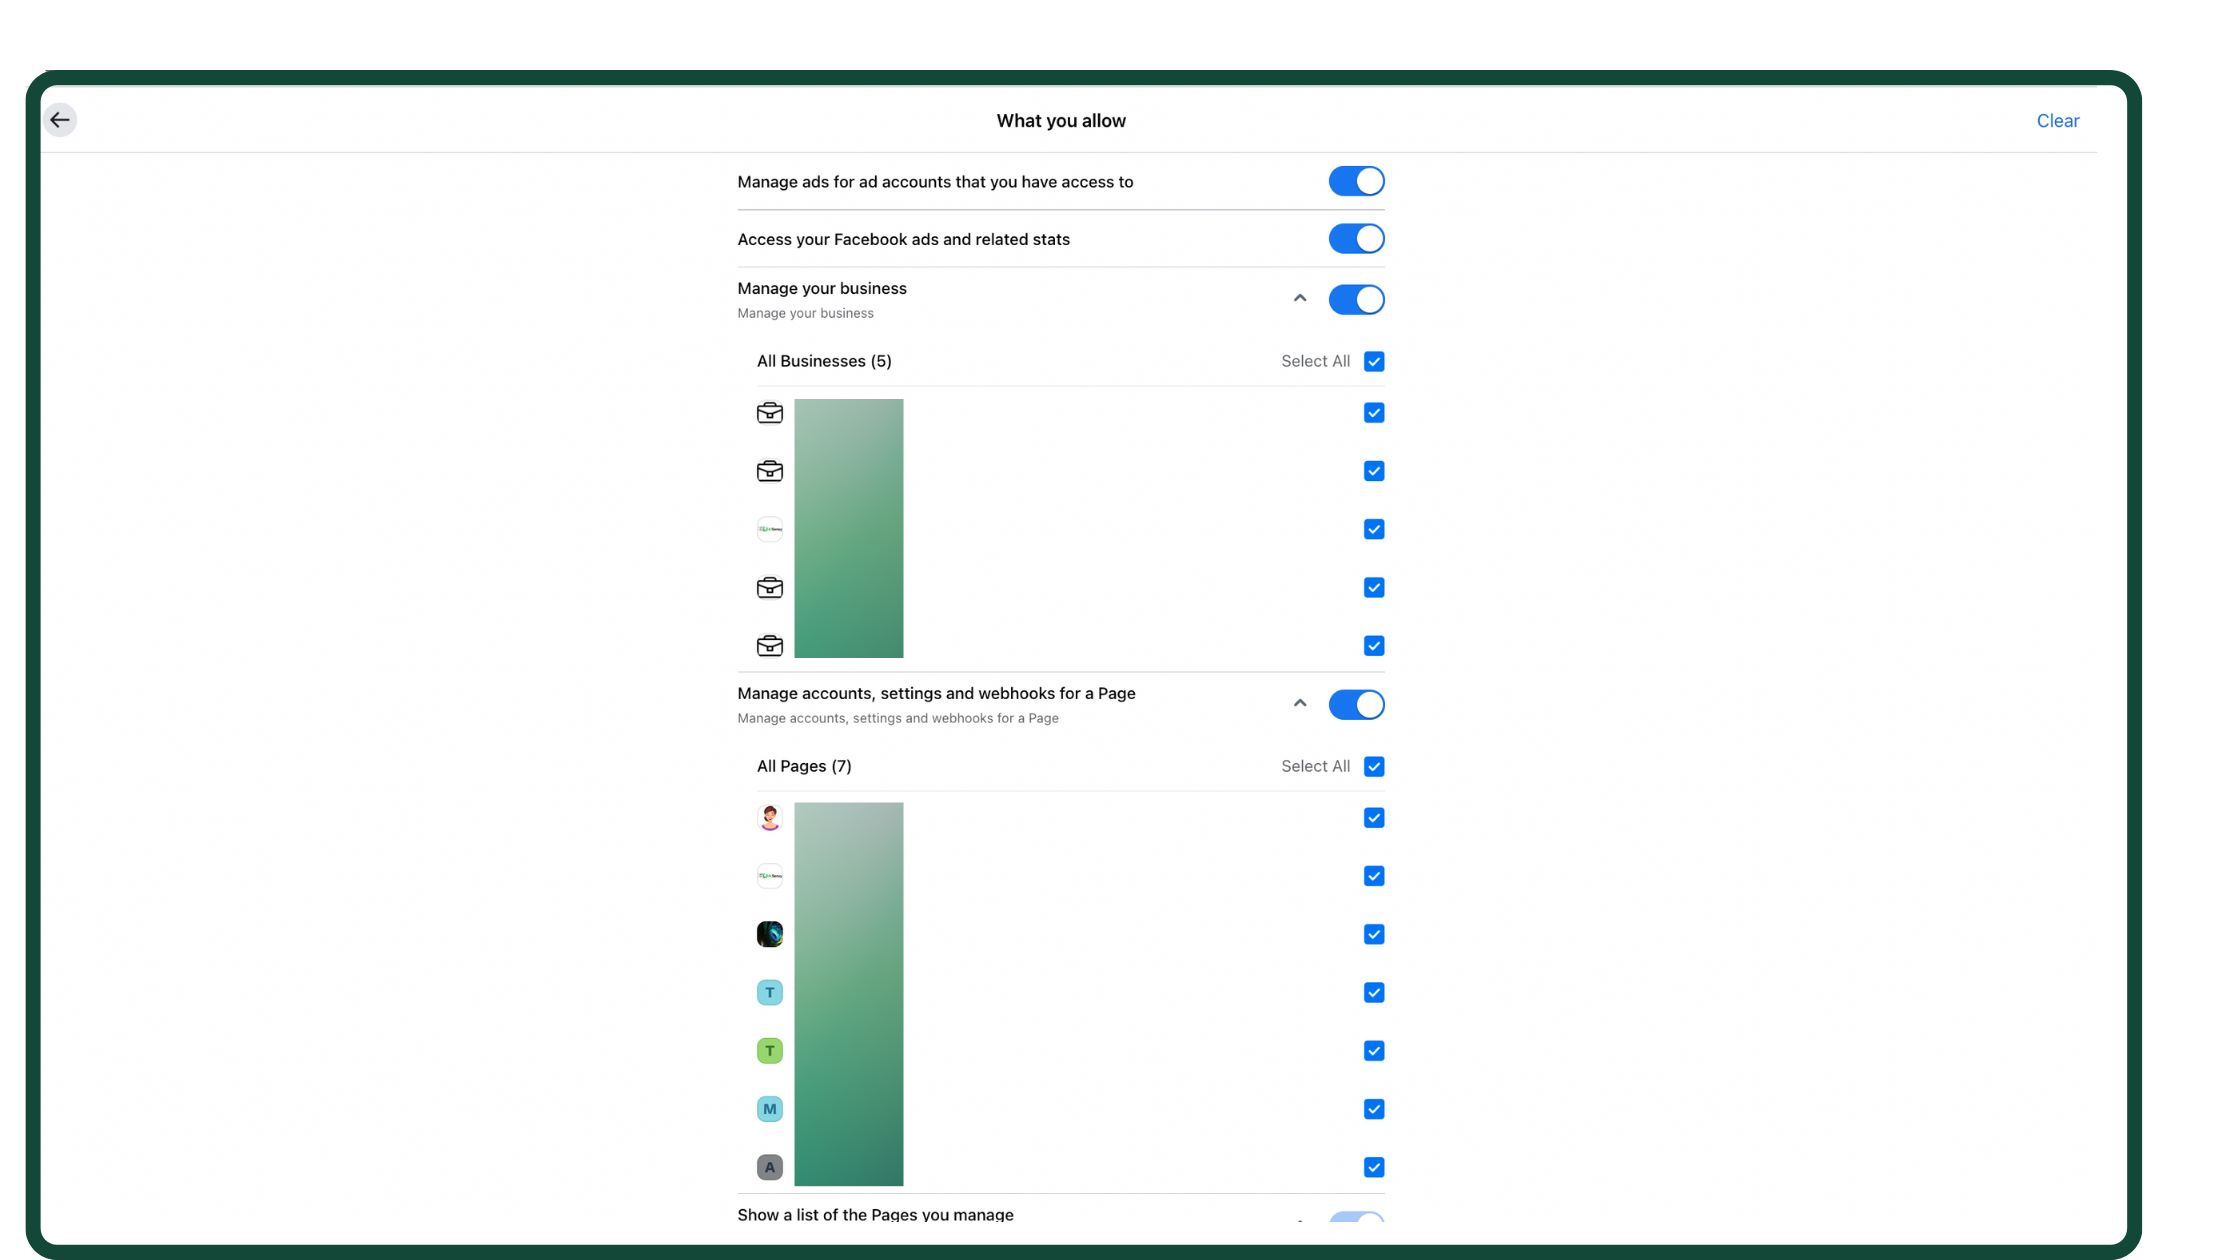
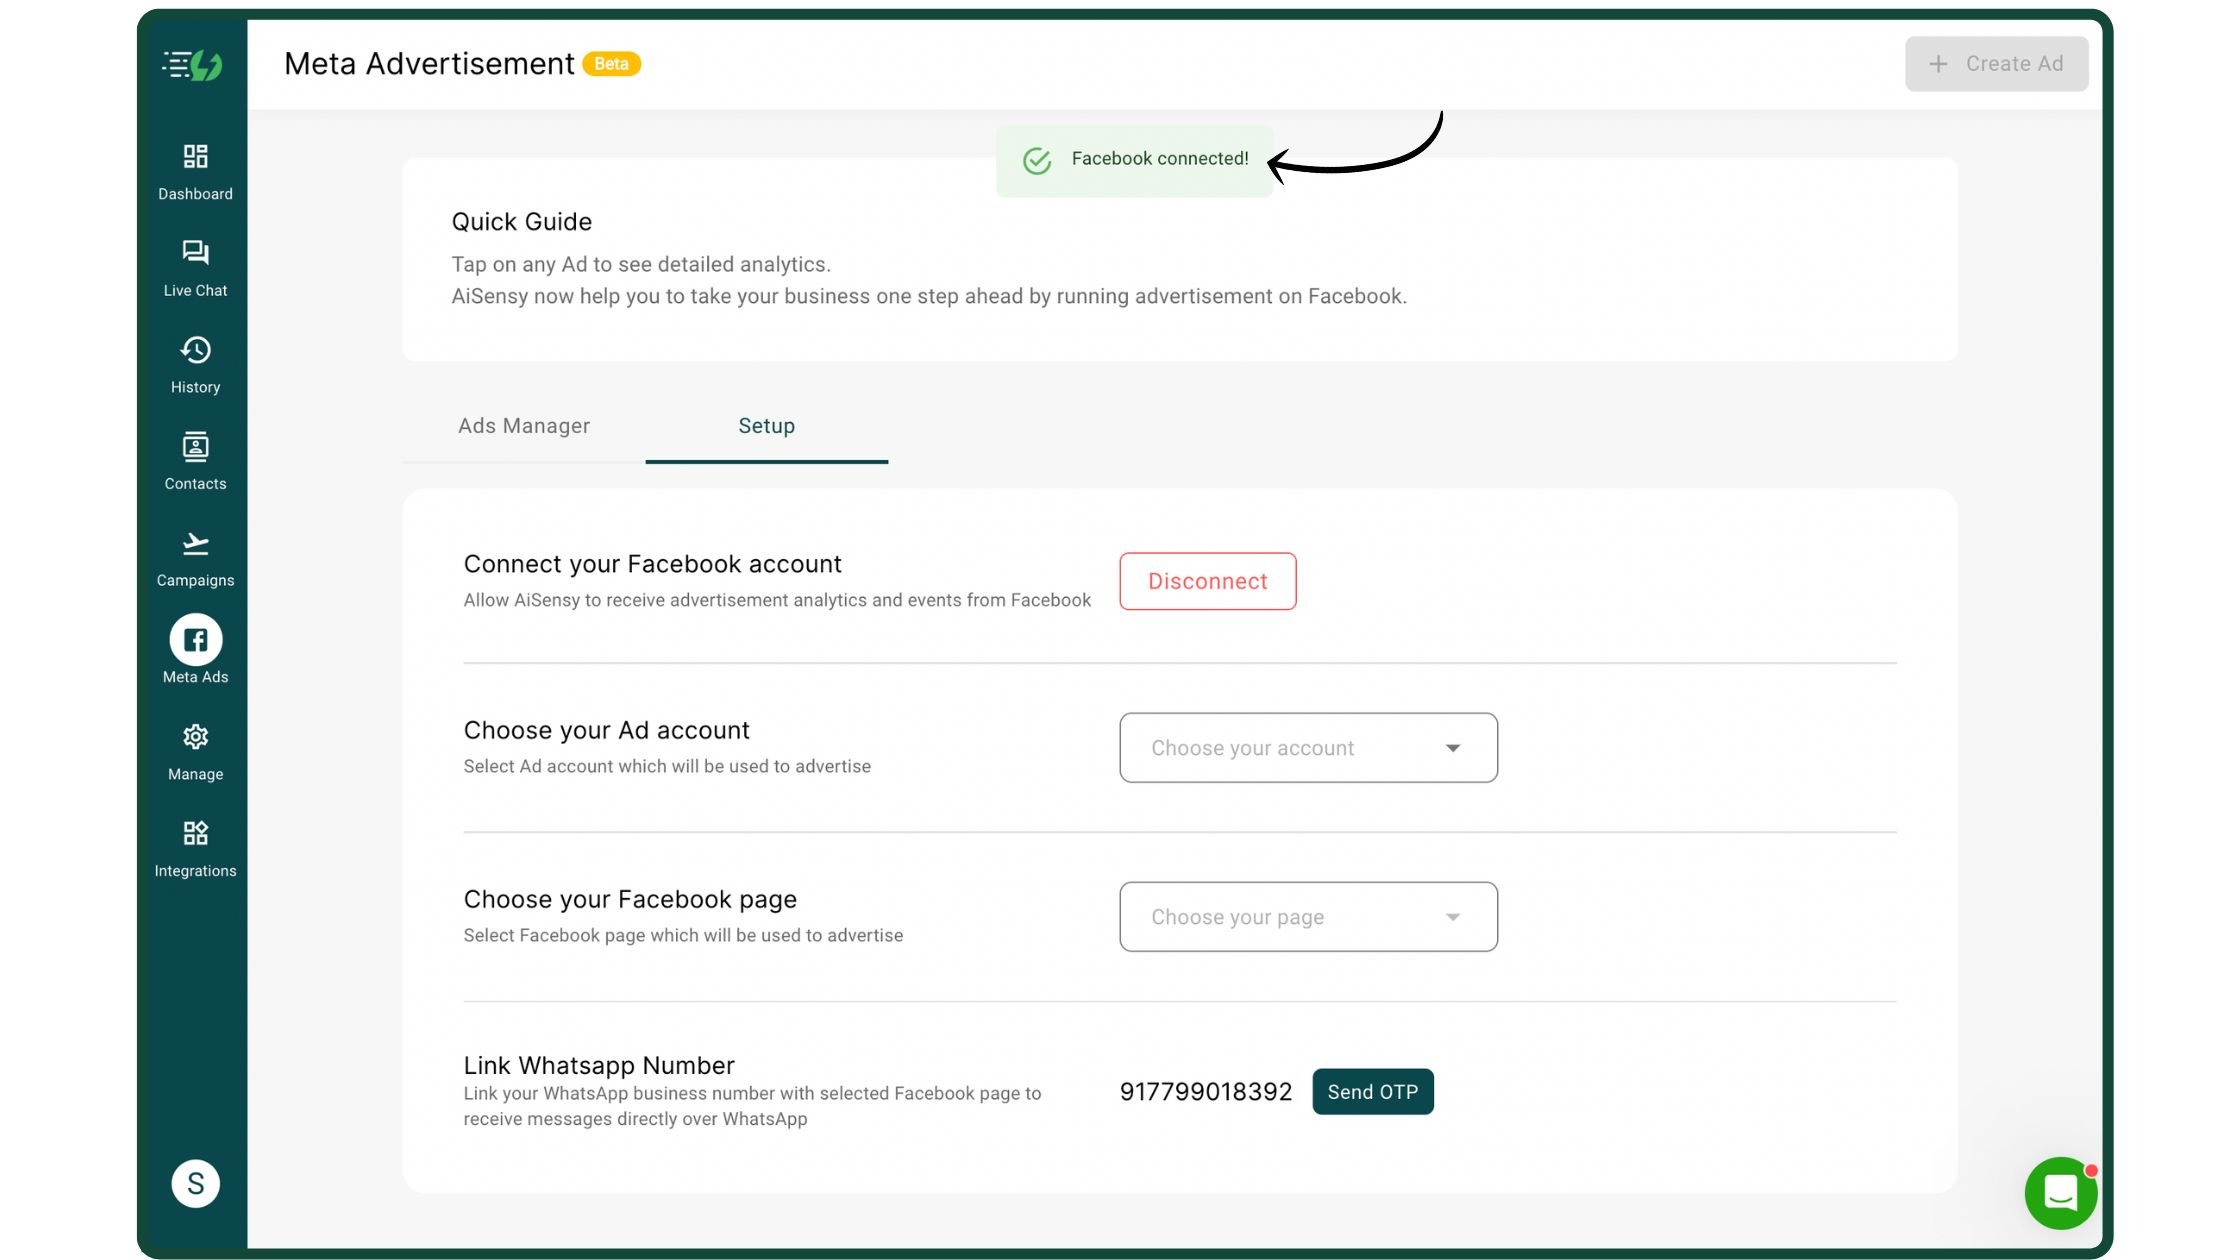
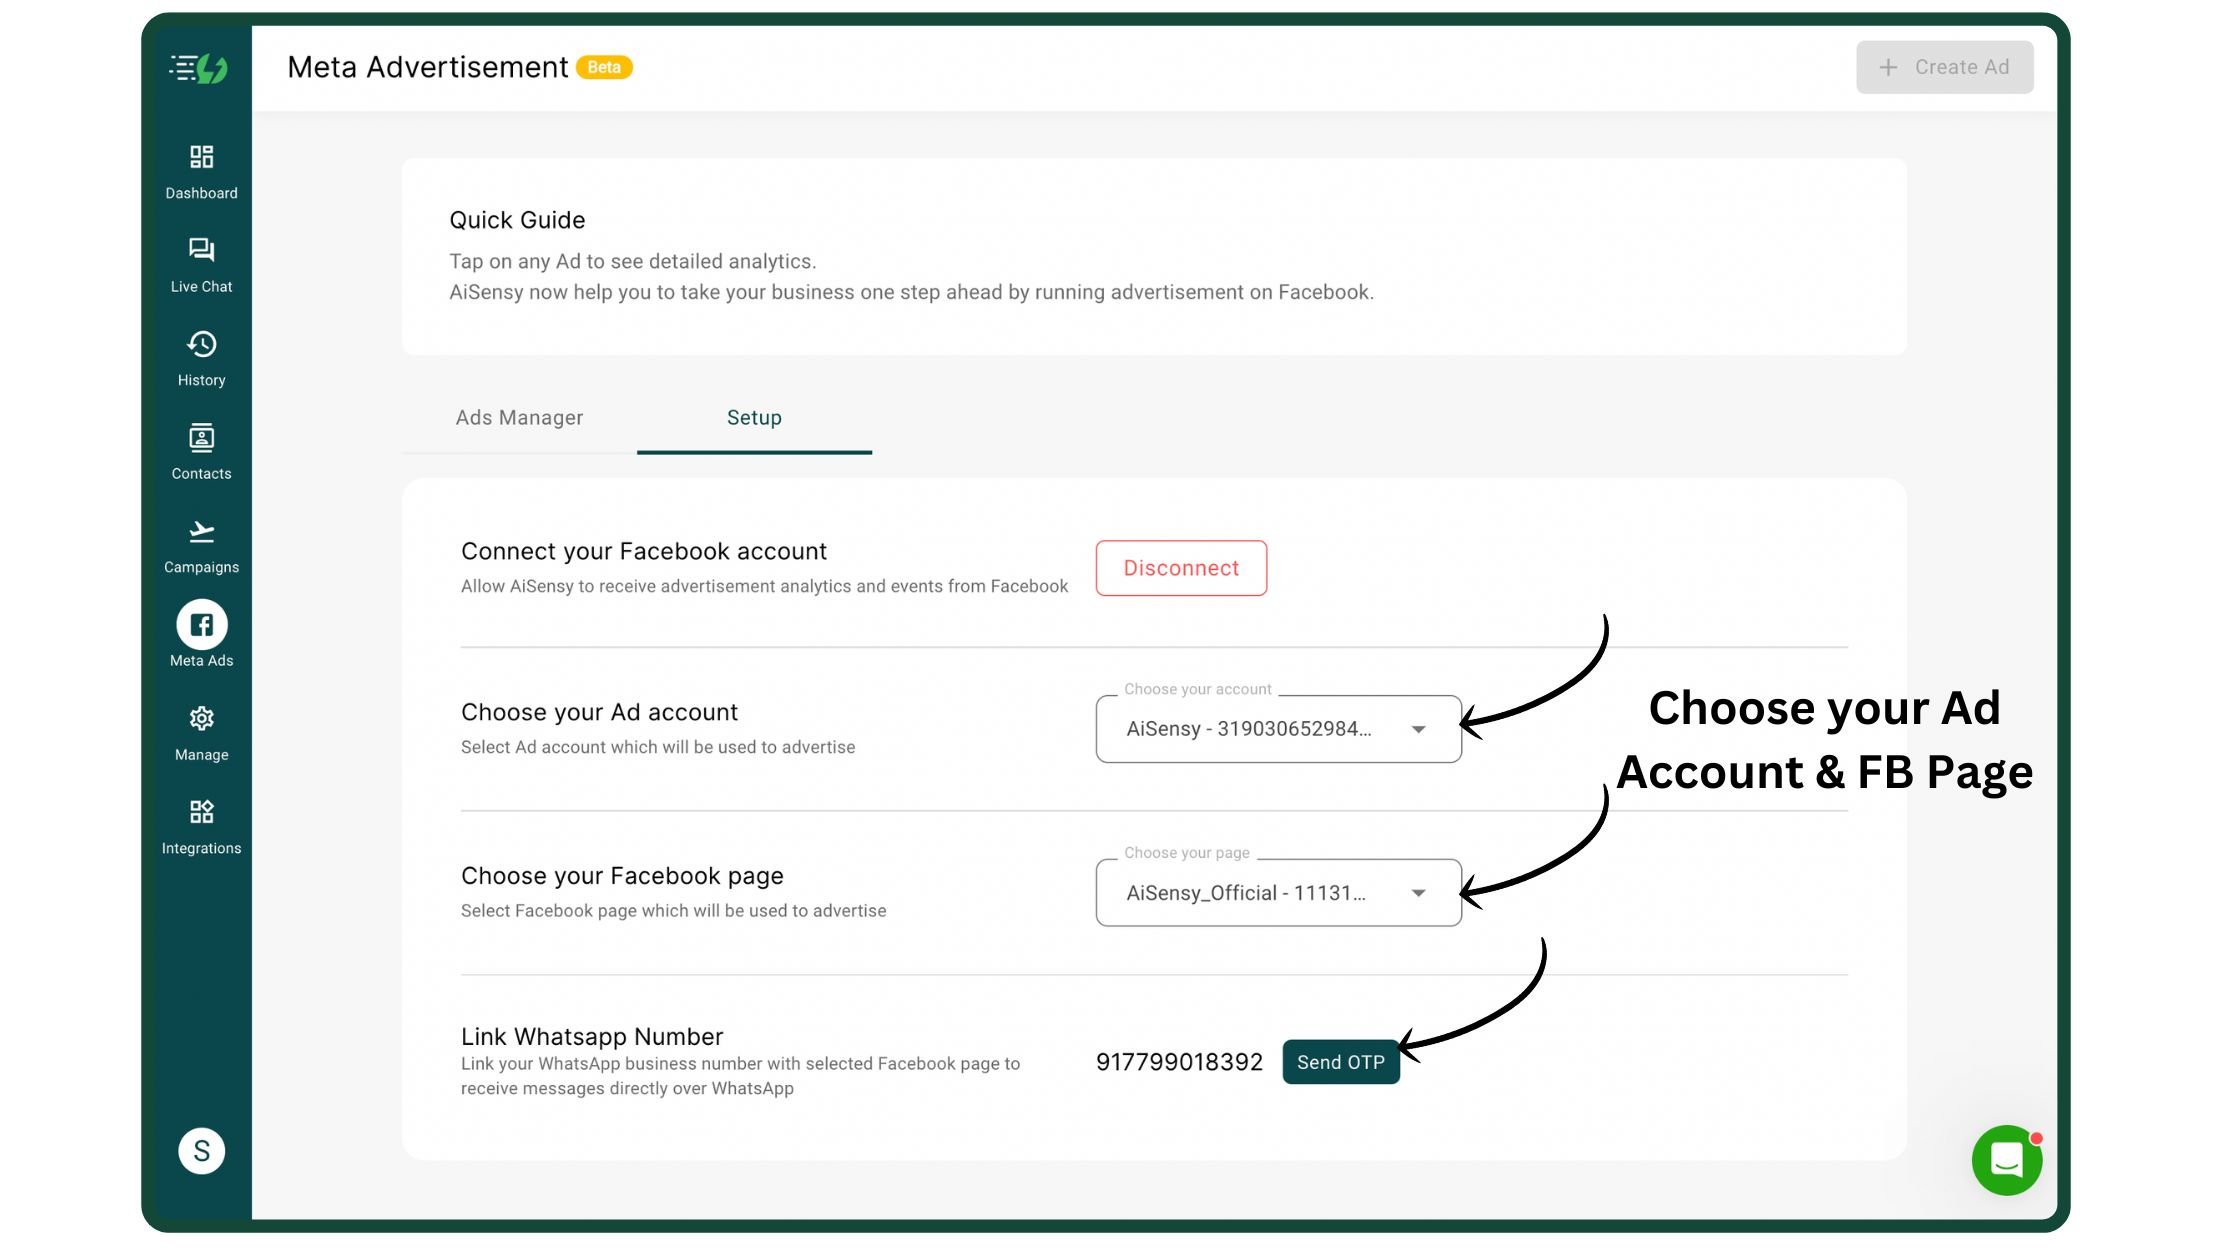
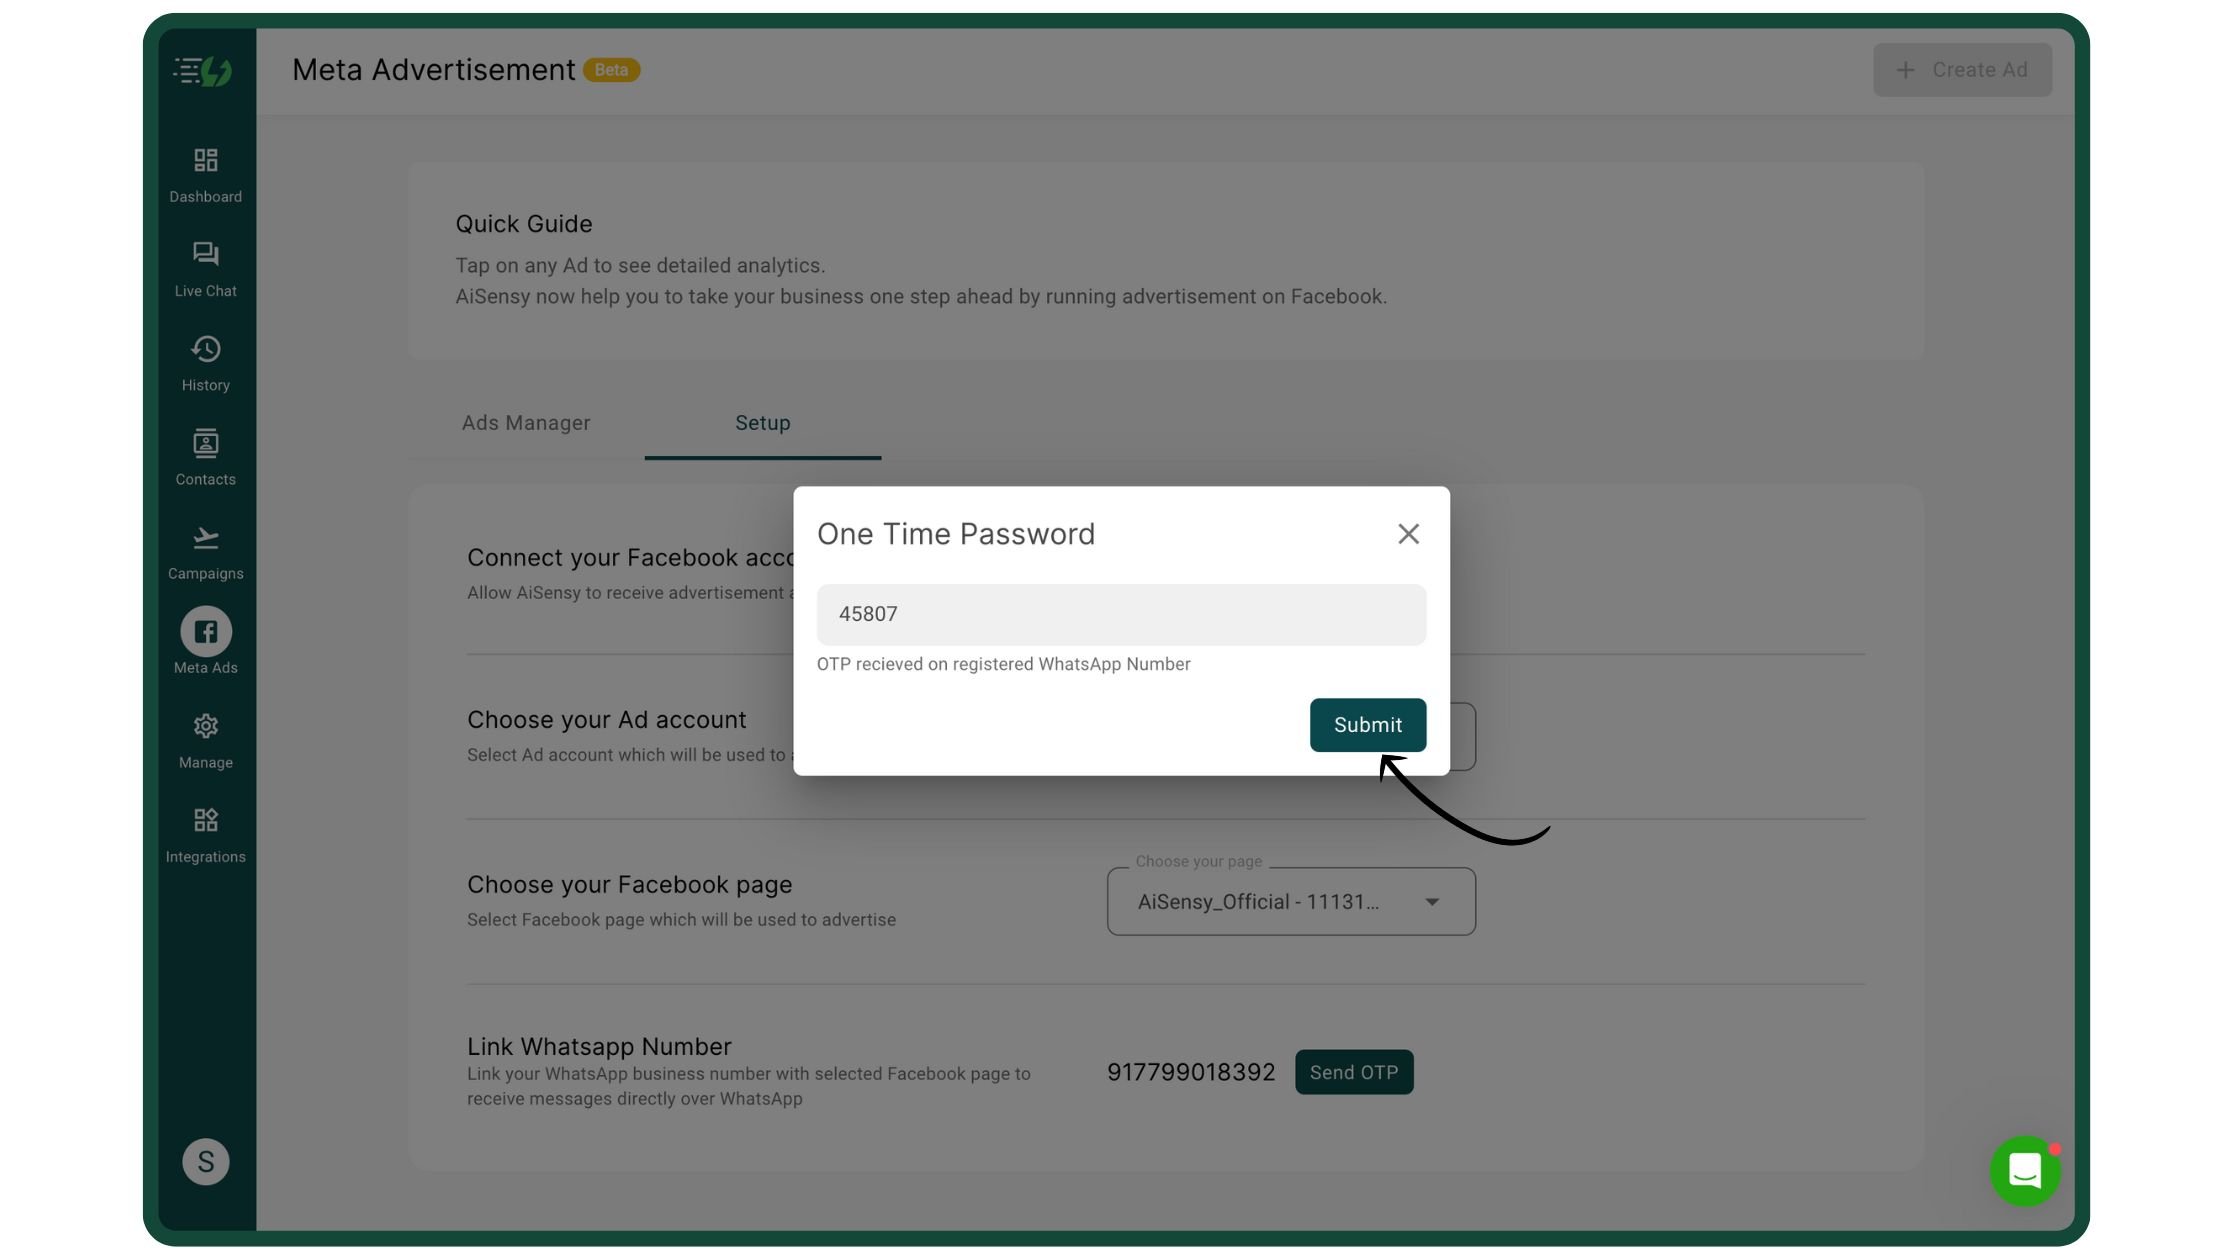
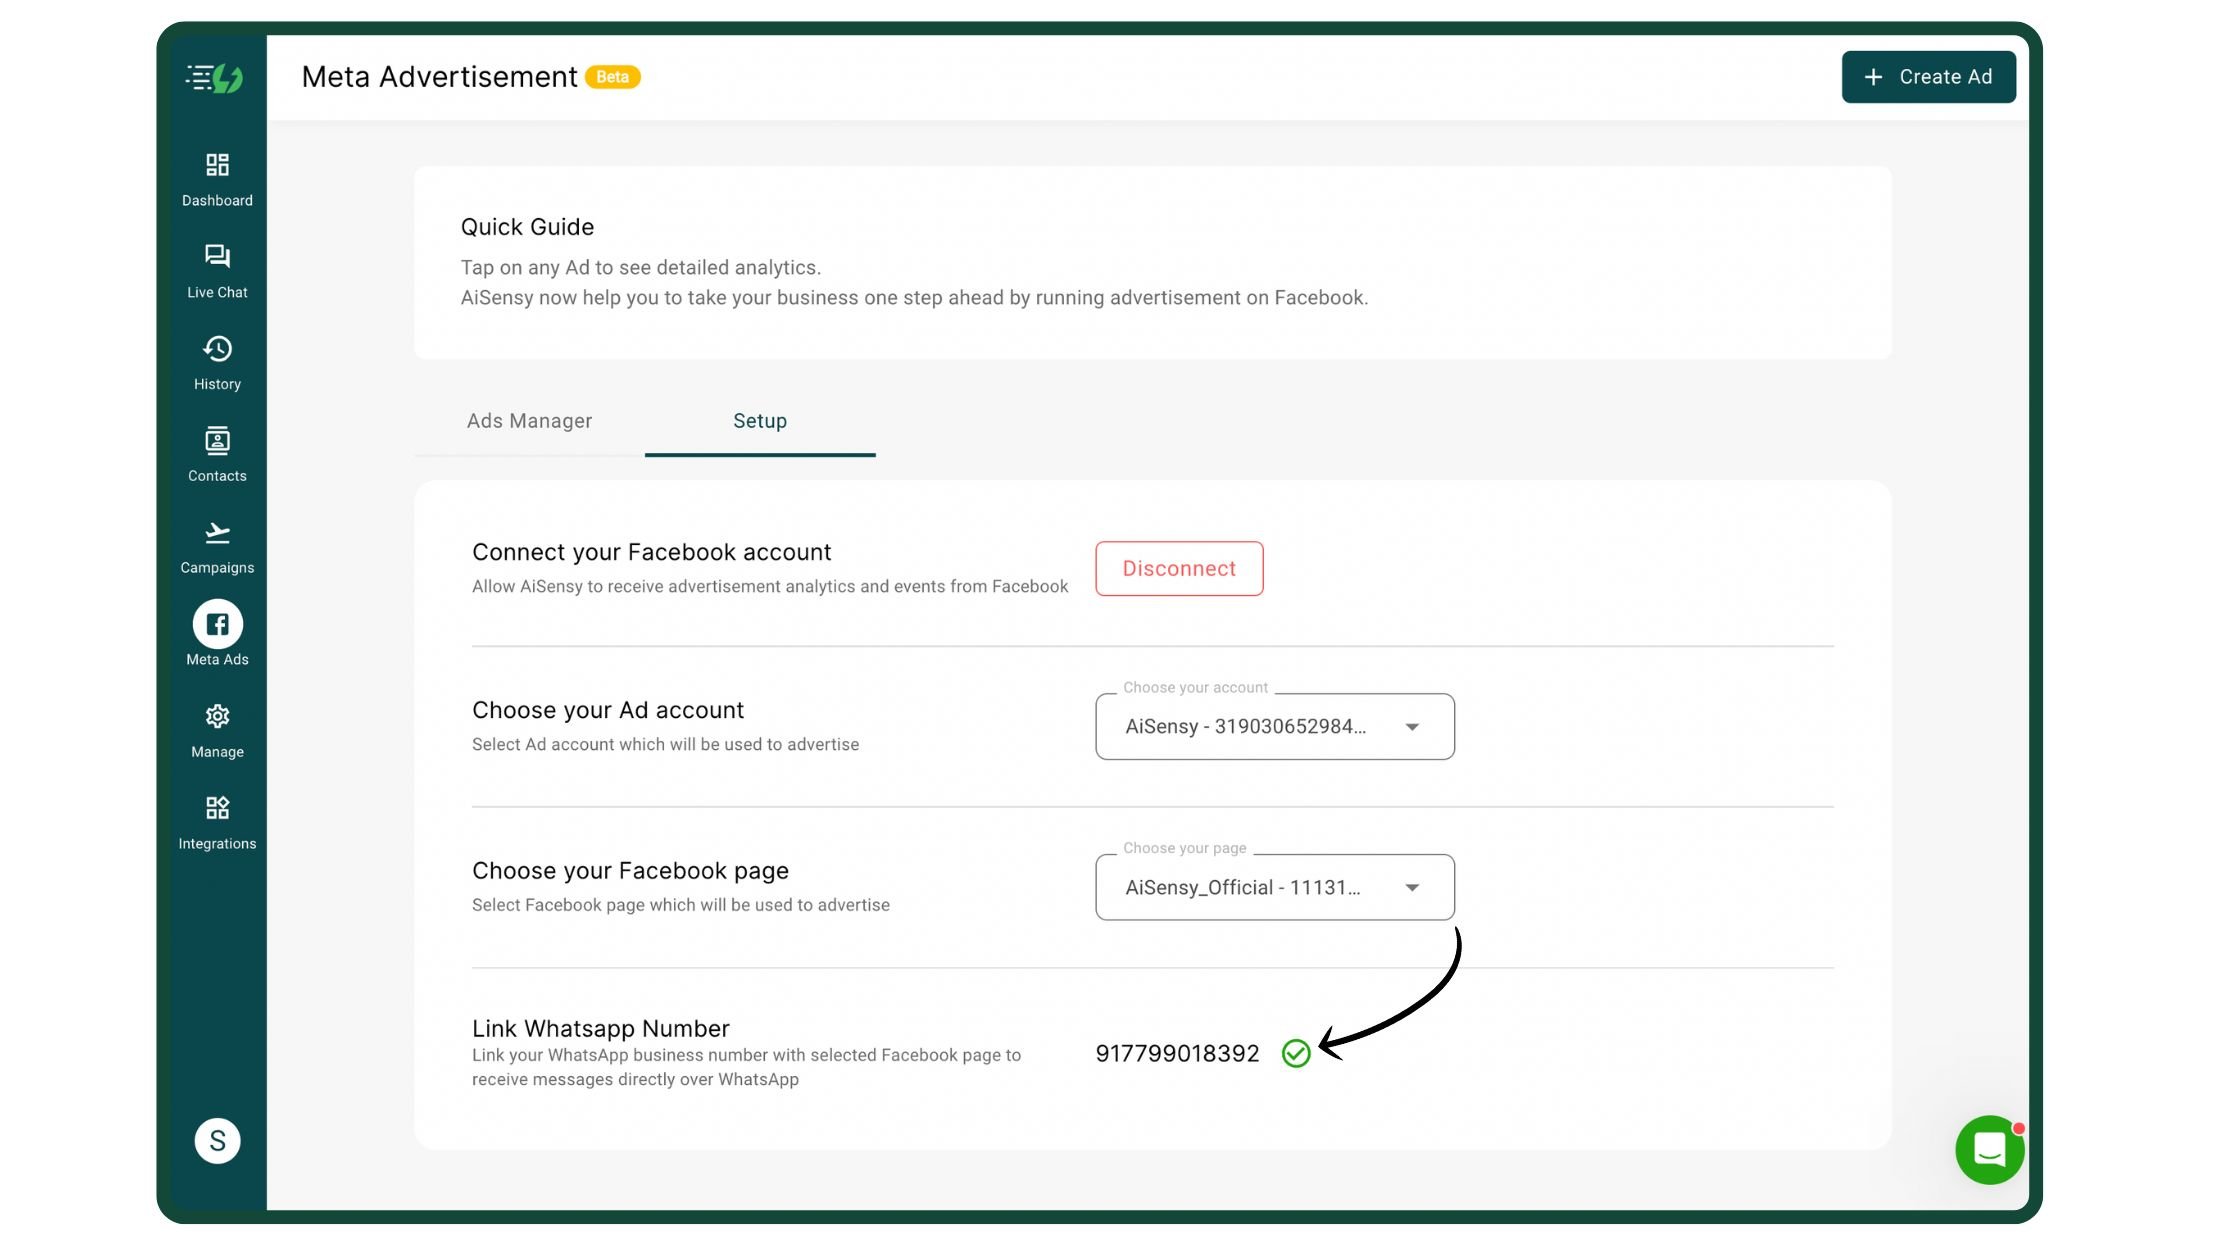
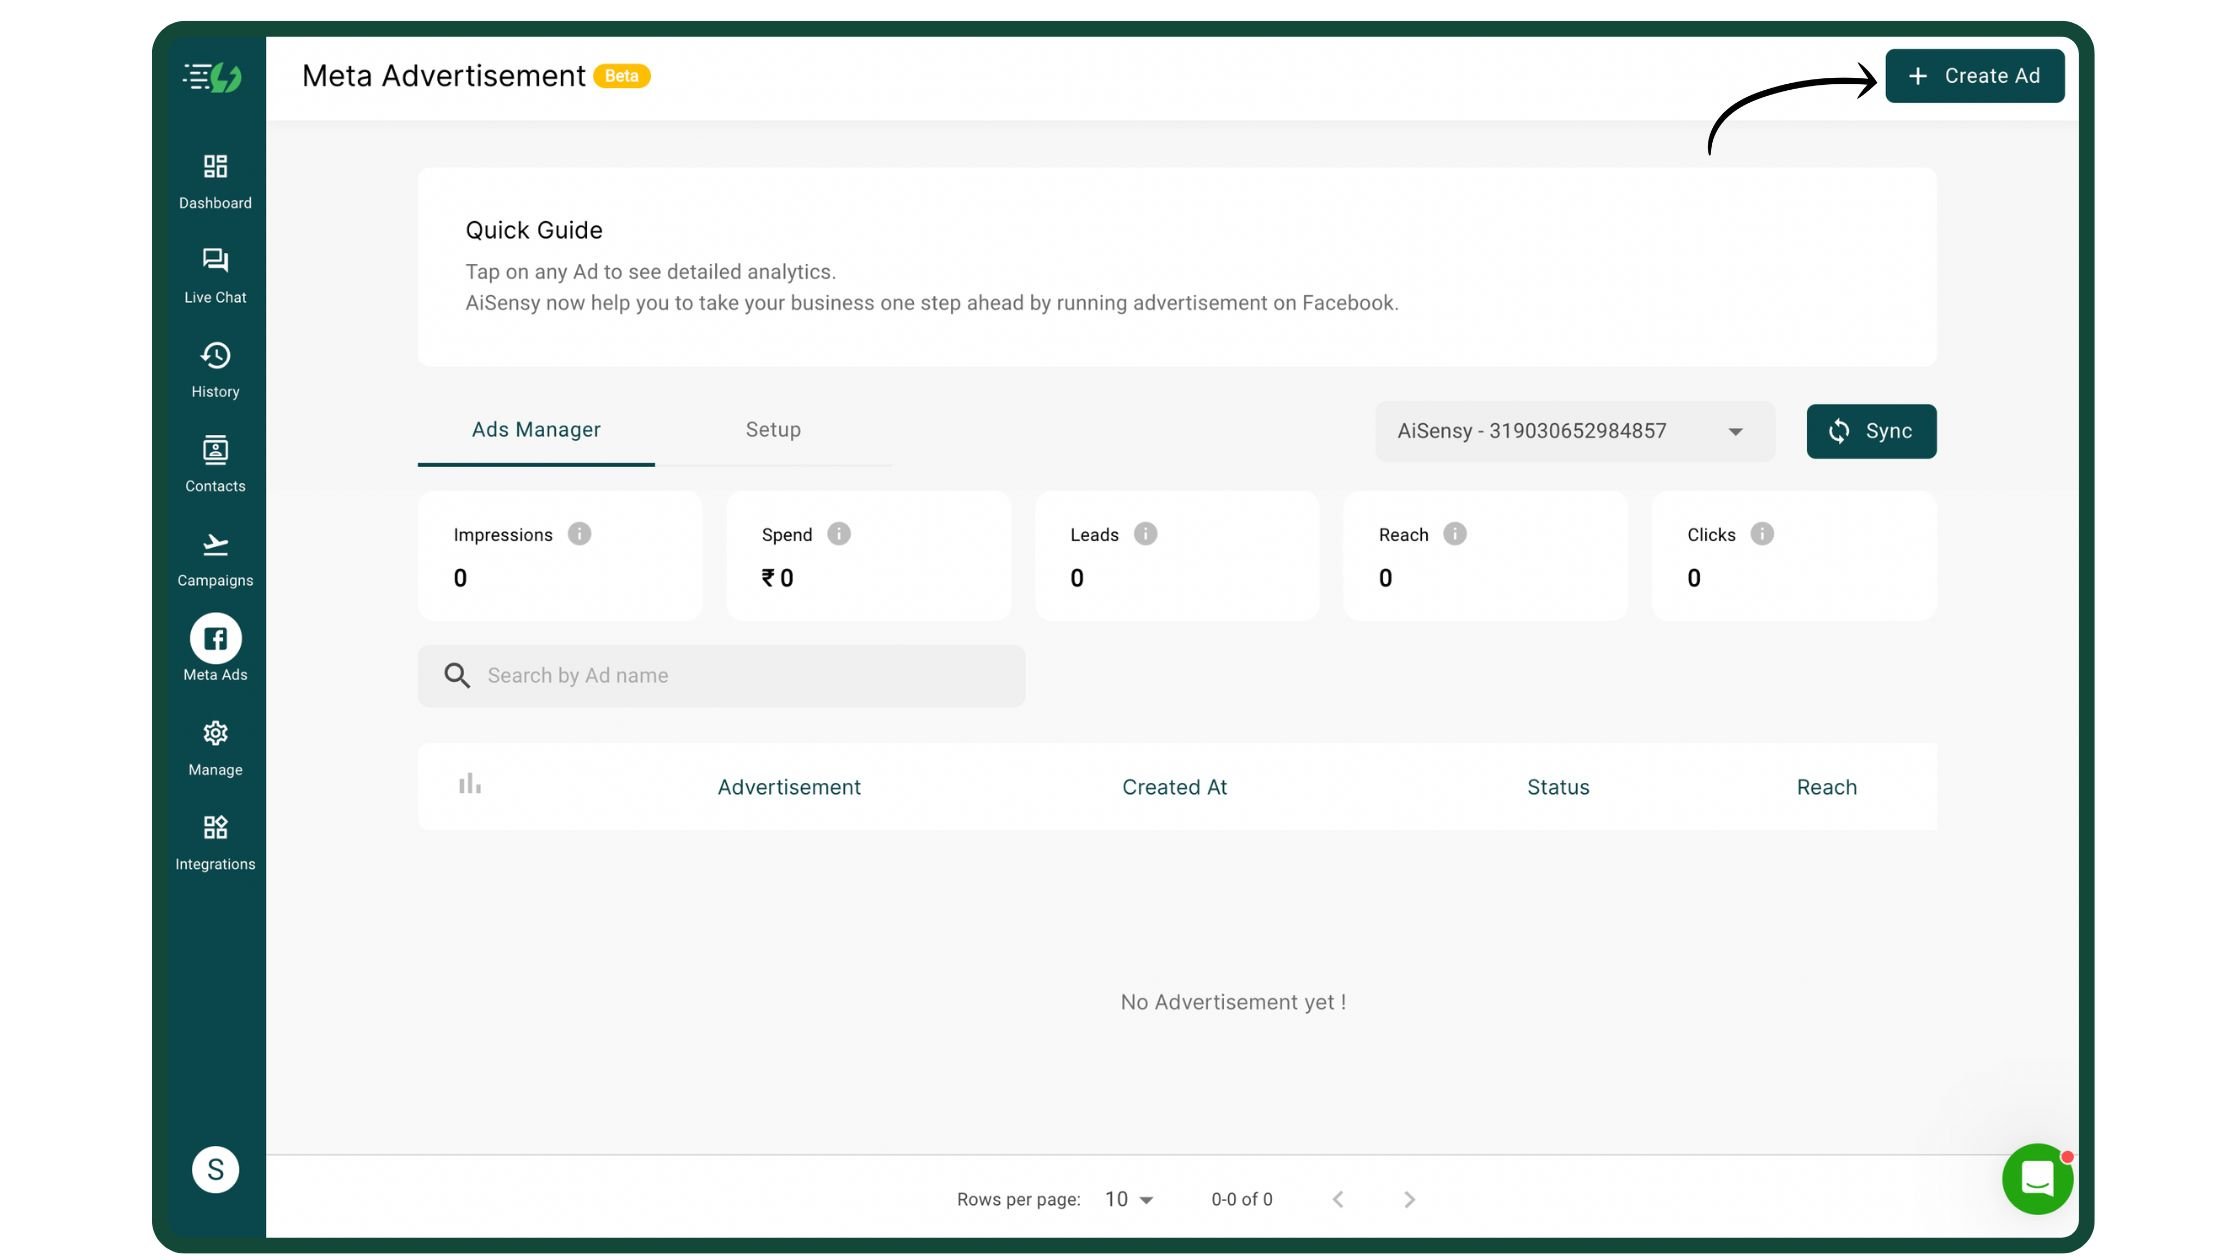
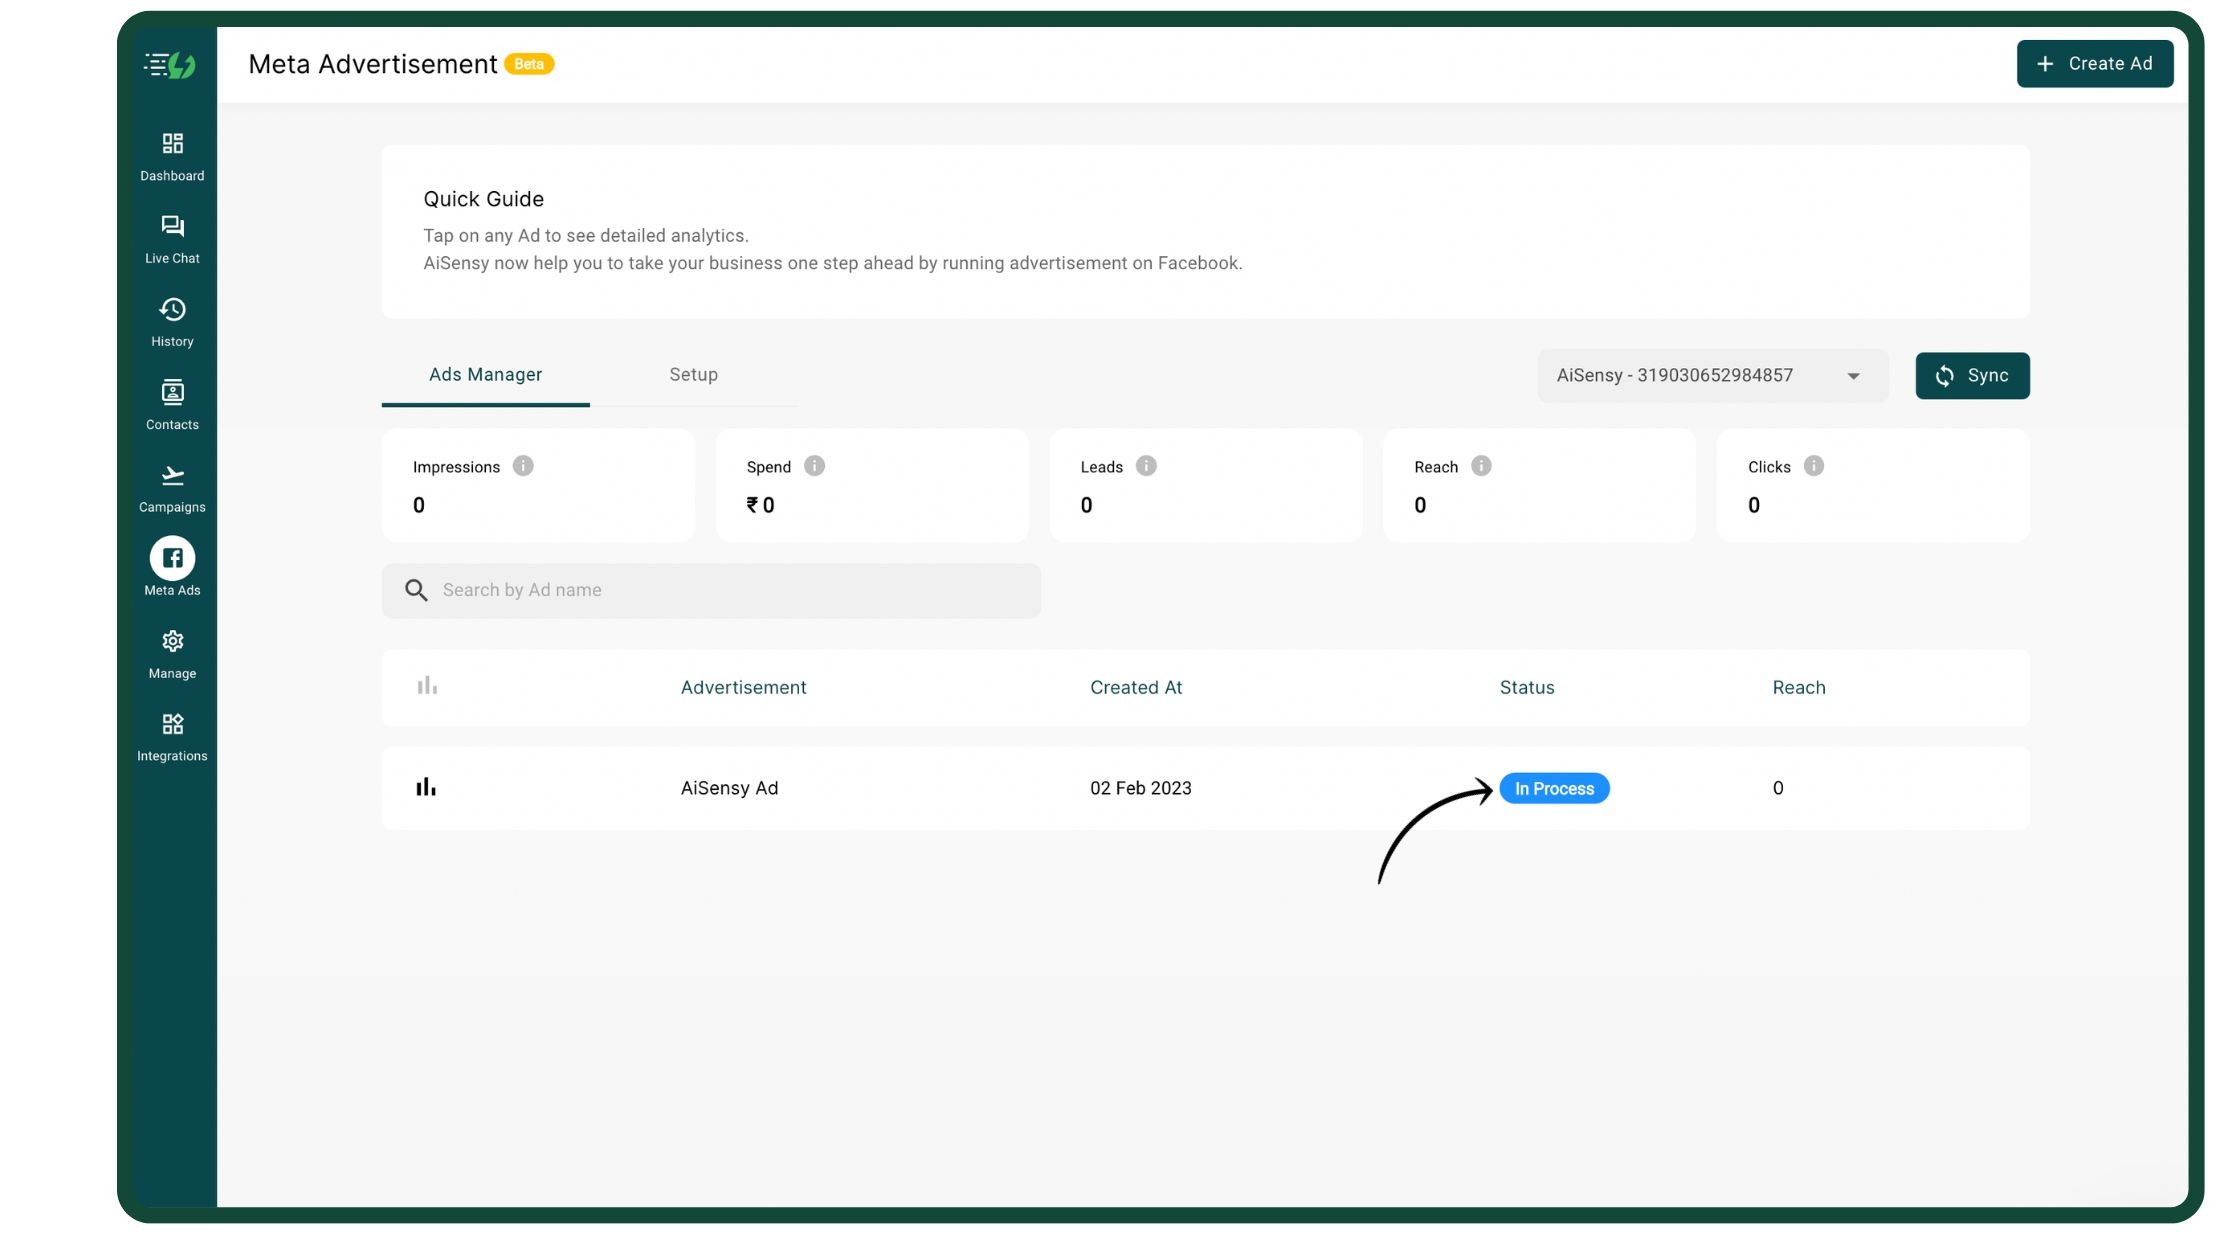
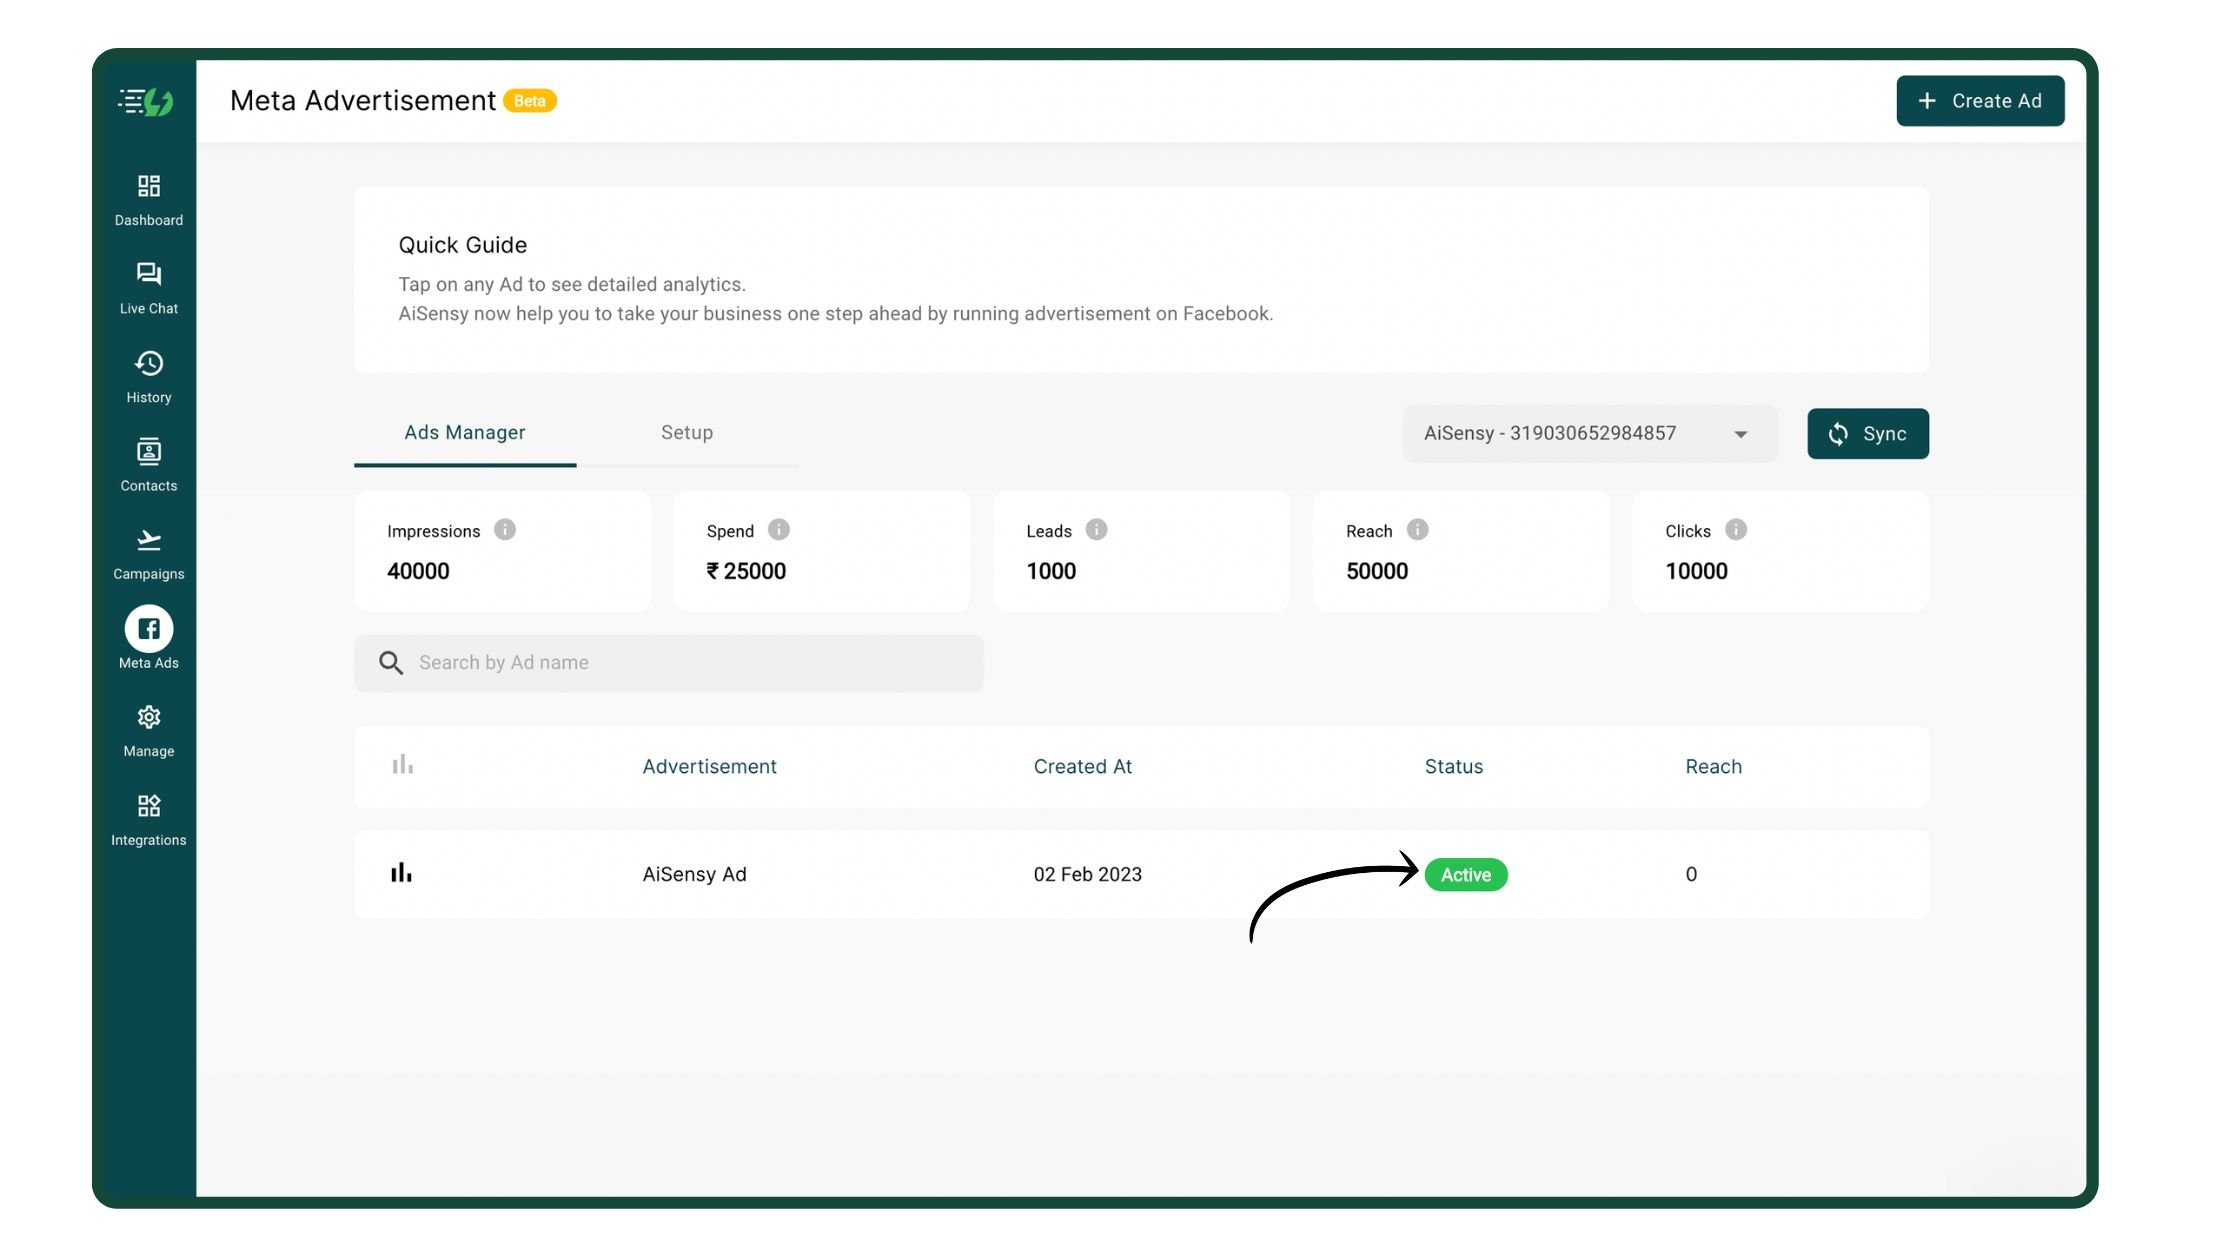
  • How to easily create Click-to-WhatsApp-Ads (CTWA) on the AiSensy platform
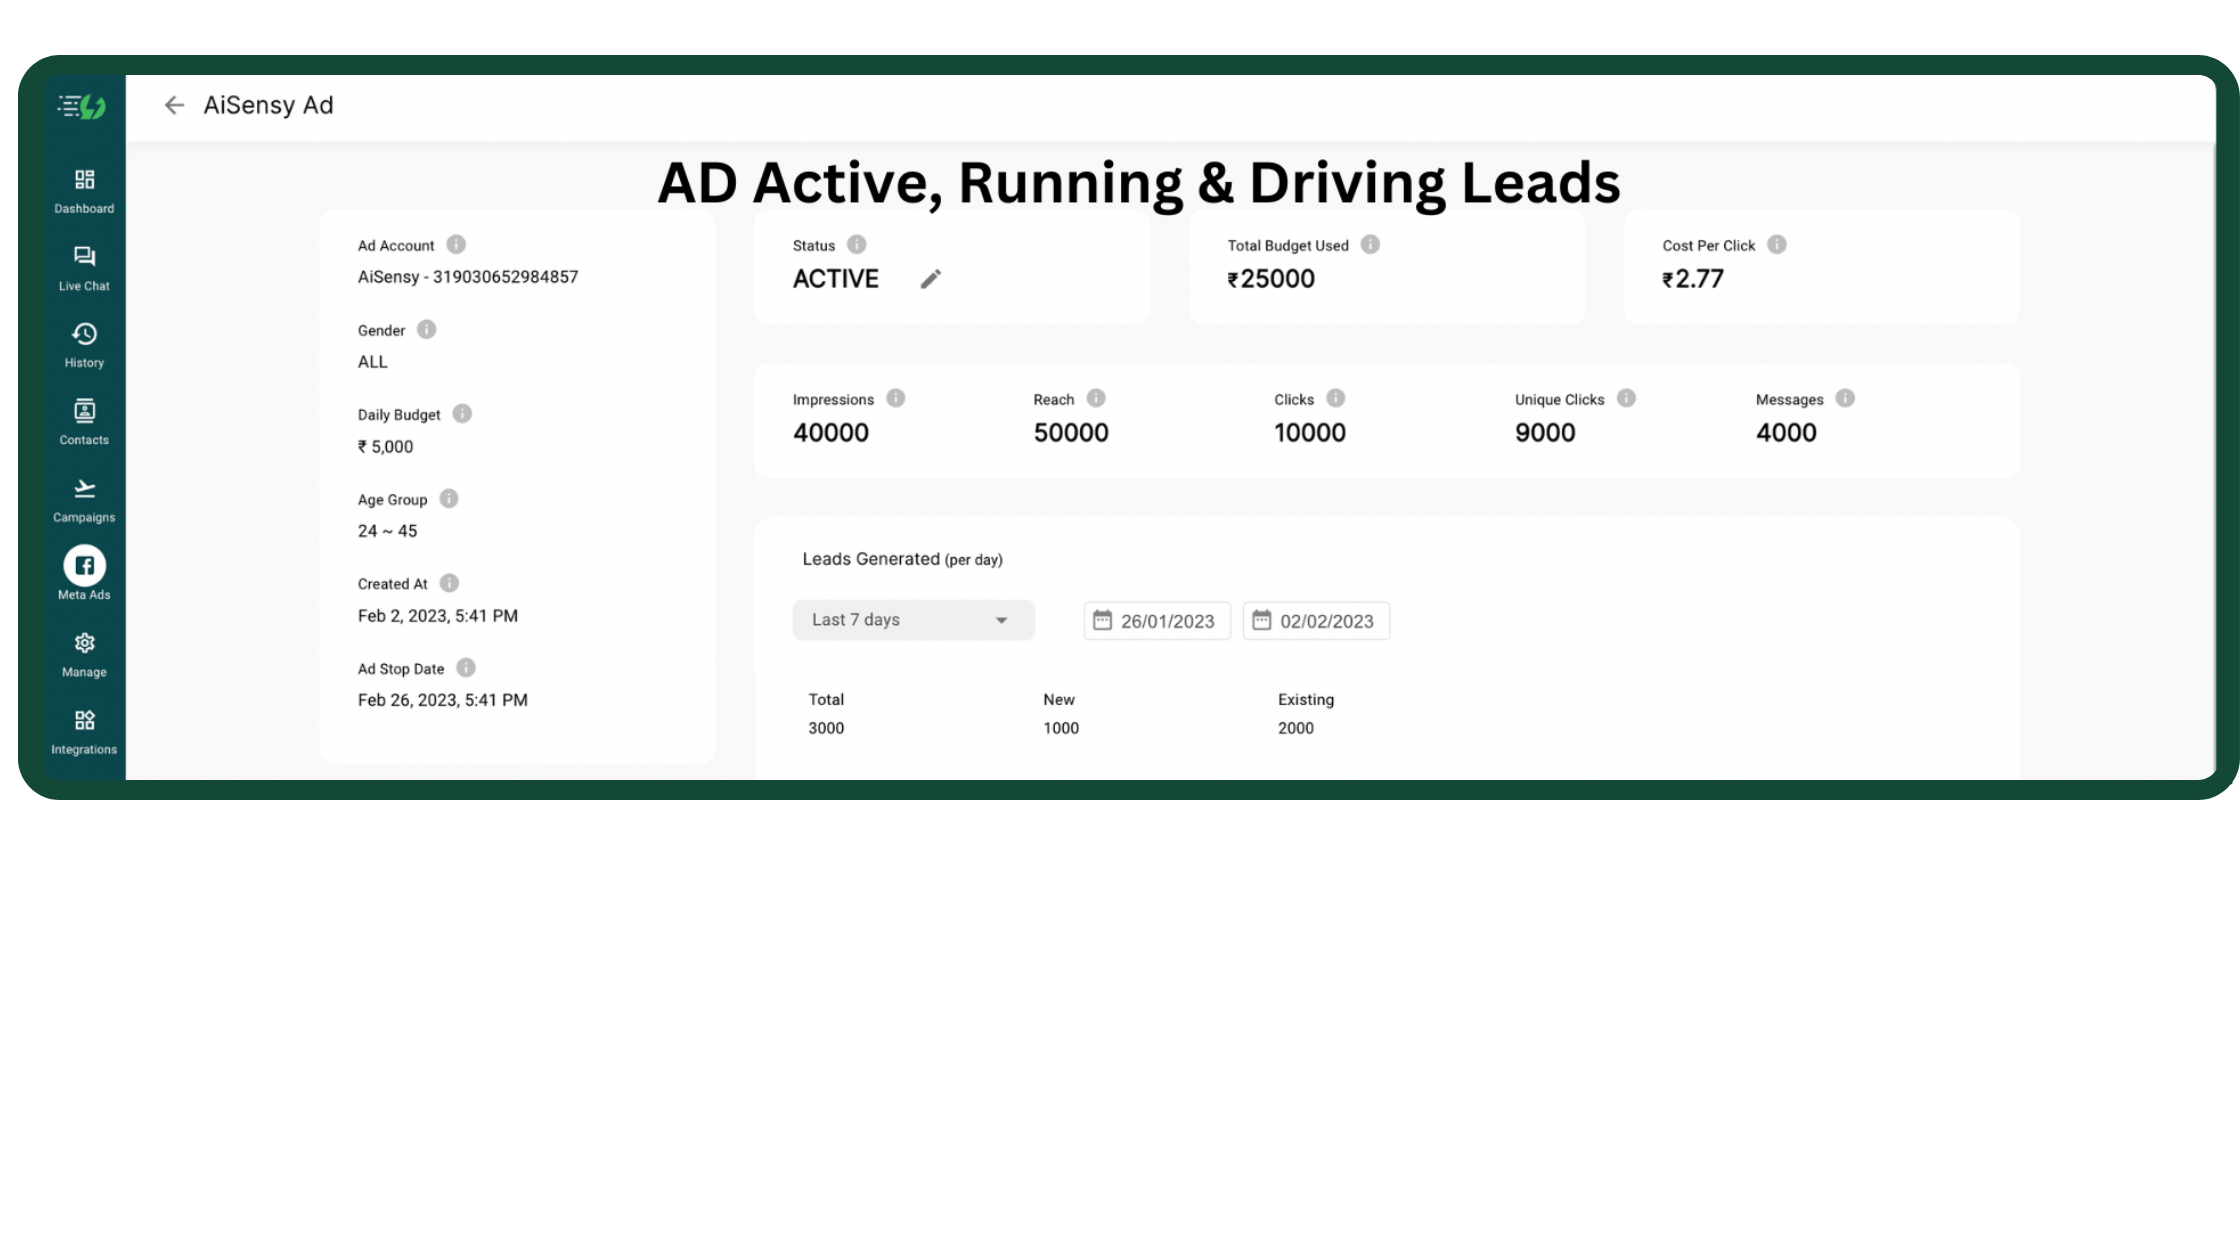
  • Track Analytics for your CTWA Campaigns

Requirements to create Click-to-WhatsApp Ads

Below are the pre-requisites you must meet to create Click-to-WhatsApp Ads:

1. Approved Facebook Business Manager Account

If your account isn't approved, refer this video & follow the steps included to get your Facebook Business Manager verified.  

2. Facebook Page

You must have a Facebook Page to create Click-to-WhatsApp Ad.  

3. Facebook Ad Account

You must have a Facebook Ad account with an updated payment method.

Steps to create Click-to-WhatsApp-Ads in AiSensy

  • 1

    Go to Meta Ads

    To create Click-to-WhatsApp ads, go to Meta Ads in AiSensy App & under Setup click on Continue with Facebook.

    Go to Meta Ads
  • 2

    Continue with Facebook

    On the next screen, click Continue to log in to your Facebook Business Account. 

    Continue with Facebook
  • 3

    Add your Facebook AD accounts

    Next, you'll see the list of Businesses and Pages linked to your Facebook Business account. 

    Tick the ones you wish to allow access to AiSensy. 

    Only those accounts which you tick will show on AiSensy & can be used to create Click to WhatsApp Ads. 

    Select your Facebook AD accounts
  • 4

    Facebook Business Connected

    Once you allow access to your Business Page, your Facebook Business account will get connected, as shown in the image. 

    Facebook Business Connected
  • 5

    Choose Ad Account & Facebook Page

    Next, choose your Facebook Ad account & Page that you wish to use to run Ads on Facebook/ Instagram. 

    After selecting the accounts, click on Send OTP to link your WhatsApp API number to your Facebook page. 

    Choose Ad Account & Facebook Page
  • 6

    Link your WhatsApp API Number

    You'll receive an OTP on your WhatsApp API number which will be automatically detected & added. 

    Just click Submit to link your WhatsApp Business API number to your Facebook Page. 

    *In case the OTP doesn't get added automatically, you'll find the OTP in the Live Chat of AiSensy. 

    Link your WhatsApp API Number
  • 7

    WhatsApp Number Linked successfully

    Linking your WhatsApp API number will enable the Create Ad button at the top of your screen. 

    This completes your Meta Ads setup. 

    Now, let's get started with creating Click-to-WhatsApp Ads for your business. 

    WhatsApp Number Linked successfully
  • 8

    Click Create Ad

    Shift to Ads Manager & click +Create Ad 

    Click Create Ad
  • 9

    Fields that you need to fill

    On the next screen, you'll see the list of fields you need to fill in to create your Click to WhatsApp Ads. 

    Let's create an Ad that entices users to click & reach your WhatsApp. 

    Fields you need to fill
  • 10

    Create your Click-to-WhatsApp-ad

    Fill in these fields to create your Click-to-WhatsApp Ad:

    • Advertisement Name - Name your ad. The name can be anything.

    • Advertisement Caption - This is the caption which will be visible to users to read. Make sure that you nail the copy to get maximum clicks on the ad.

      Make sure to not use any special characters as Facebook restricts their use while creating the Caption for your Ad.

    • Website Link - Here, add the link to your website.

    • Headline - This is the Headline that will appear in Bold beside the clickable WhatsApp icon.

    • Media - This is the image that the users will view while interacting with your Click-to-WhatsApp Ad. You need to upload a 1080x1080 (square) dimension image to AiSensy's Media Library. 

    After filling in these details, verify once before proceeding to the next step. 

    Fill in the required fields
  • 11

    Fill in your Ad Demographics

    Next, feed in the audience demographics whom you wish to target. 

    Add the locations where you wish to run your Facebook/ Instagram Ads, gender & your audience's targeted age group

    Fill in your Ad Demographics
  • 12

    Select a Budget

    Next, select your per-day budget & duration of the advertisement.

    Once you pick the budget & duration, you'll get a total estimated budget for your Click-to-WhatsApp ad. 

    After picking your budget, click Next.

    Select a Budget
  • 13

    Click Create to Publish Ad

    Once you've verified your Ad details, click Create to submit your Ad for approval. 

    Click Create to Publish Ad
  • 14

    CTWA Ad in progress

    Go to Ads manager to view your Ad status. 

    Click the Sync Status button to update your ad status. 

    Generally, in 5 minutes, you'll see the status of your ad as In Progress

    Ad in progress
  • 15

    Your CTWA Ad is LIVE 🎉🎊

    Sit back & relax. 

    Facebook generally takes 15-20 minutes to verify & approve/reject your Ad content. 

    In case your Ad gets rejected, you can view the rejection reason in your Facebook Ads account. 

    Your CTWA Ad is LIVE
  • 16

    Monitor your Ad Analytics

    You can easily monitor your Ad performance by going to Ads manager & clicking on your CTWA Ad. 

    That's it!

    It's time to start creating Ads on Facebook/ Instagram via AiSensy & drive leads to your WhatsApp Business account. 

    Ctwa campaign Analytics
English 🇺🇸🇬🇧