
Pabbly is one of the best automation & integration tools that allows you to automate manual & routine tasks in real-time.
Here, we'll tell you how you can integrate Pabbly with WhatsApp via AiSensy to automate API-based campaigns on WhatsApp👇
Pabbly is one of the best automation & integration tools that allows you to automate manual & routine tasks in real-time.
Here, we'll tell you how you can integrate Pabbly with WhatsApp via AiSensy to automate API-based campaigns on WhatsApp👇
Pabbly acts as an intermediate between two applications, transferring data from one app into another. Basically, it works on triggers & actions. A trigger on one app will lead to an action on the other app.
Here are some trigger examples for better understanding-
1. A customer purchases something from your store.
2. A person books an appointment.
3. A person makes a payment.
Here are the actions that you might want to follow:
1. Deliver notification on WhatsApp for the same event
2. Add the person to your AiSensy contacts
3. Add the person to your CRM.
and much more...
Let's understand this with an example of how you can connect an App like Hubspot to send WhatsApp API Campaigns via AiSensy with Pabbly.
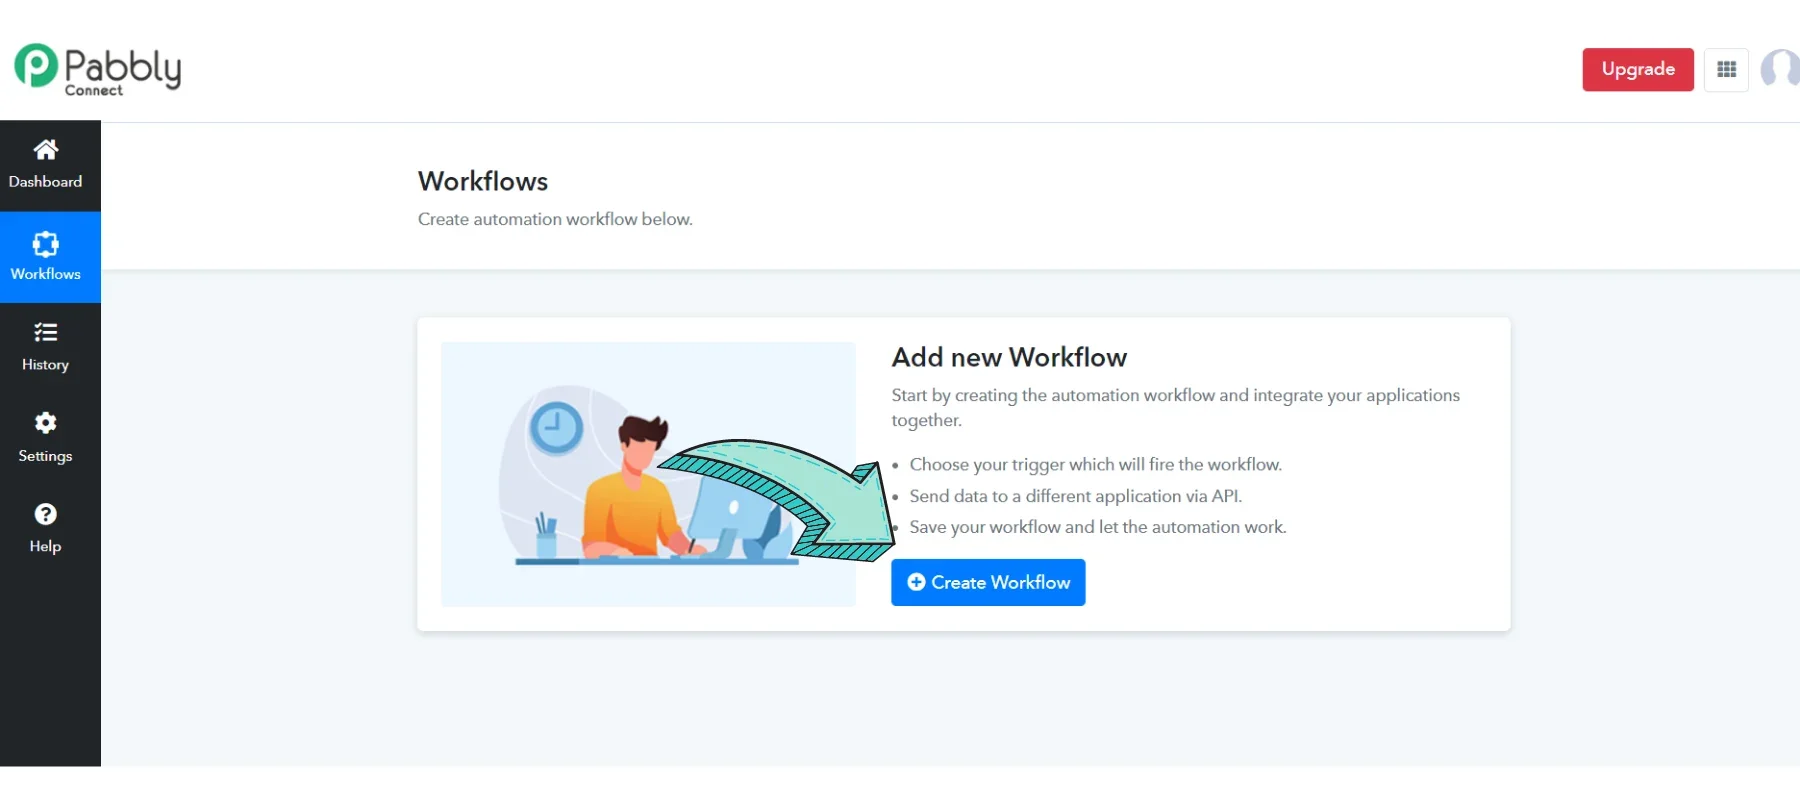
The first step is creating a Workflow. Here, you'll connect your CRM or other software with AiSensy's WhatsApp Campaigns and create sequences to automate API campaigns.
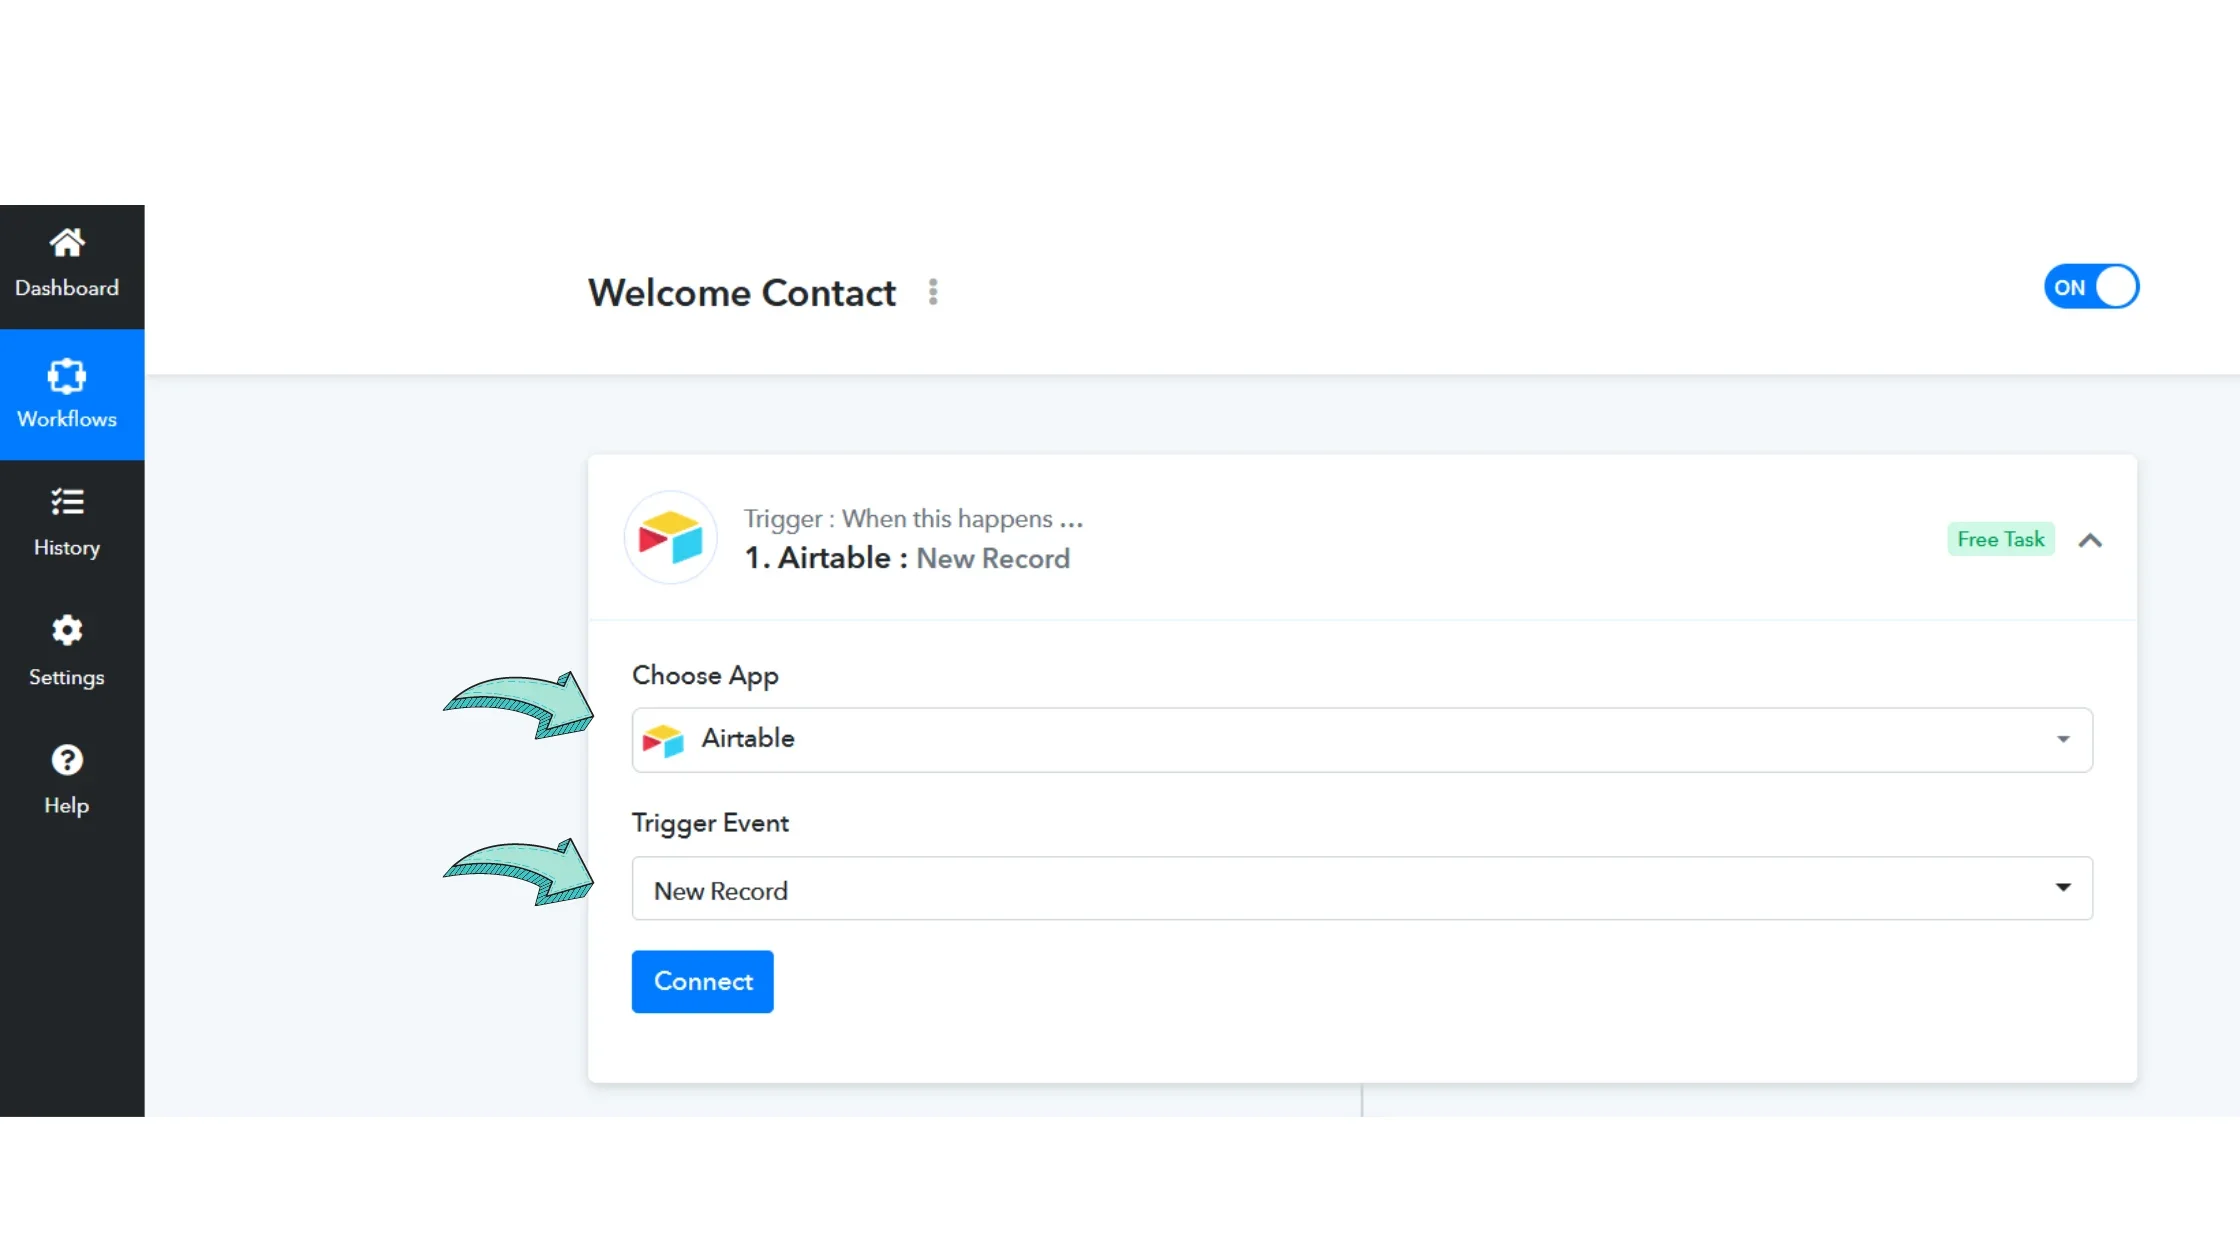
Next, choose the application you want to connect & select a trigger event.
Triggers are basically events based on which a user will be sent an API Campaign. For Example, if the user signs up on your platform, a welcome message will be sent.
Press 'Connect' to add your Airmeet API Key to link your Airmeet with Pabbly.
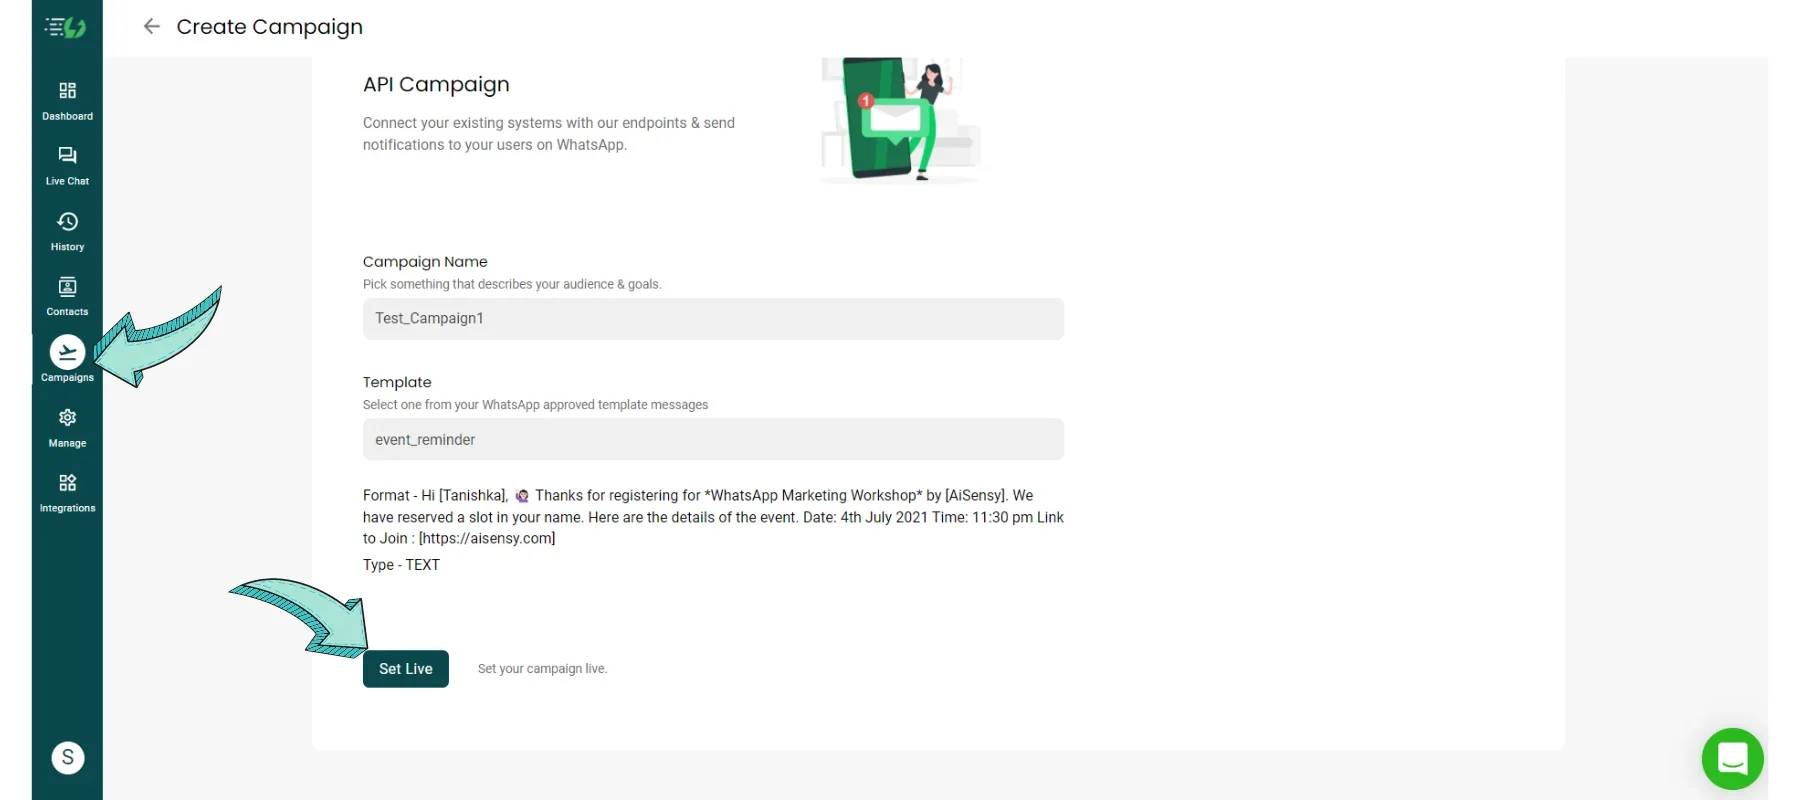
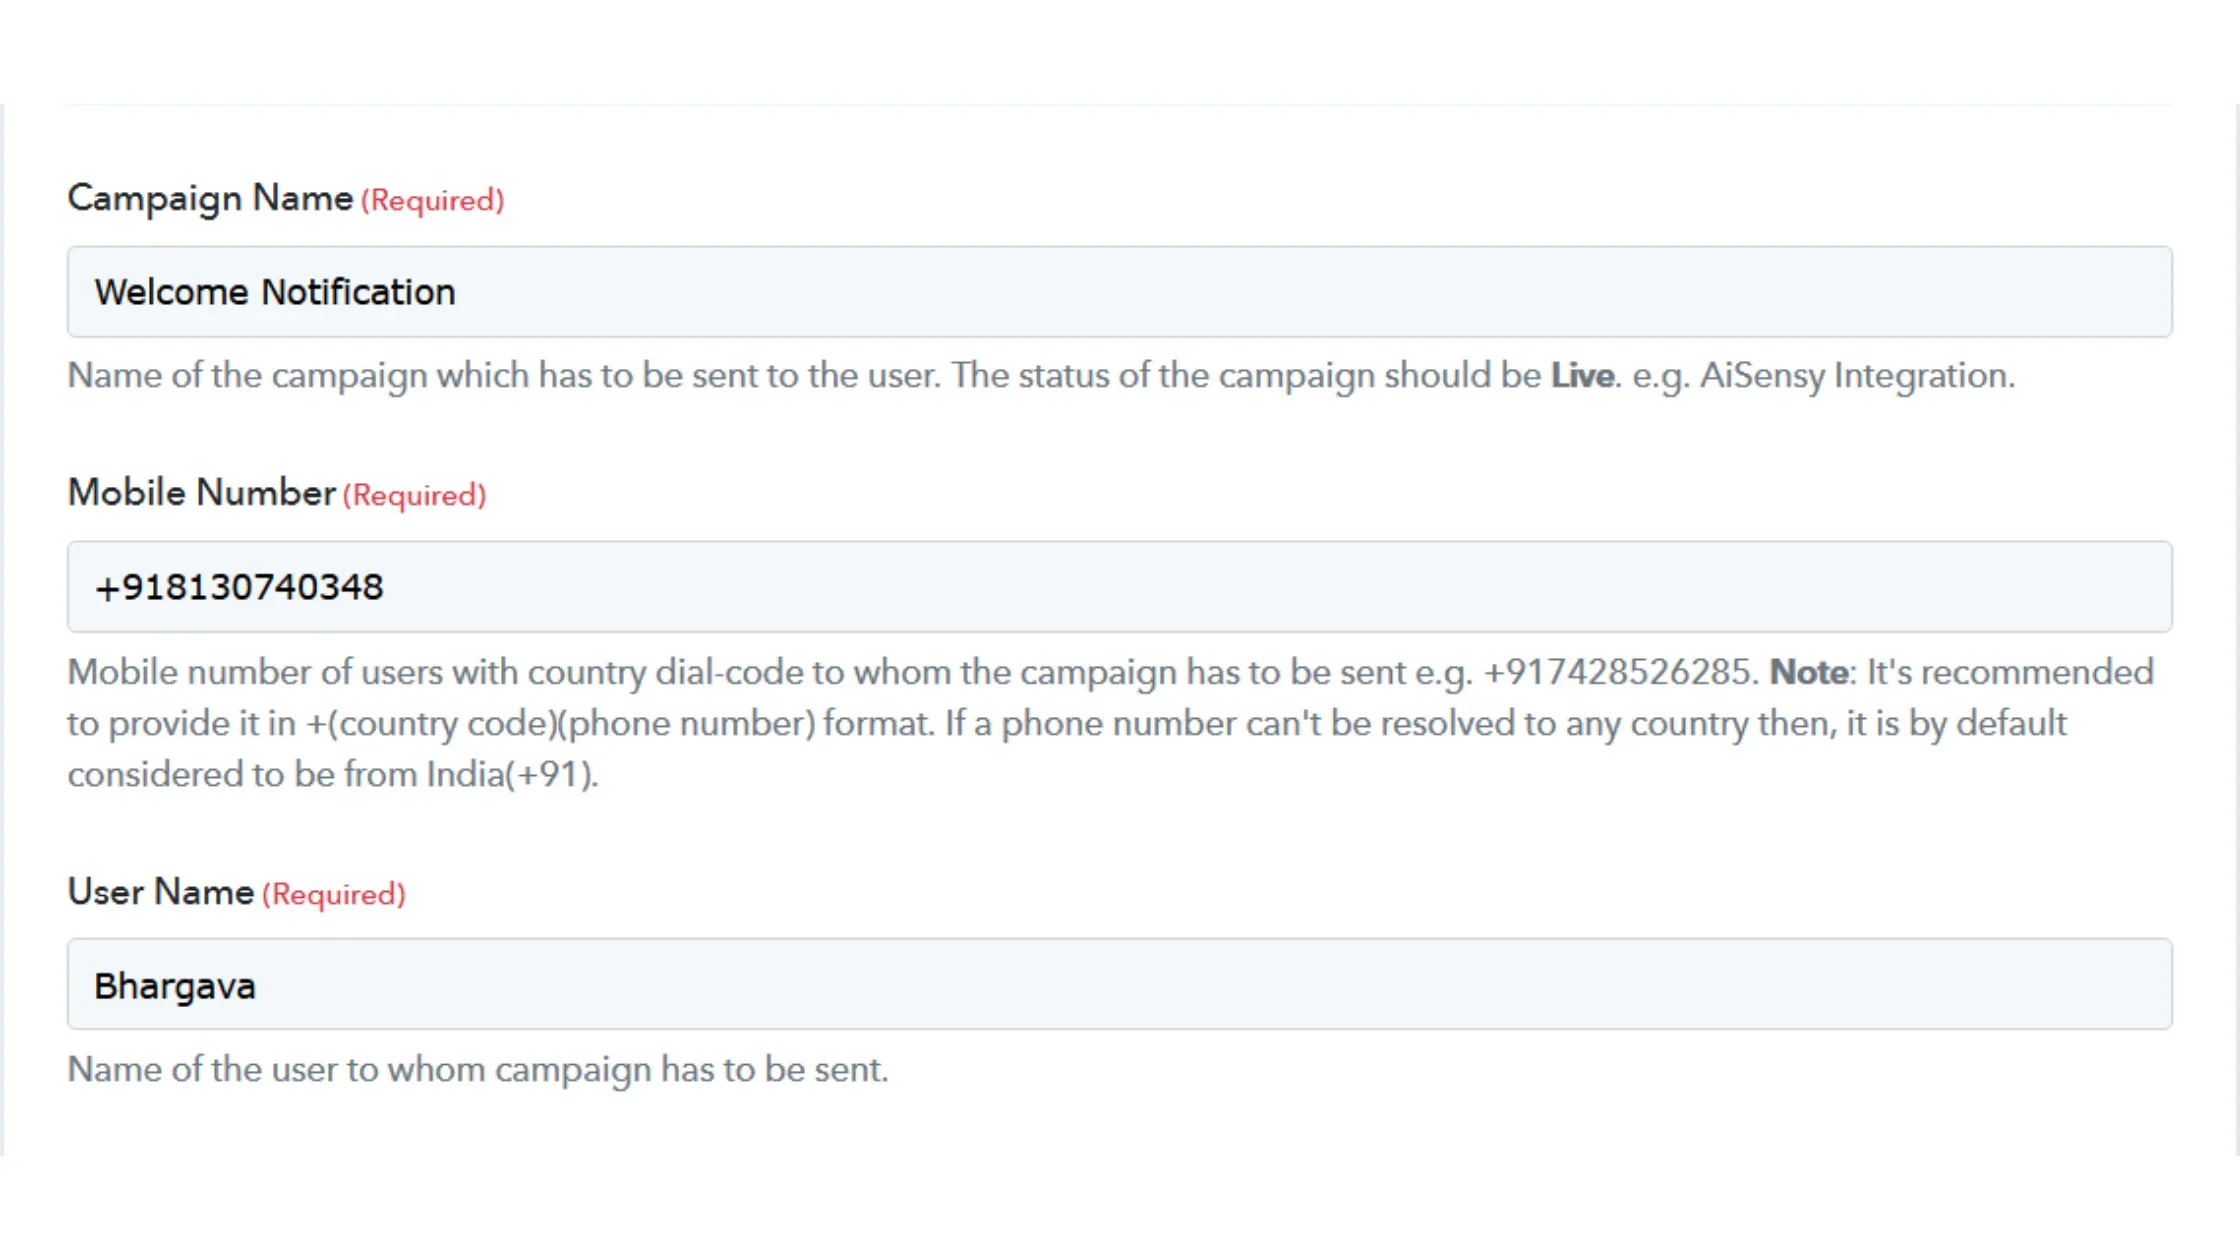
Go to the Campaigns section & create an API Campaign. The image on the left shows a sample Campaign created. You need to pick a pre-approved WhatsApp template Message & create a Campaign Name.
Don't forget to "Set Live" the Campaign before adding it to the JSON Body.
In this step, you'll be setting actions for the Trigger.
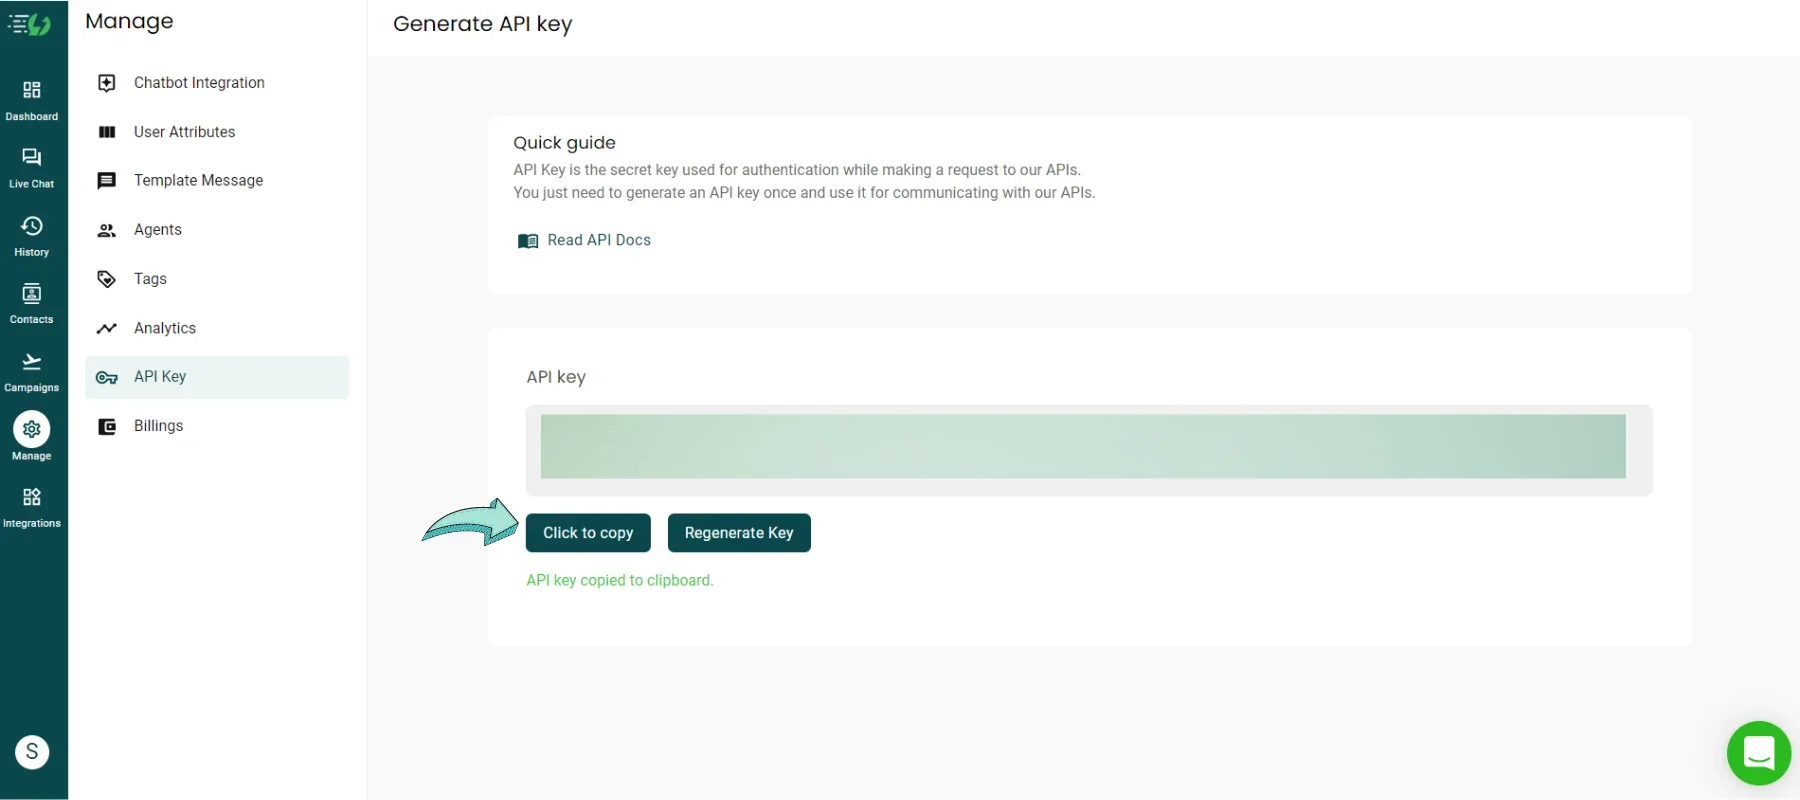
After this, click 'connect' & Copy paste the API Key from AiSensy App to here.
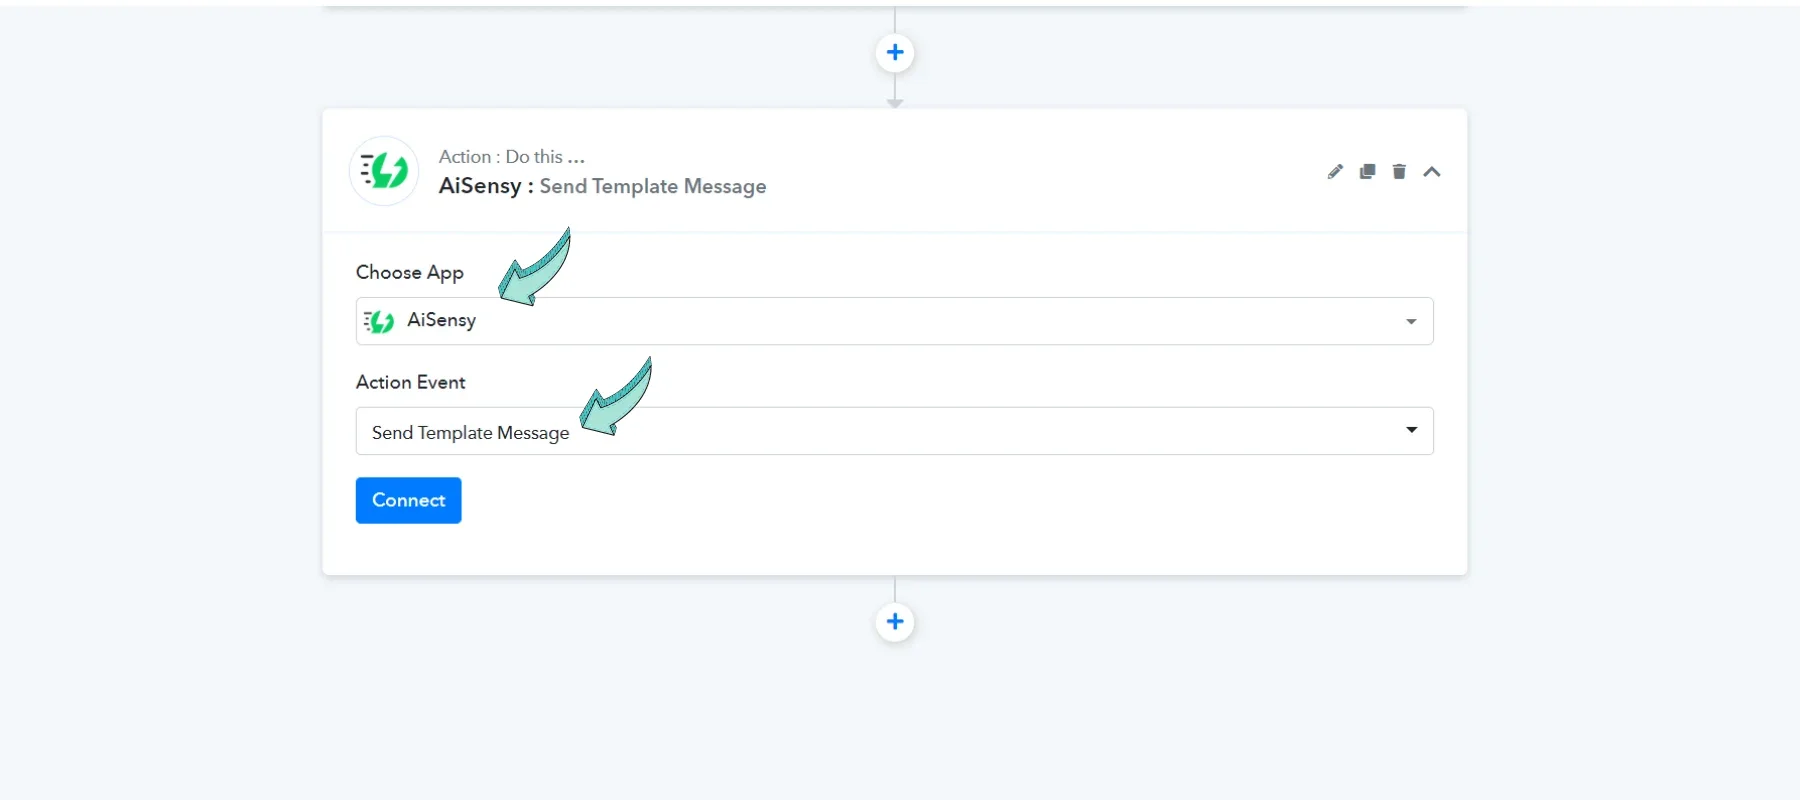
After choosing the Action, click 'Connect' & copy-paste the API key from the manage section in AiSensy App.
Here, add your Campaign name exactly as it shows on AiSensy Campaign Page.
Add the name & Mobile Number of the user along with their country code.
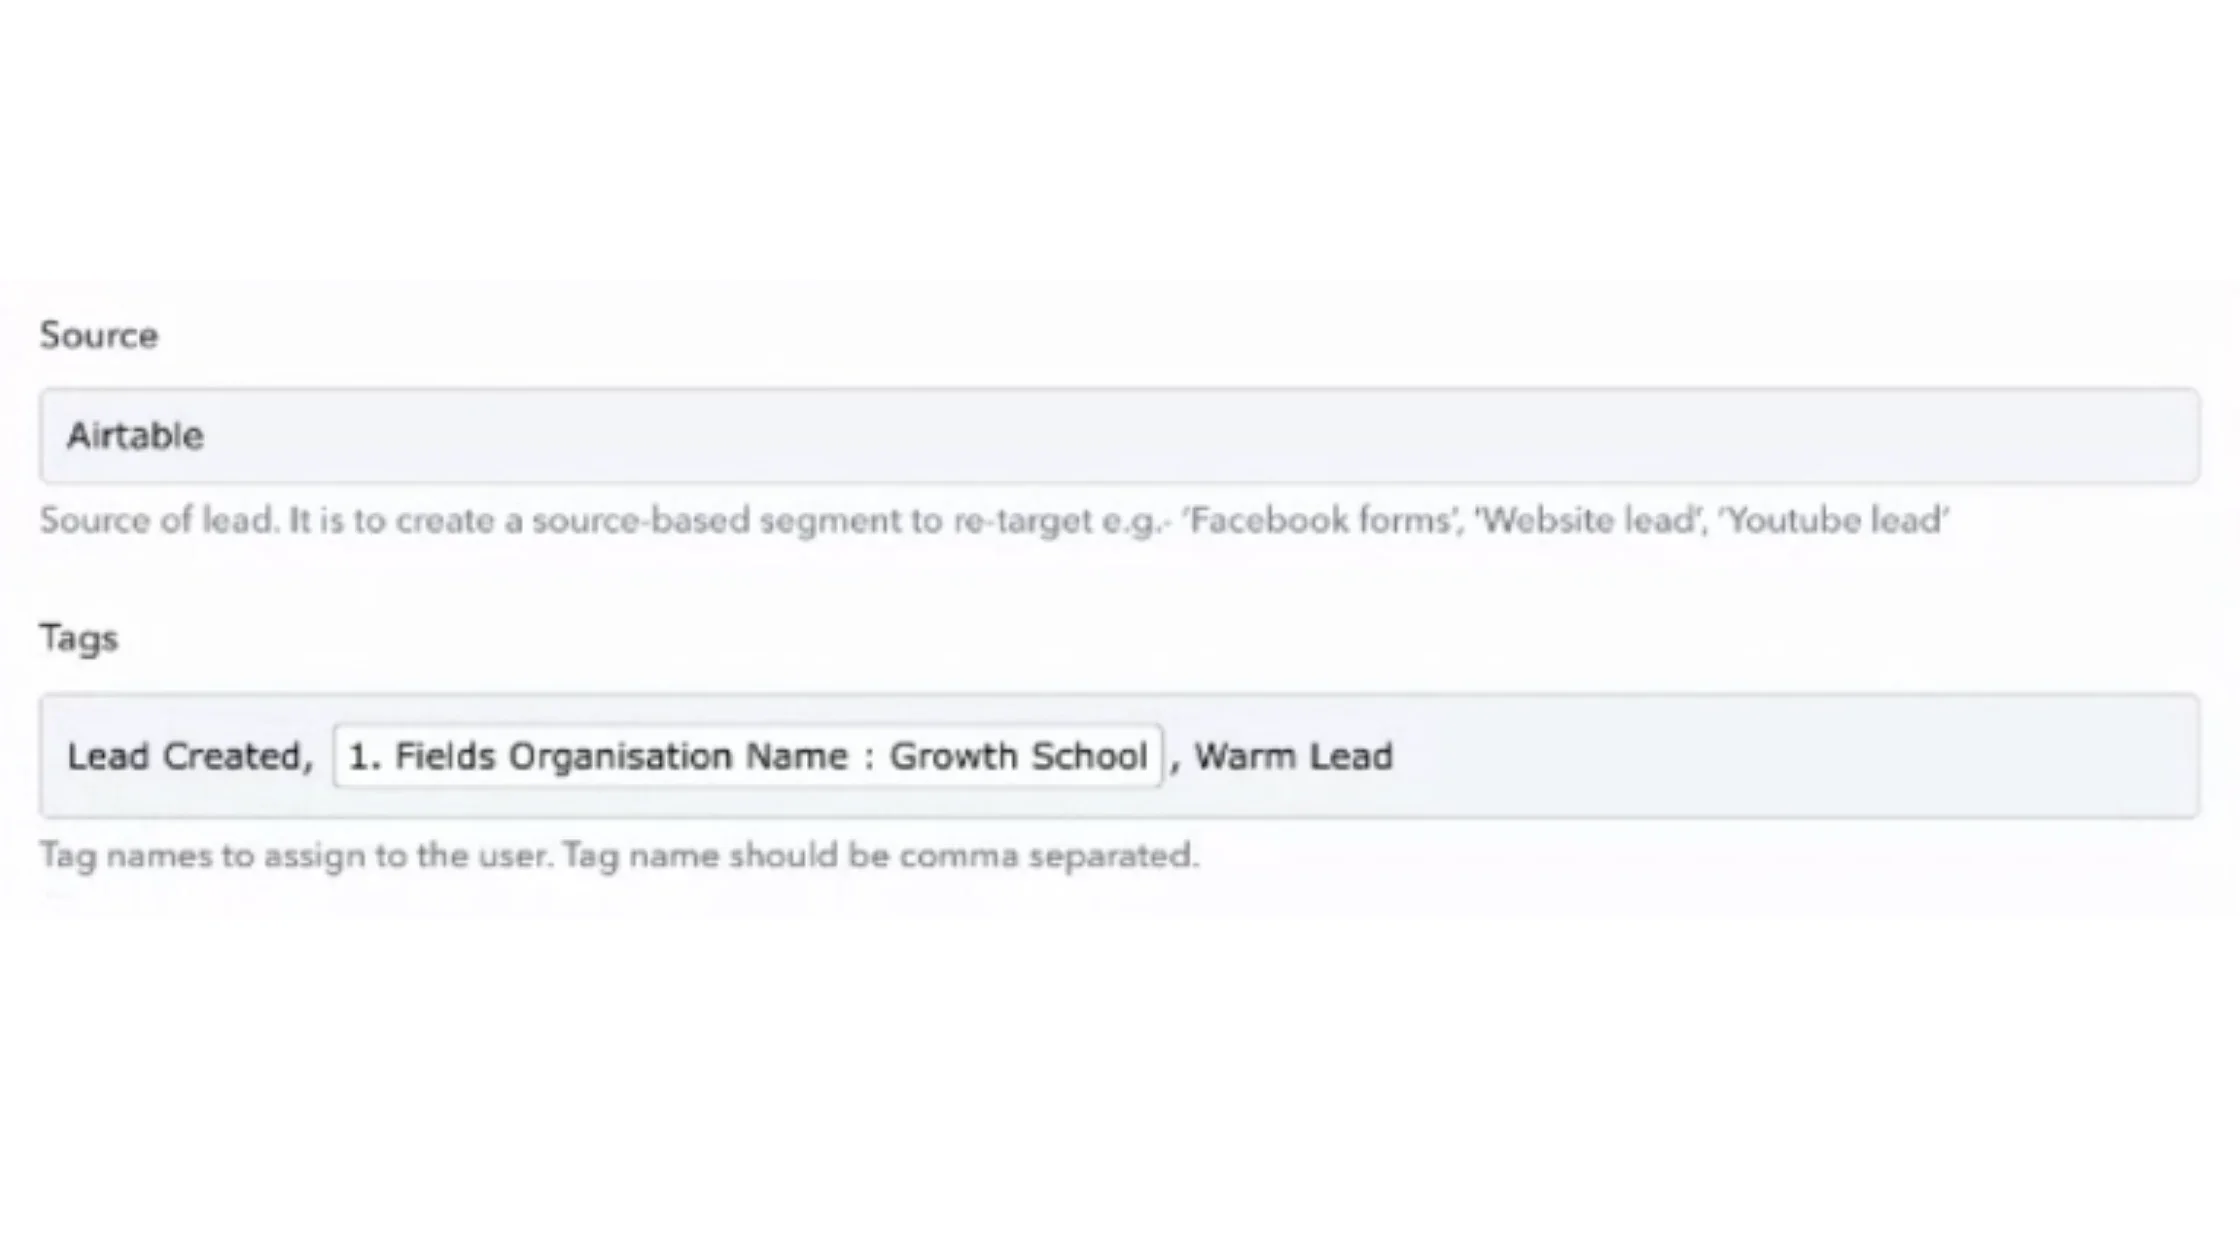
In the source, add the name of the app you're connecting with AiSensy, which in this case is Airtable!
Next, map the tags as shown in the image to the right. Separate each tag with a ',' (comma).
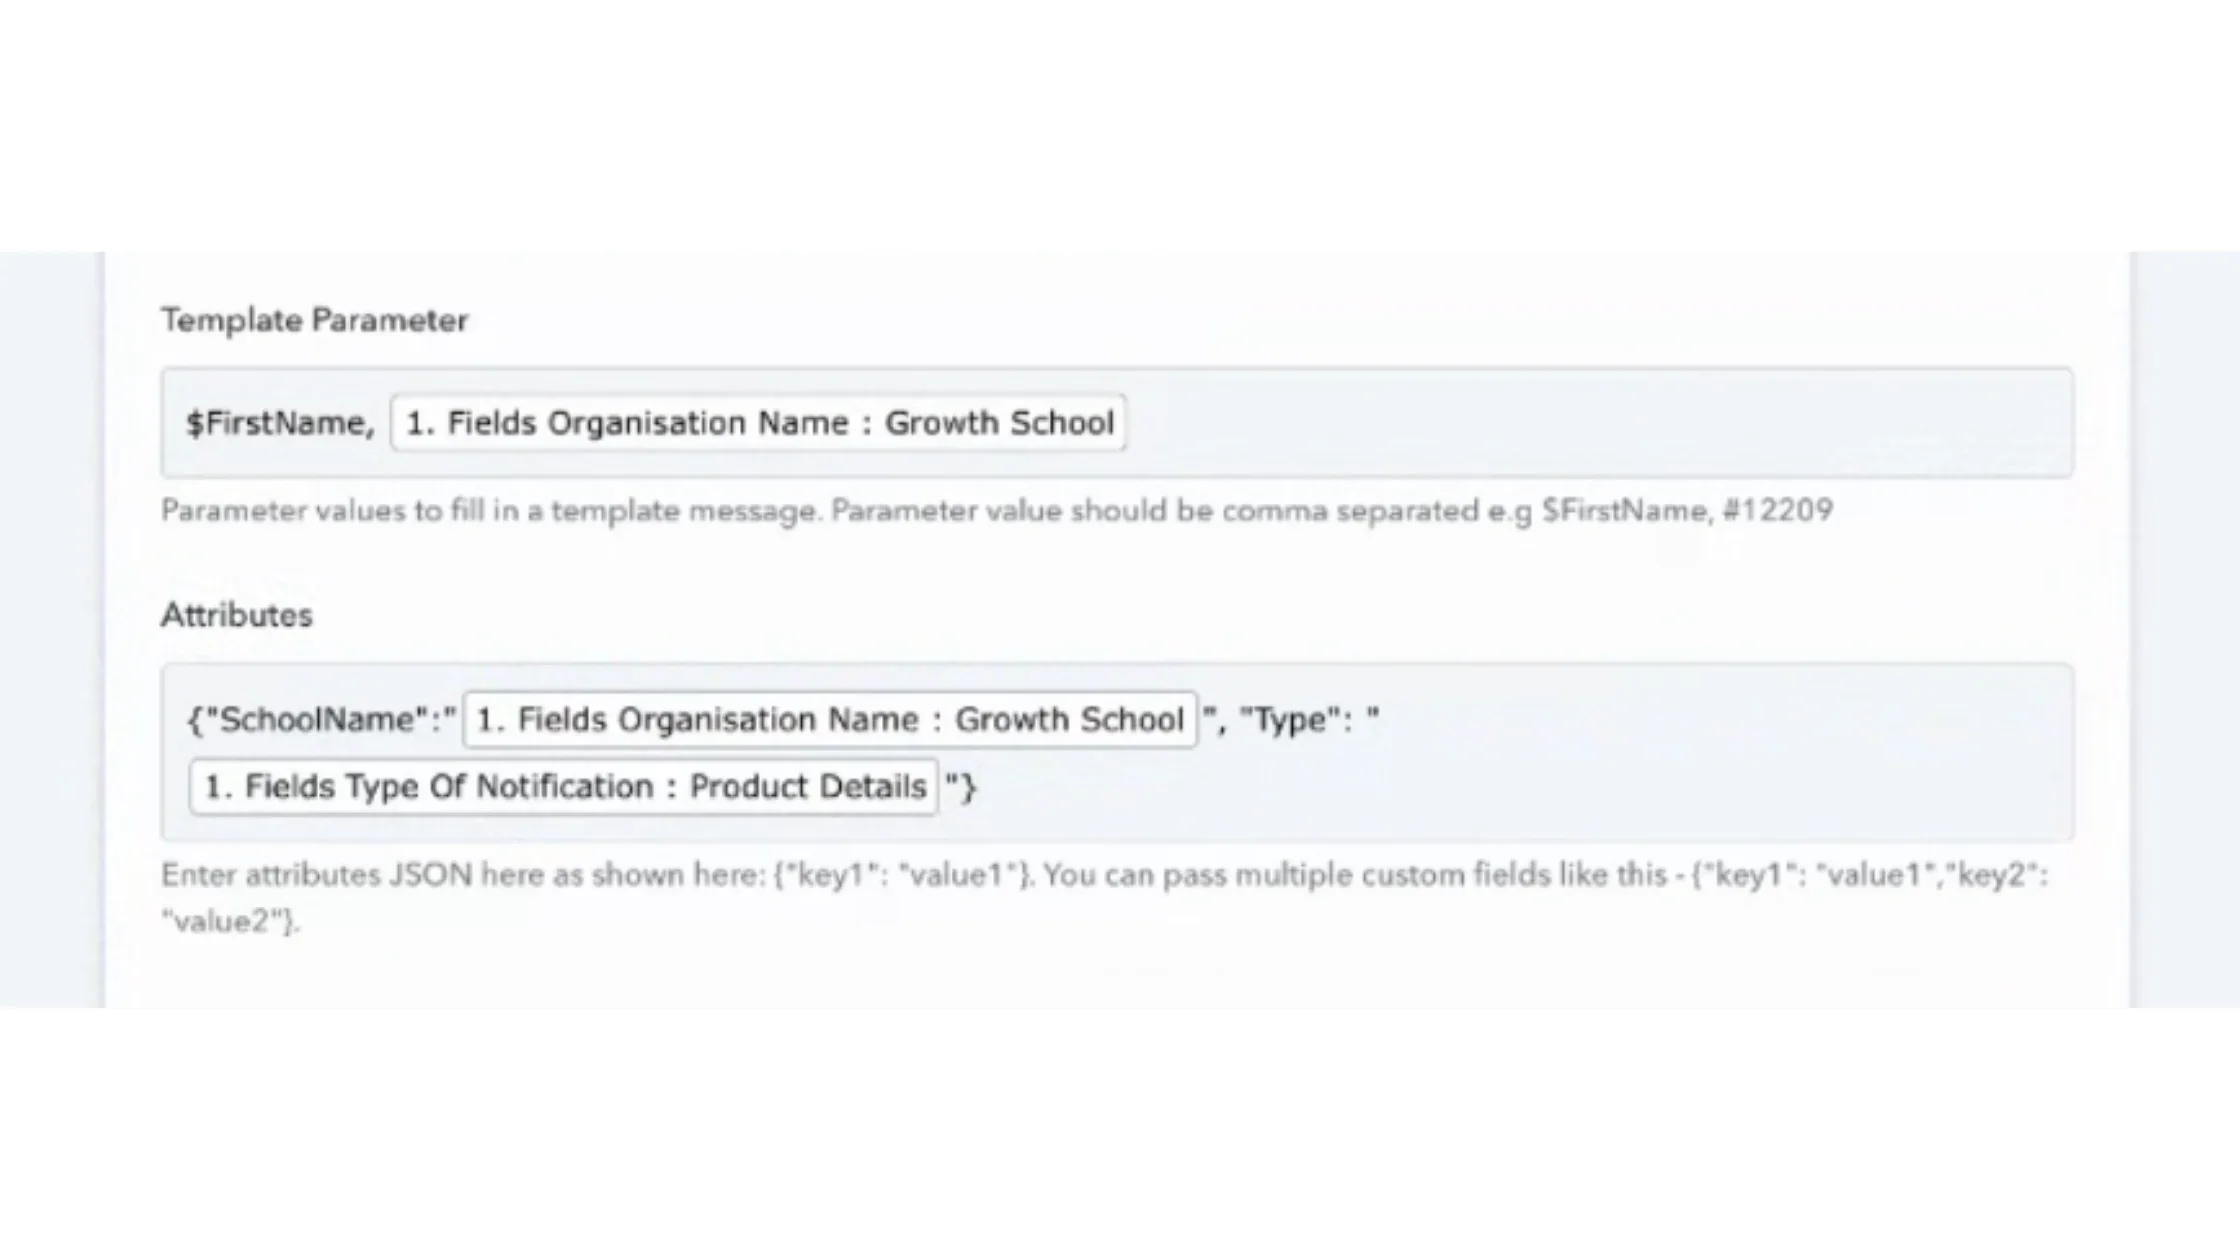
Here, map the template parameters. Make sure to separate each parameter with a ',' (comma).
Note- You only need to map parameter values only if your message contains variable parameters. E.g. name, number.
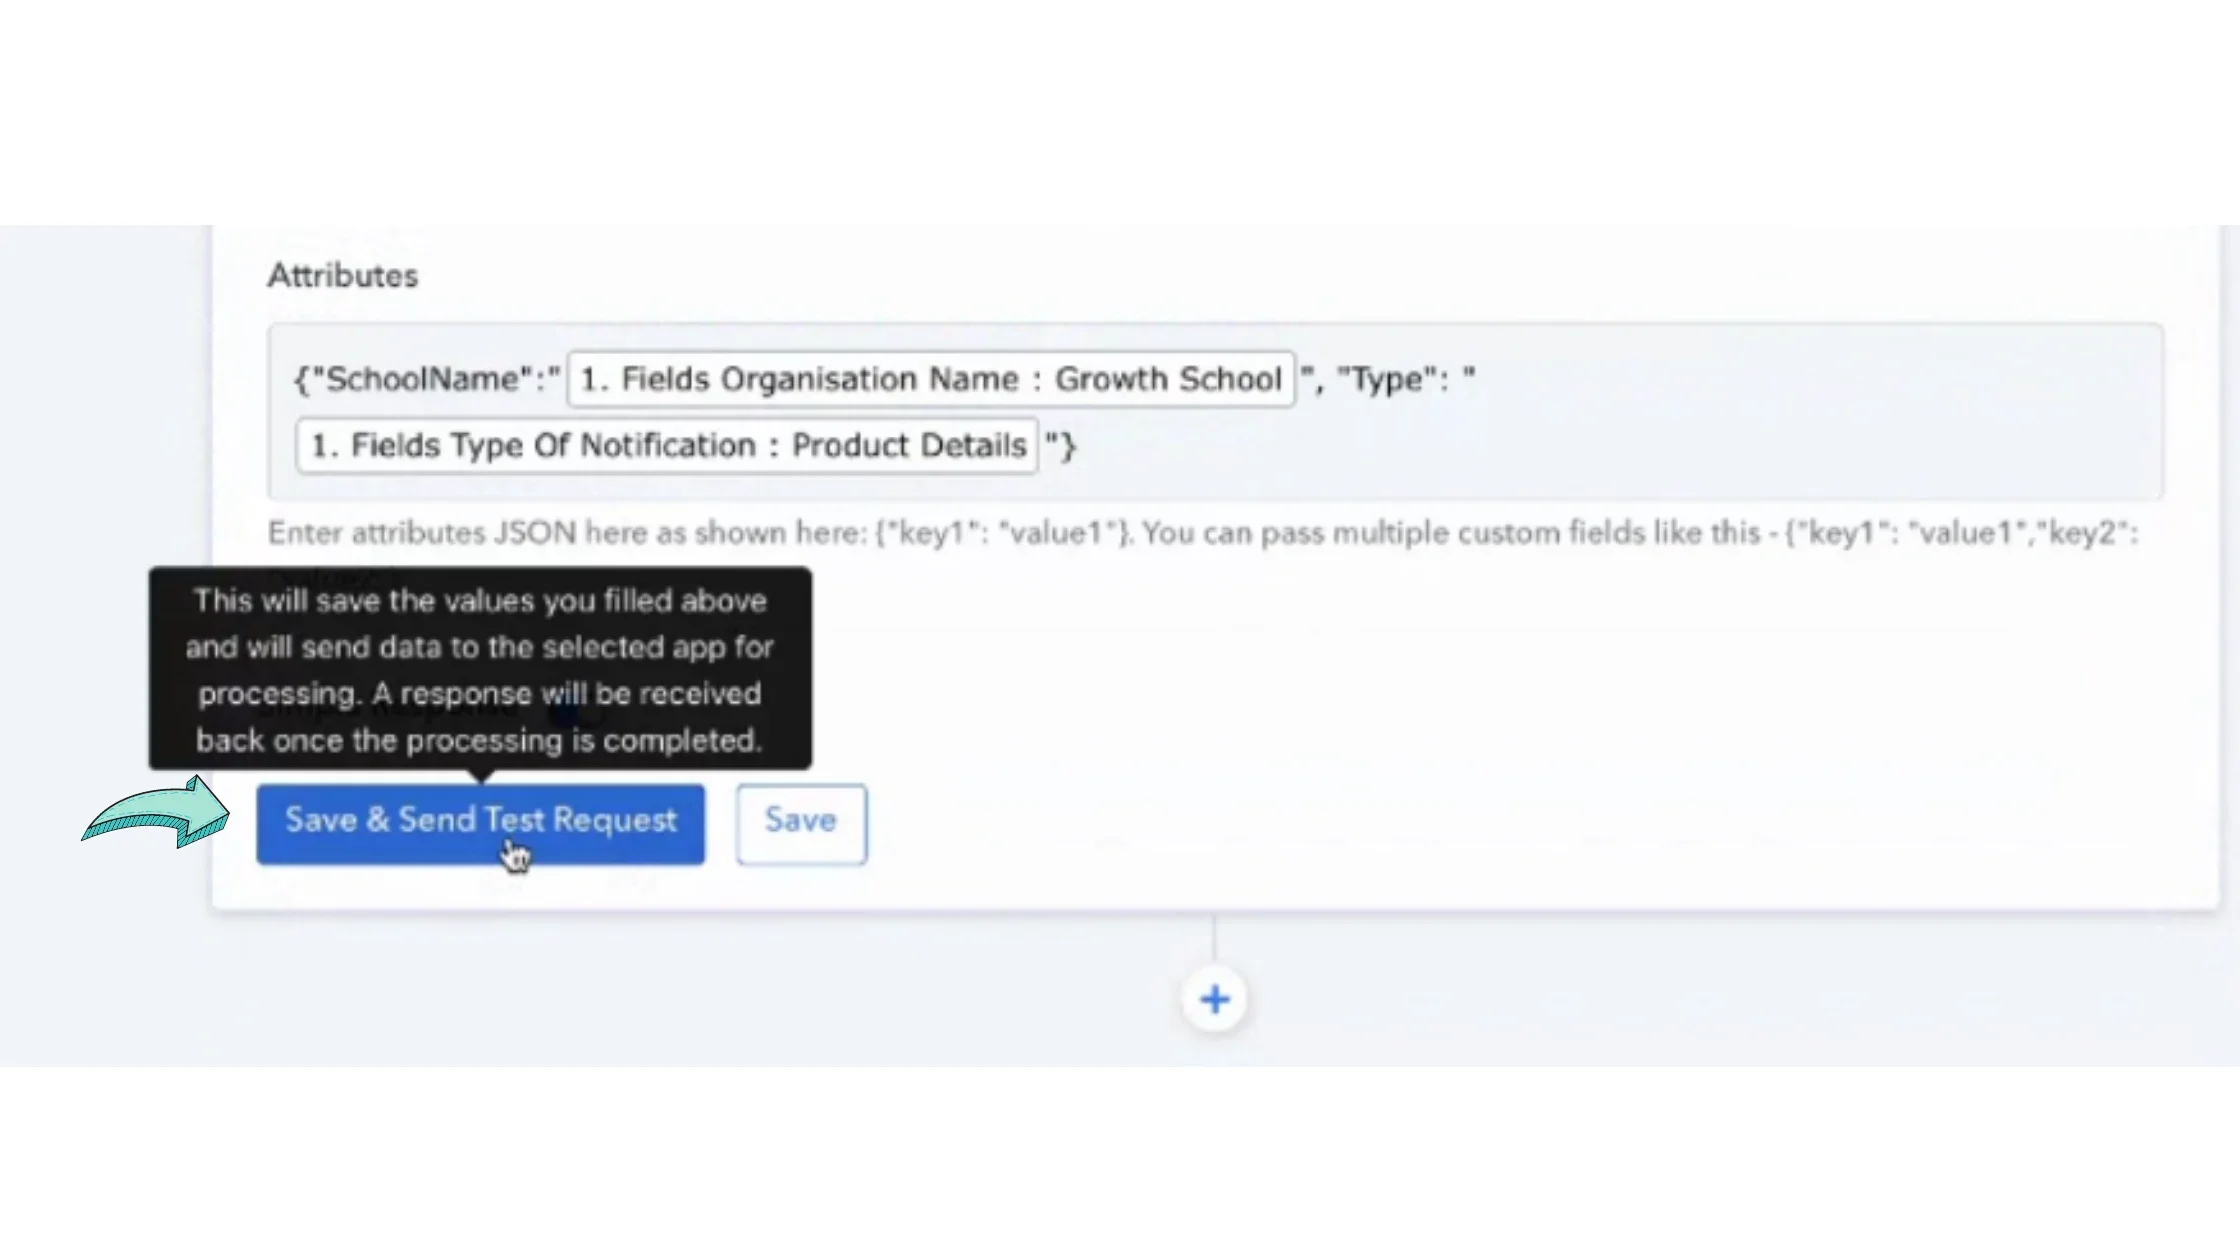
Next, map the attributes between '{}' (curved brackets) and separate each attribute with a comma ','
Note here that mapping Tags & Attributes is purely optional.
Last, save and send a test request to check whether the Campaign is all set or not.
If all goes well, you'll get a success message. If there are errors, you'll receive an 'error message' mentioning the reason for failure.
Revise the campaign & check for underlying errors.
If the error still persists, you can connect with our customer support team for further help.

Our excellent customer support team is ready to help.

 Your payment was processed successfully. Congratulations!
 You have cancelled the payment process.
 This popup does not exist. I'm sorry.