How to create Free Dialogflow WhatsApp Chatbot?

Chatbot (1)

What is the WhatsApp Chatbot?

WhatsApp Chatbot is an intelligent bot capable of responding to human queries just like a customer support agent. 

It has fed-in answers for common customer queries, breaks down sentences & responds to the query intelligently.

When a customer messages you on WhatsApp, WhatsApp Chatbot engages with the user to answer their query. 

With a WhatsApp Chatbot you can easily:

1. Automate Customer Support & sales 24x7

2. Reduce administration burden by automating general queries.

3. Save 30% on operational costs.
Steps to create Dialogflow WhatsApp Chatbot for Free

  • 1

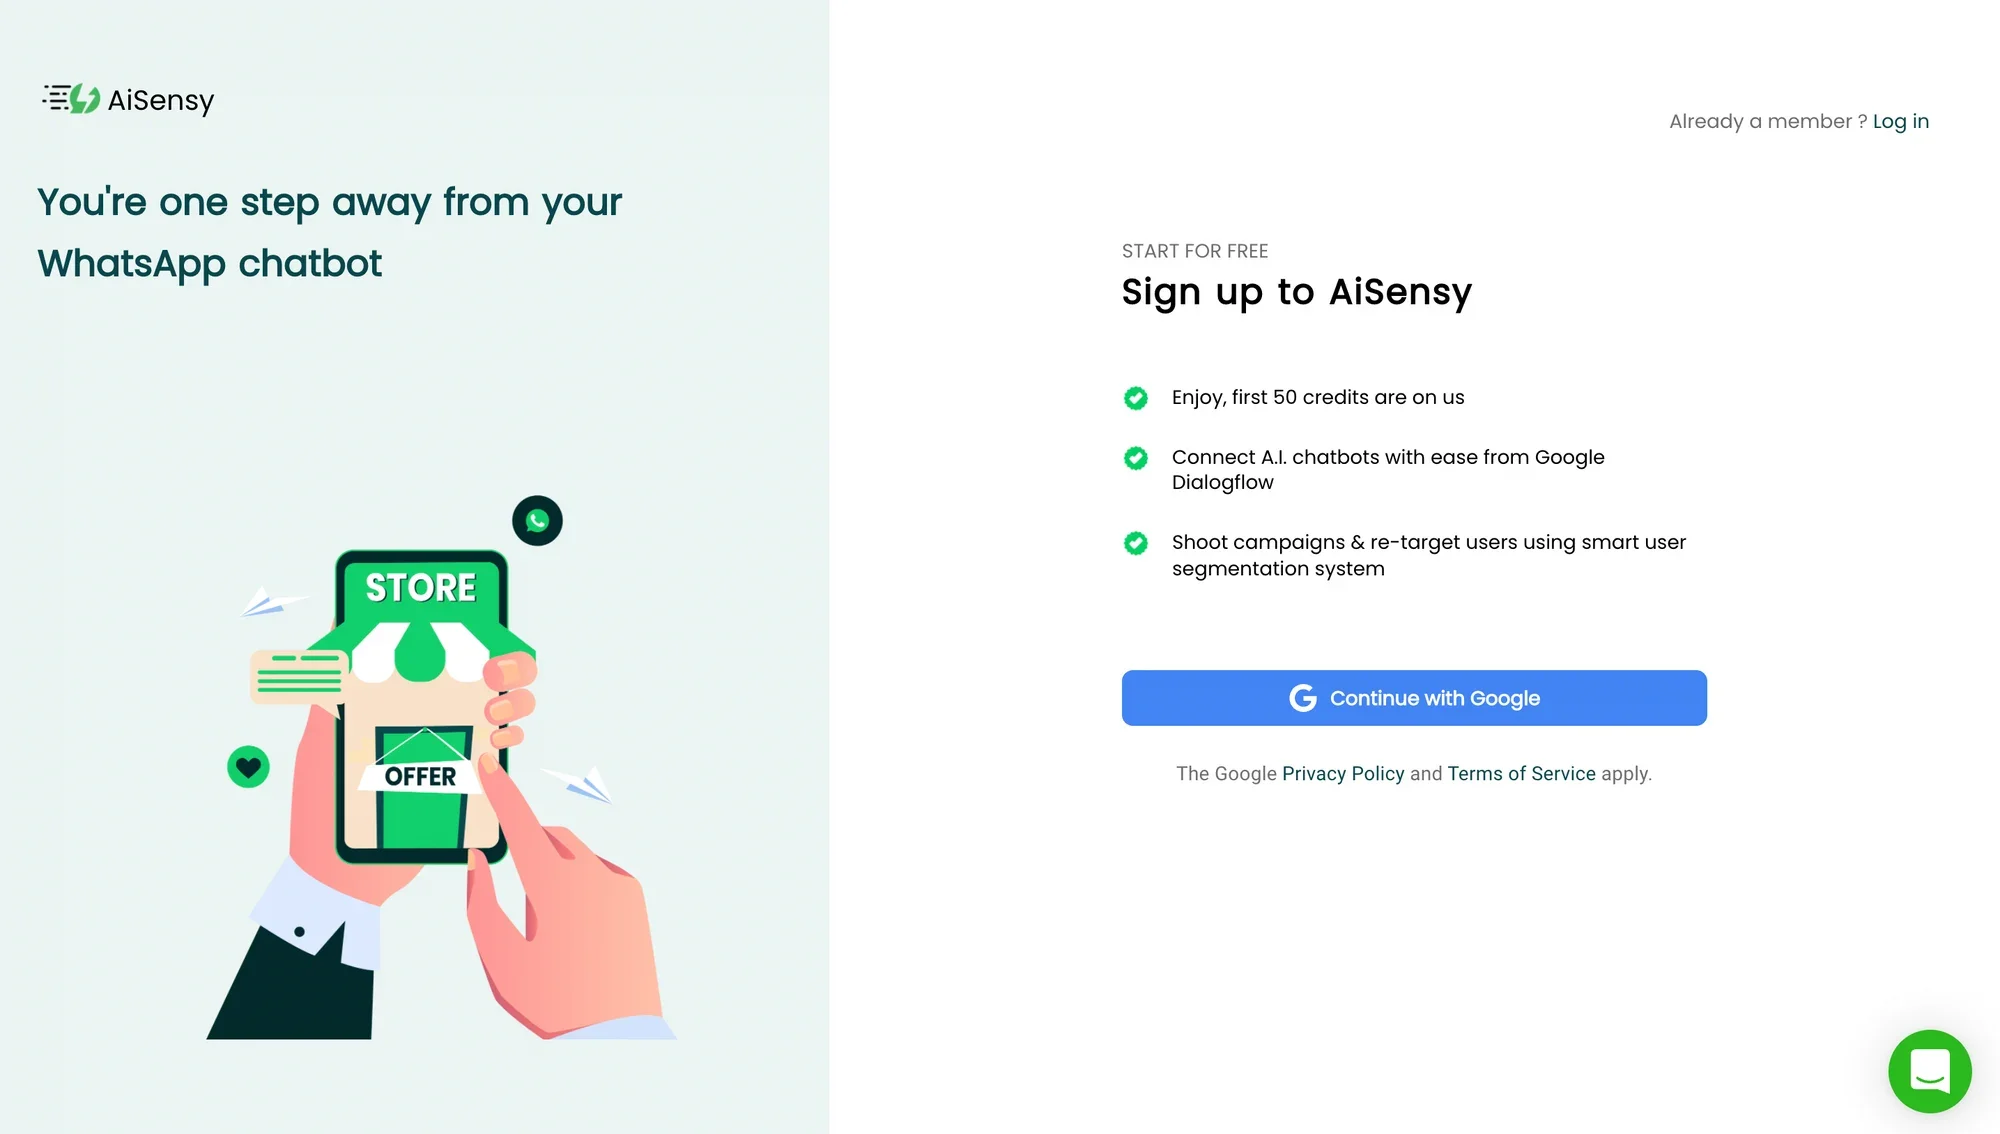
    Sign up to AiSensy

    You first need to sign up to AiSensy to implement the Dialogflow WhatsApp Chatbot. 

     Go to AiSensy Signup Page by clicking here & choose, "Continue with Google"

    You can use all premium features in a 14-Day free trial after which you need to opt for a plan to continue using AiSensy. 

    Signup for free trial
  • 2

    Sign up on Google Dialogflow

    Now, sign up on Google Dialogflow. It's Free!

    Sign up on dialogflow for free
  • 3

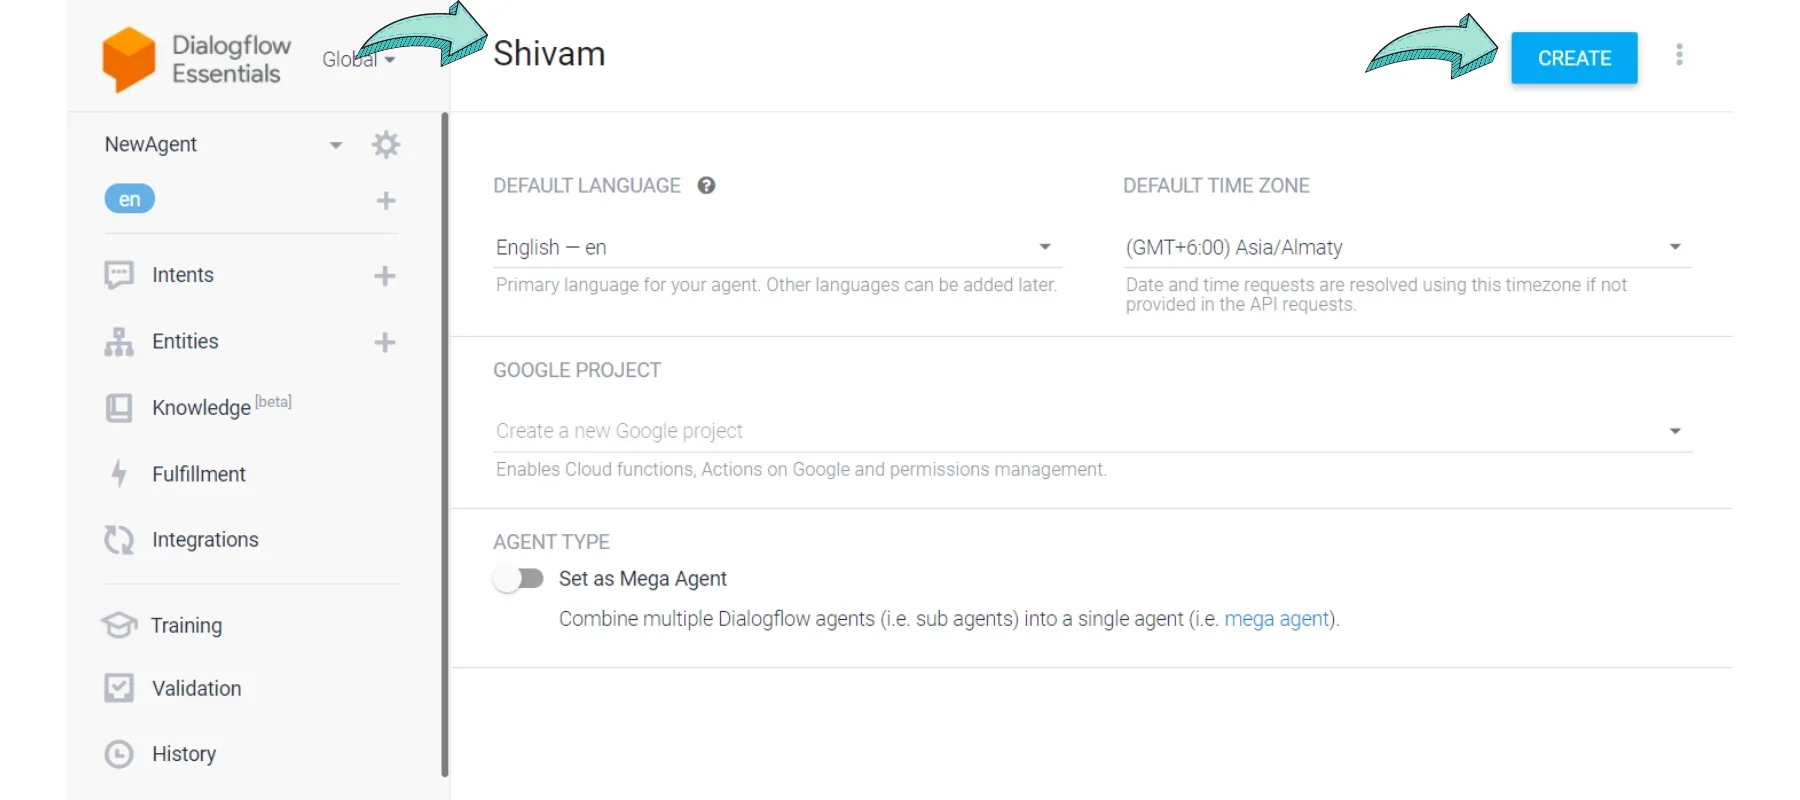
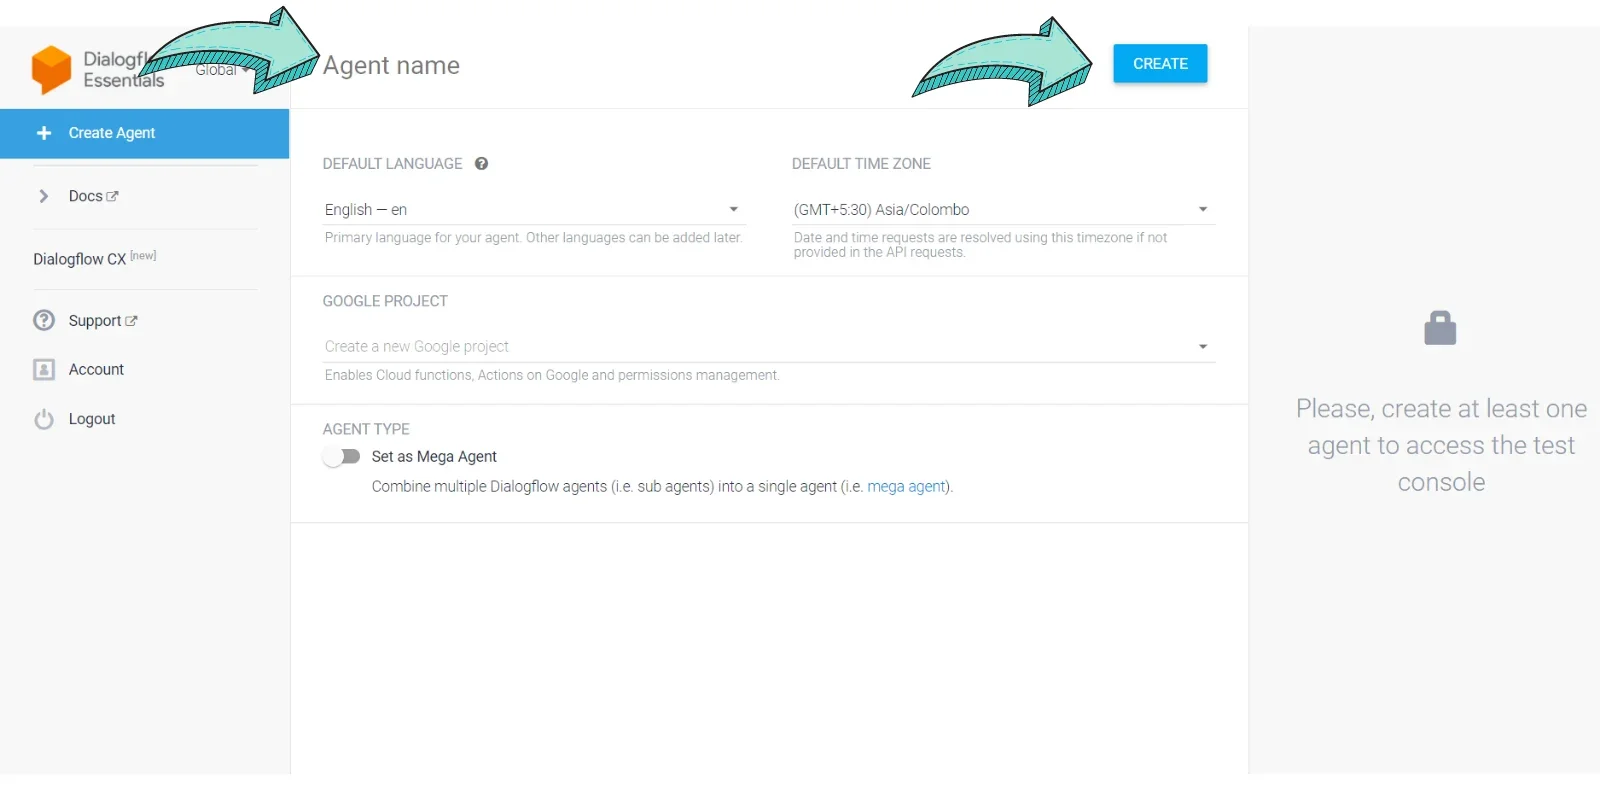
    Setup a Profile & add Agent Name

    To create a Dialogflow Chatbot, you need to add an agent name. 

    The name can be anything like your business name or the name you want to assign your WhatsApp Chatbot. 

    Set up the default time period & hit Save.

    Check out this tutorial to know how to create an agent.  

    Name your whatsapp chatbot
  • 4

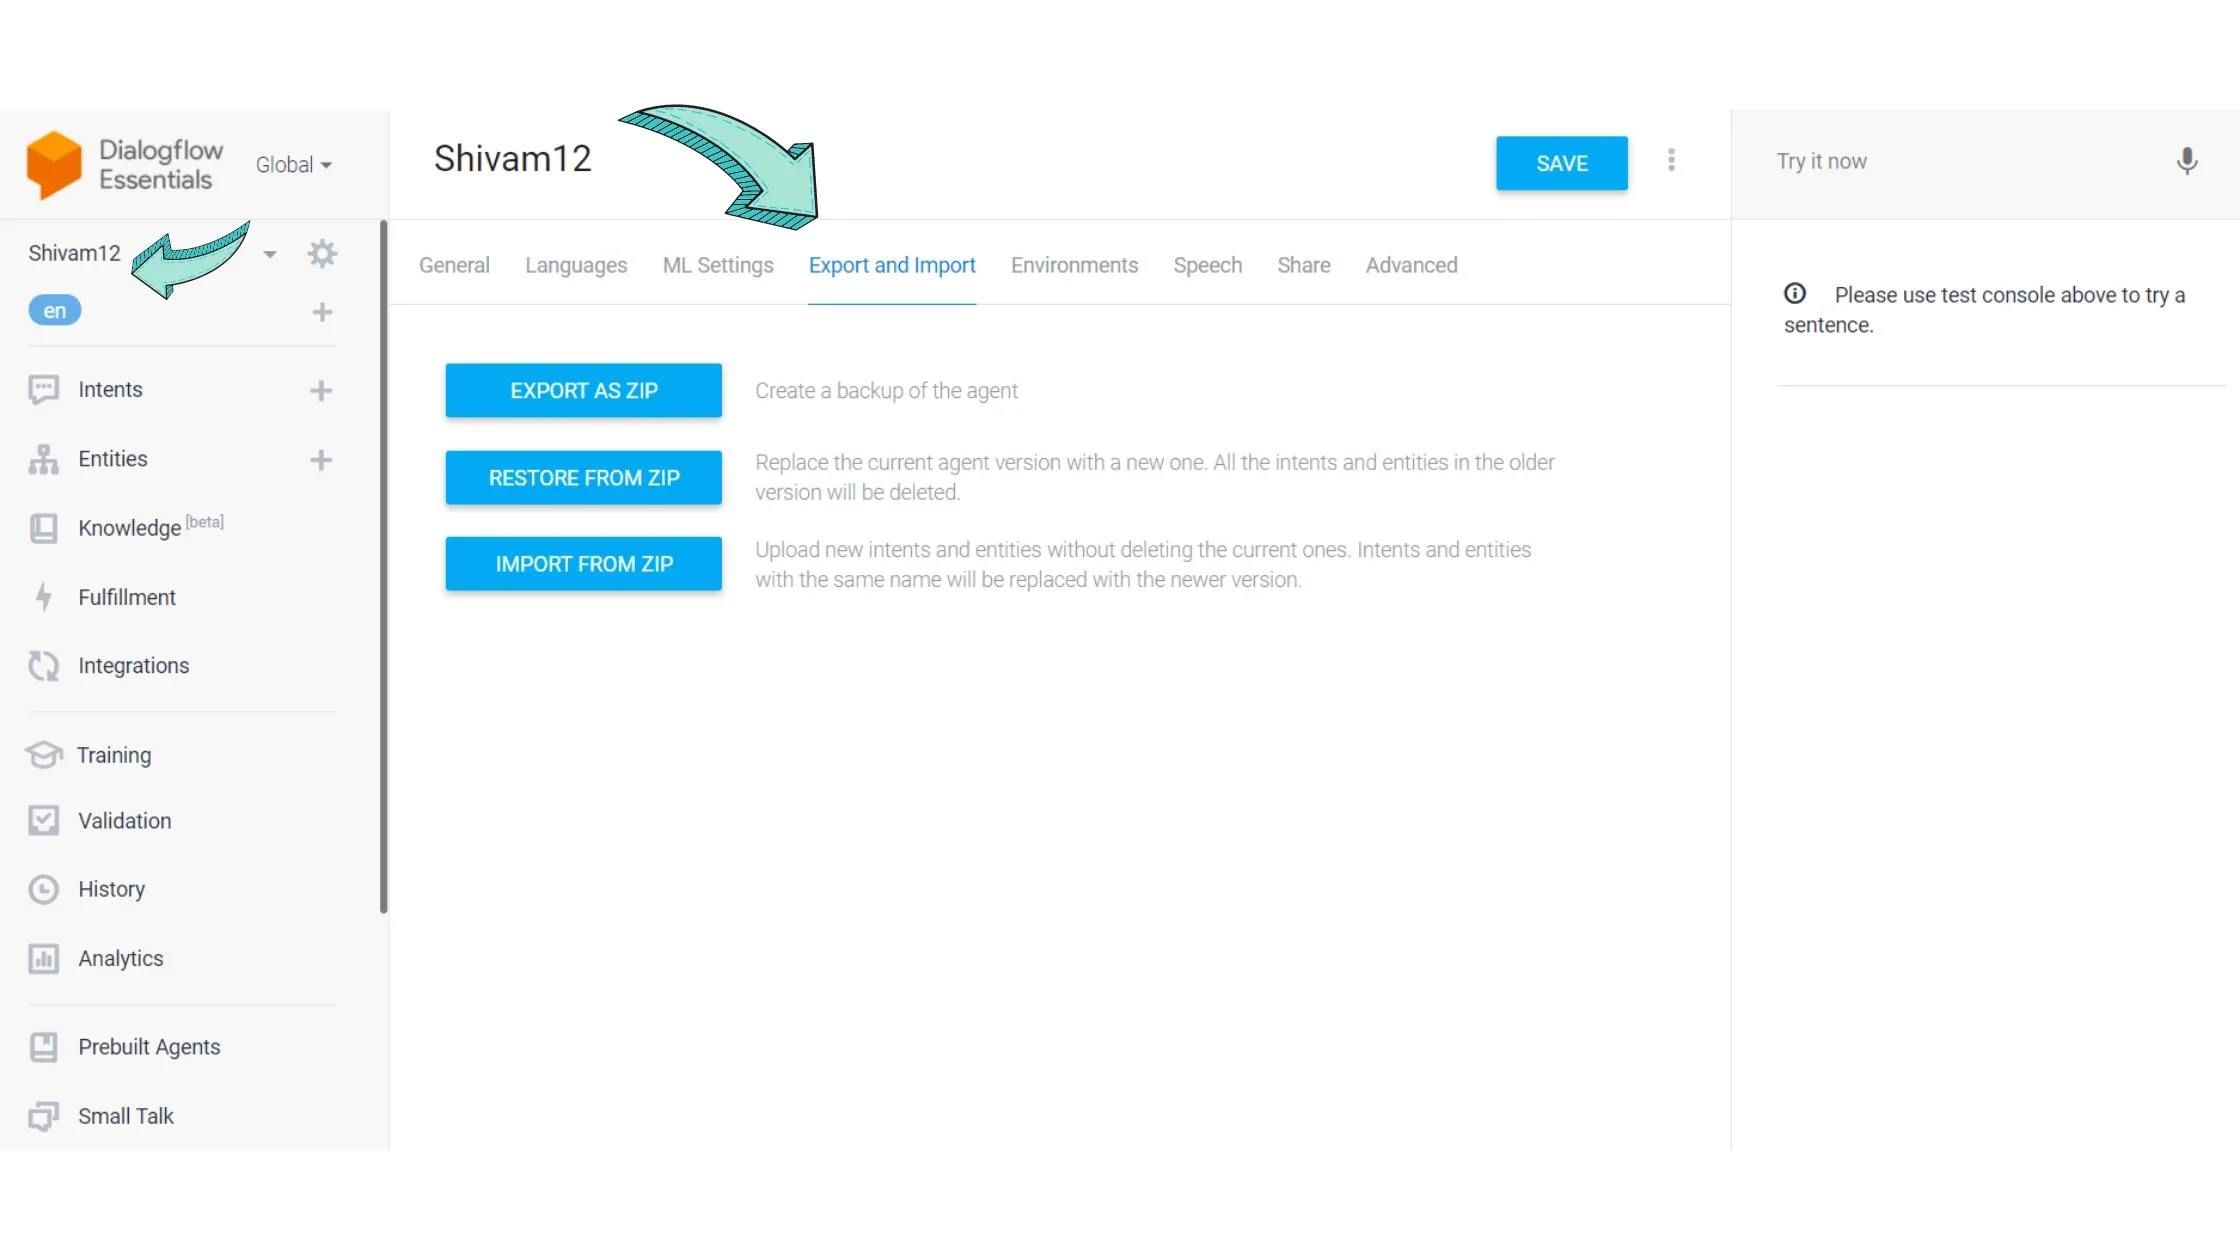
    Go to Import & Export Section in Agent Profile

    It's now time to use a pre-made Chatbot template to create your WhatsApp Chatbot. 

    Go to your agent's profile & hit the Import & Export page. 

    Go to import & export section
  • 5

    Download a WhatsApp Chatbot Template

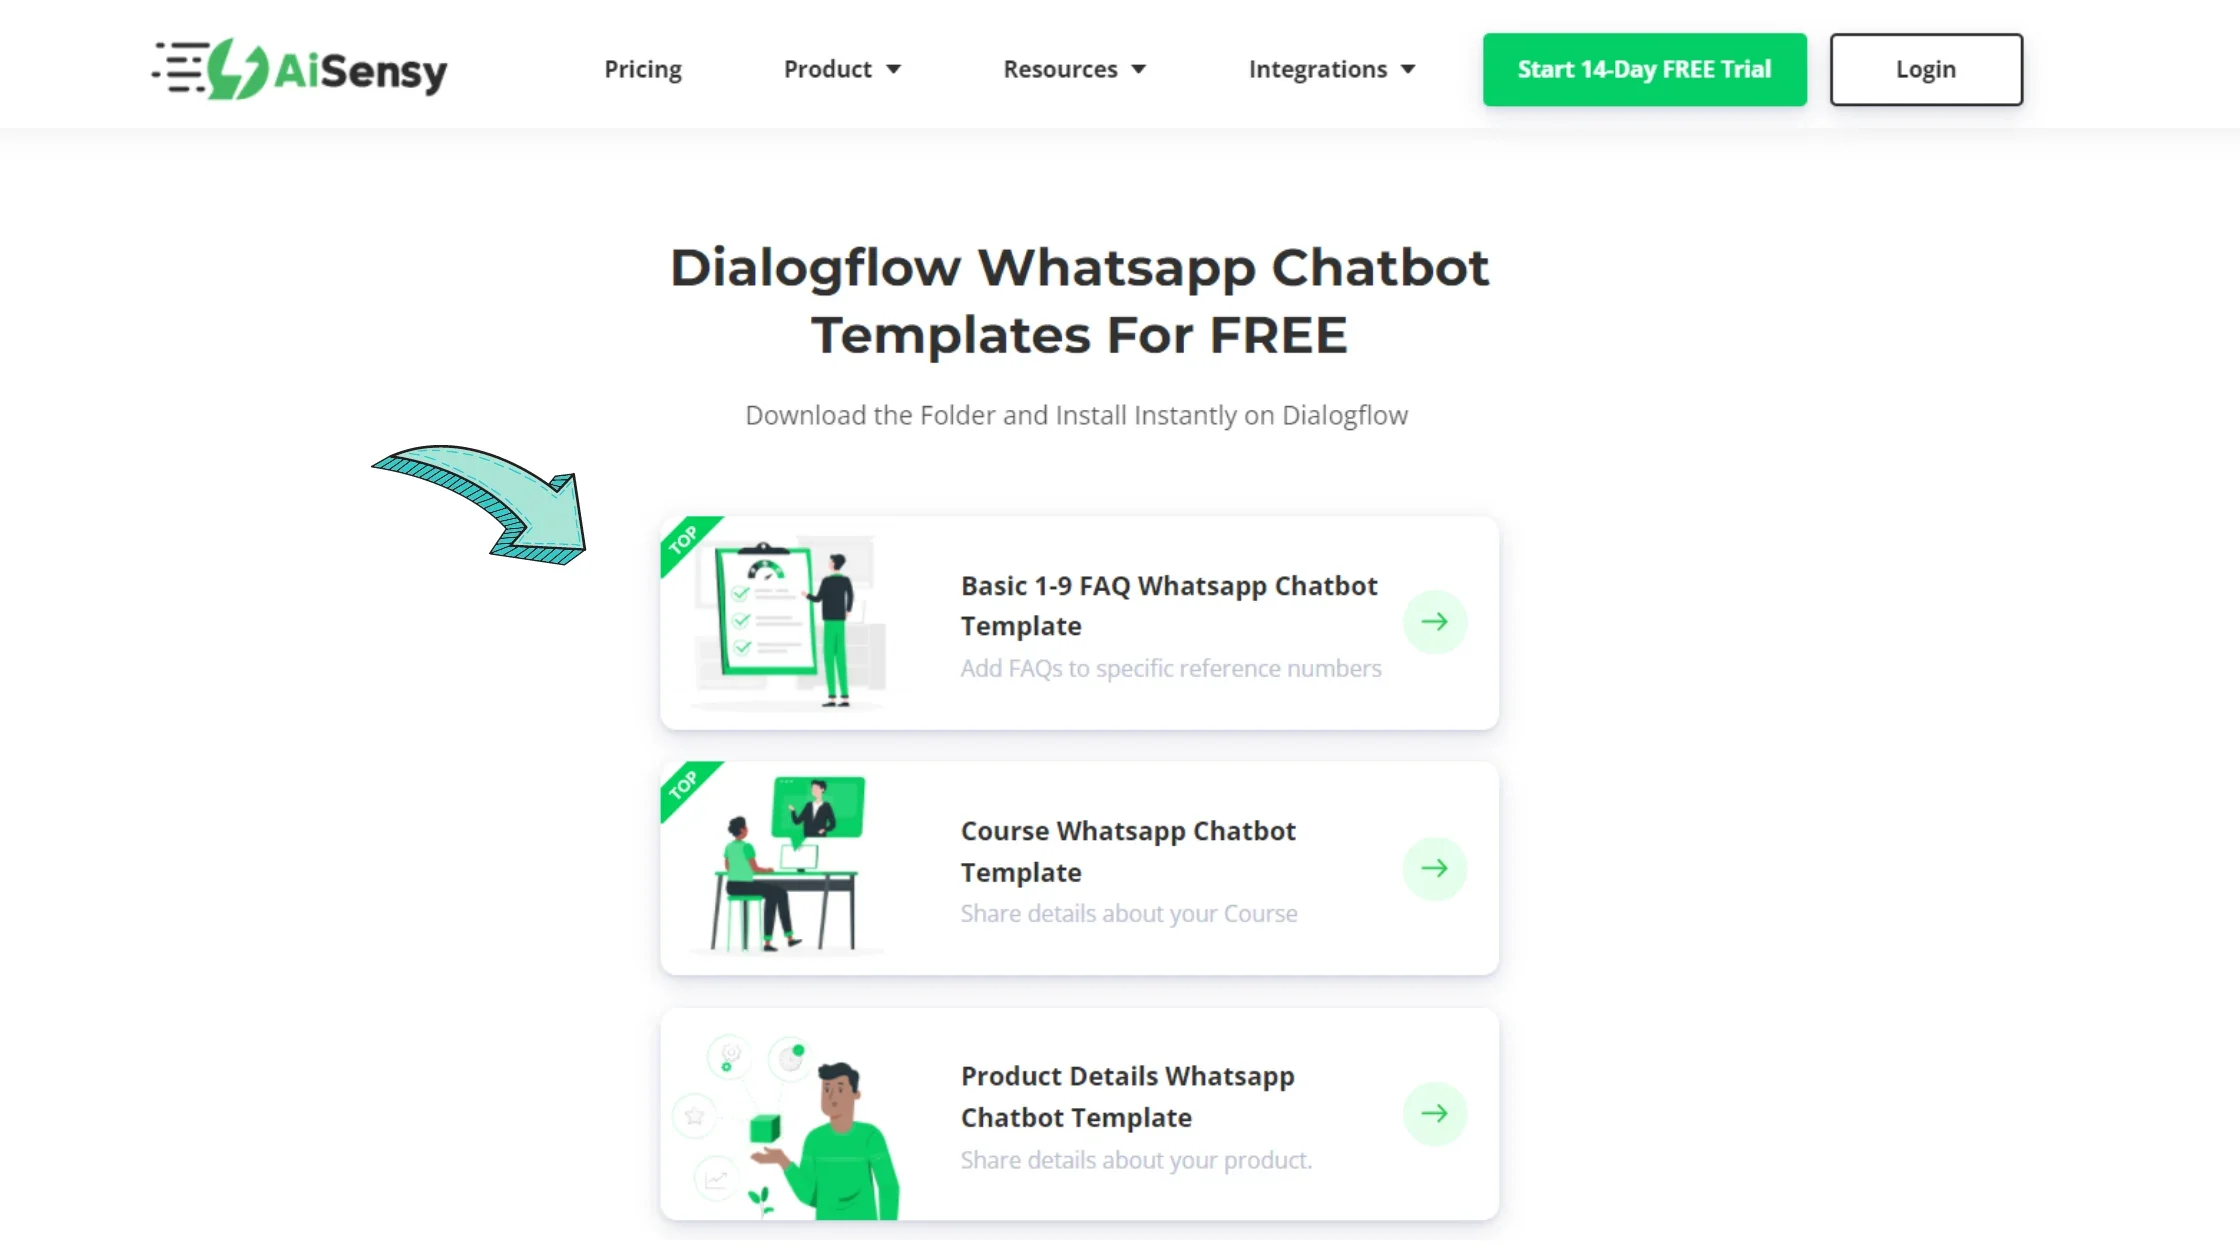
    Pick any WhatsApp Chatbot Template from the many templates available & download the one which appeals the most to your business. 

    E.g. If you run an Ecommerce Business, pick the Basic 1-9 FAQ Chatbot or Feedback Chatbot or Product Details Chatbot. 

    Once you've downloaded the Chatbot Template, here's what you need to doπŸ‘‡β€

    Download a chatbot template
  • 6

    Upload the File to Dialogflow Chatbot

    Now, extract the Zip file to a different location. 

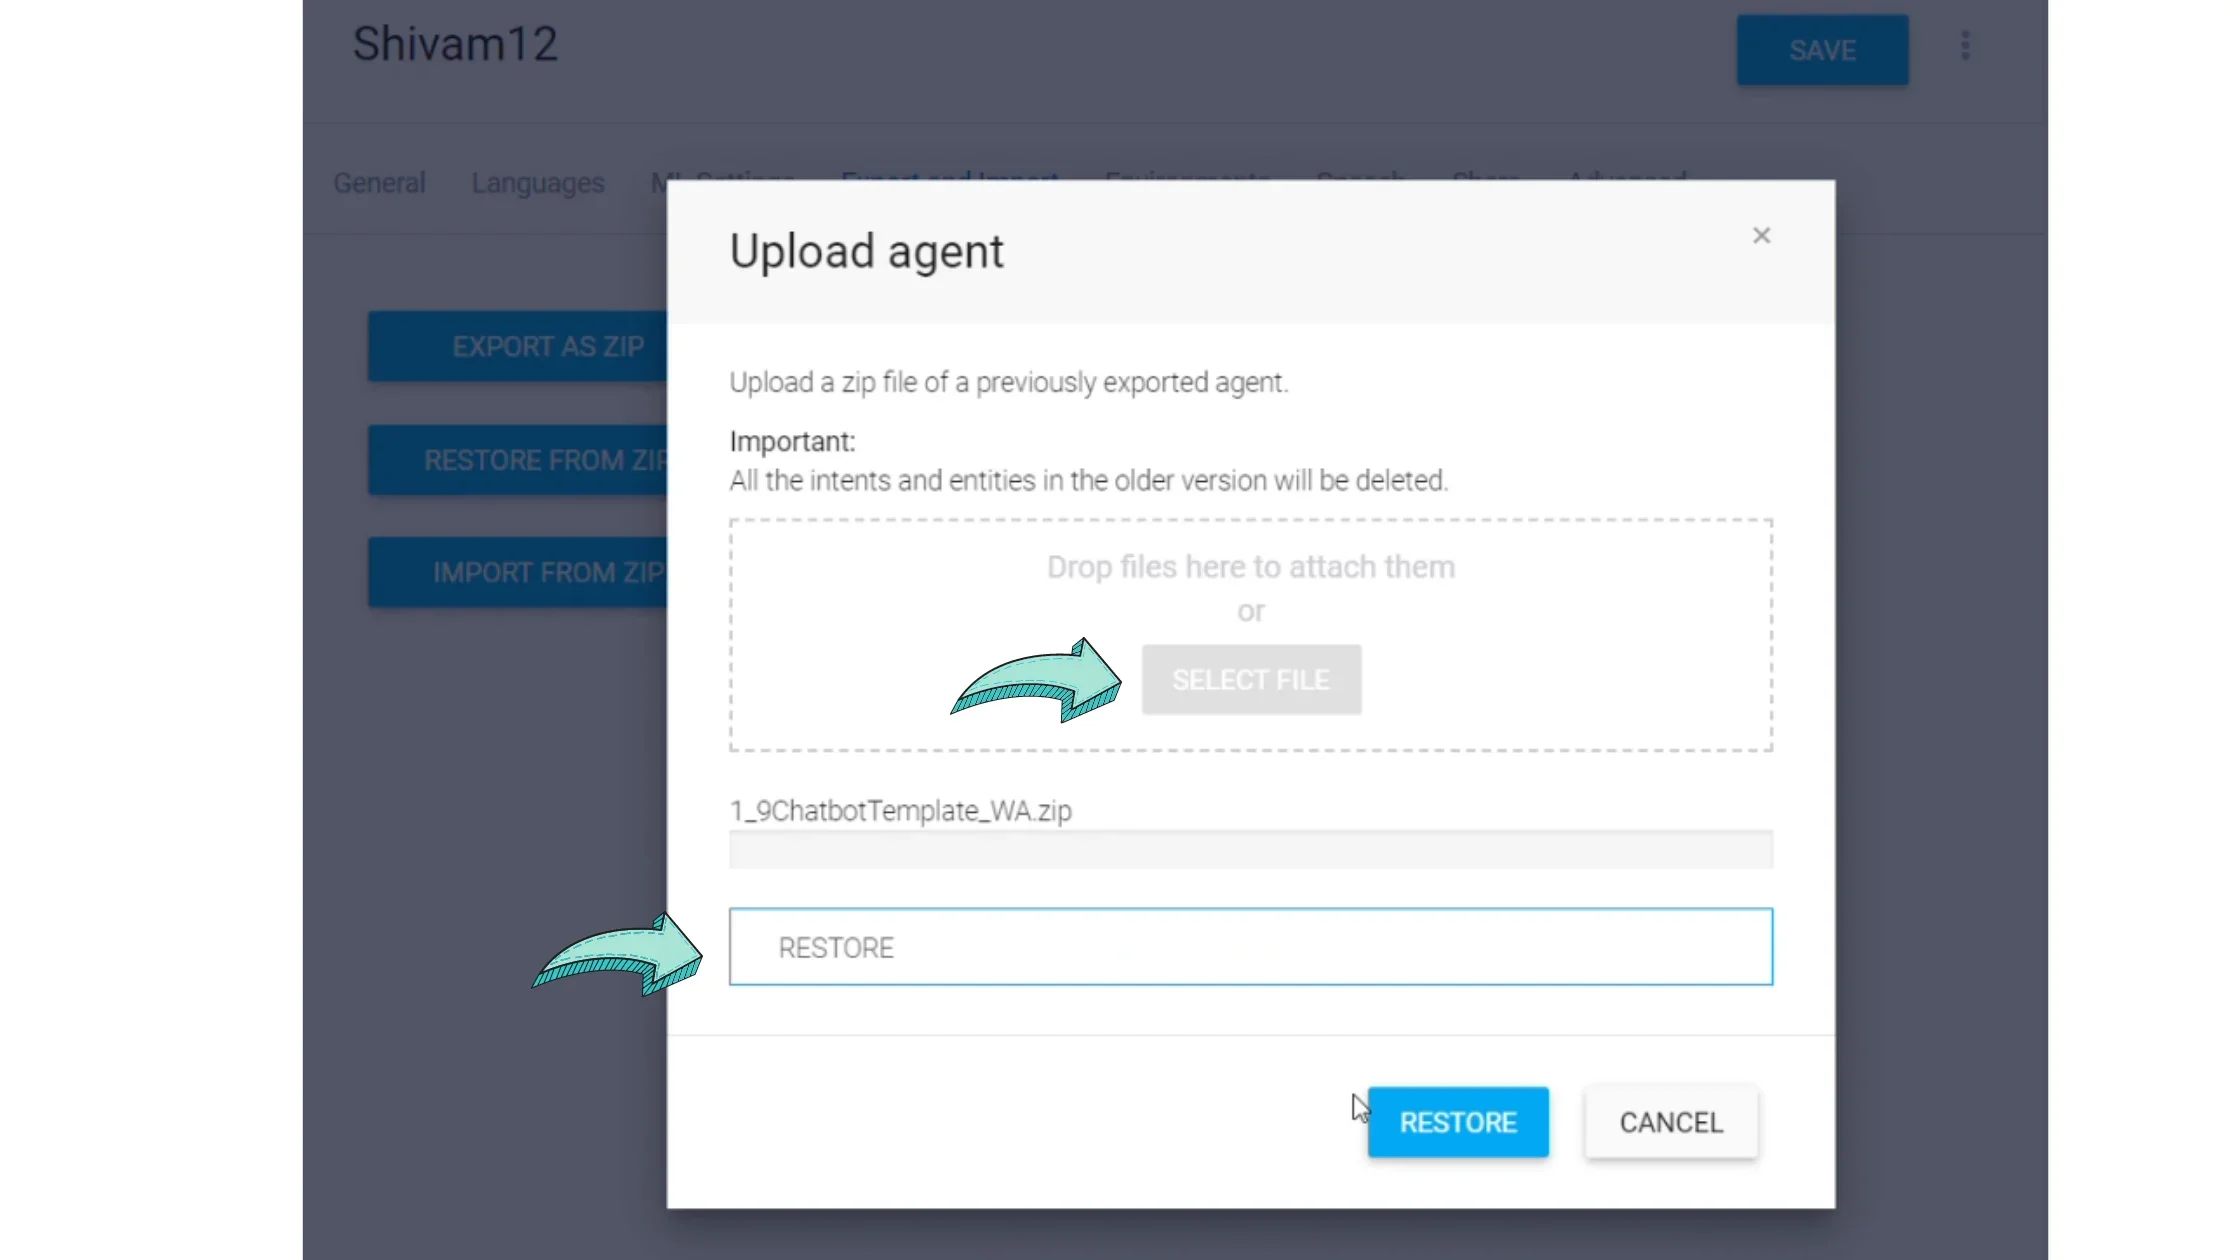
    Once you do it, upload the extracted file to your Dialogflow Chatbot, enter RESTORE & click the restore button to add the Chatbot Template successfully. 

    Here, we've added the 1-9 Basic FAQ Chatbot Template to Dialogflow. 

    Now, let's add the intent or purpose to the WhatsApp Chatbot. 

    Upload file to dialogflow
  • 7

    WhatsApp Chatbot Intent

    The intent here means the user's purpose for one conversation turn. For each agent, you define many intents, where your combined intents can handle a complete conversation. 

    One intent performs one particular action or gives one particular piece of information. For a deep dive into intents, check out this tutorial

    There are 2 things you need to fill to implement 1-9 Basic FAQ Chatbot:

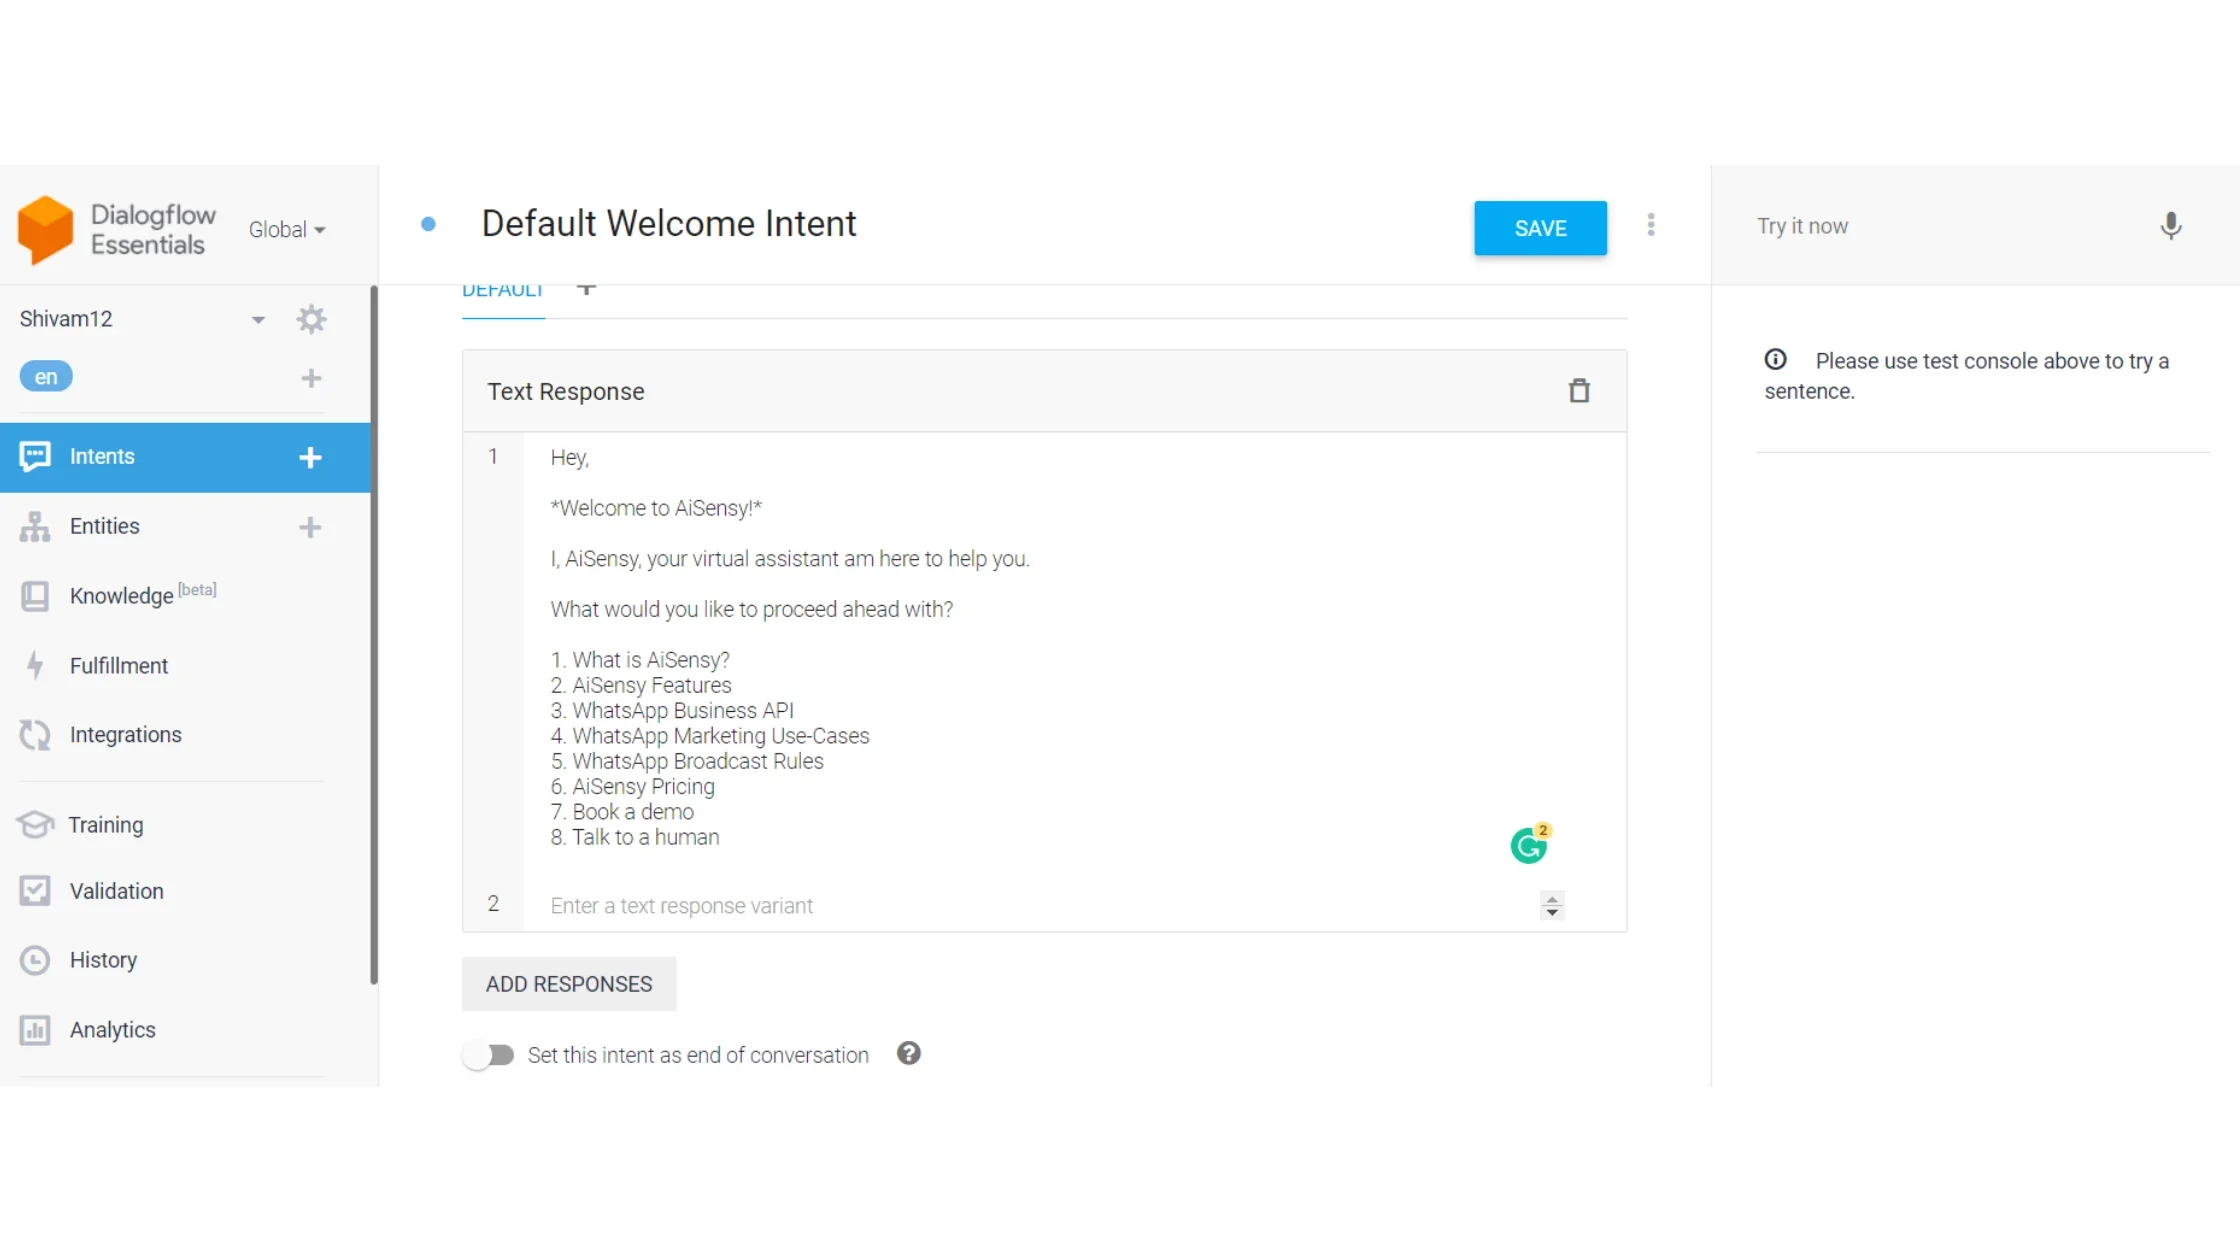
    1. Default Welcome Intent- This is the default welcome message triggered by the WhatsApp Chatbot upon receiving a particular message from the user. E.g. Hi, Hello. 

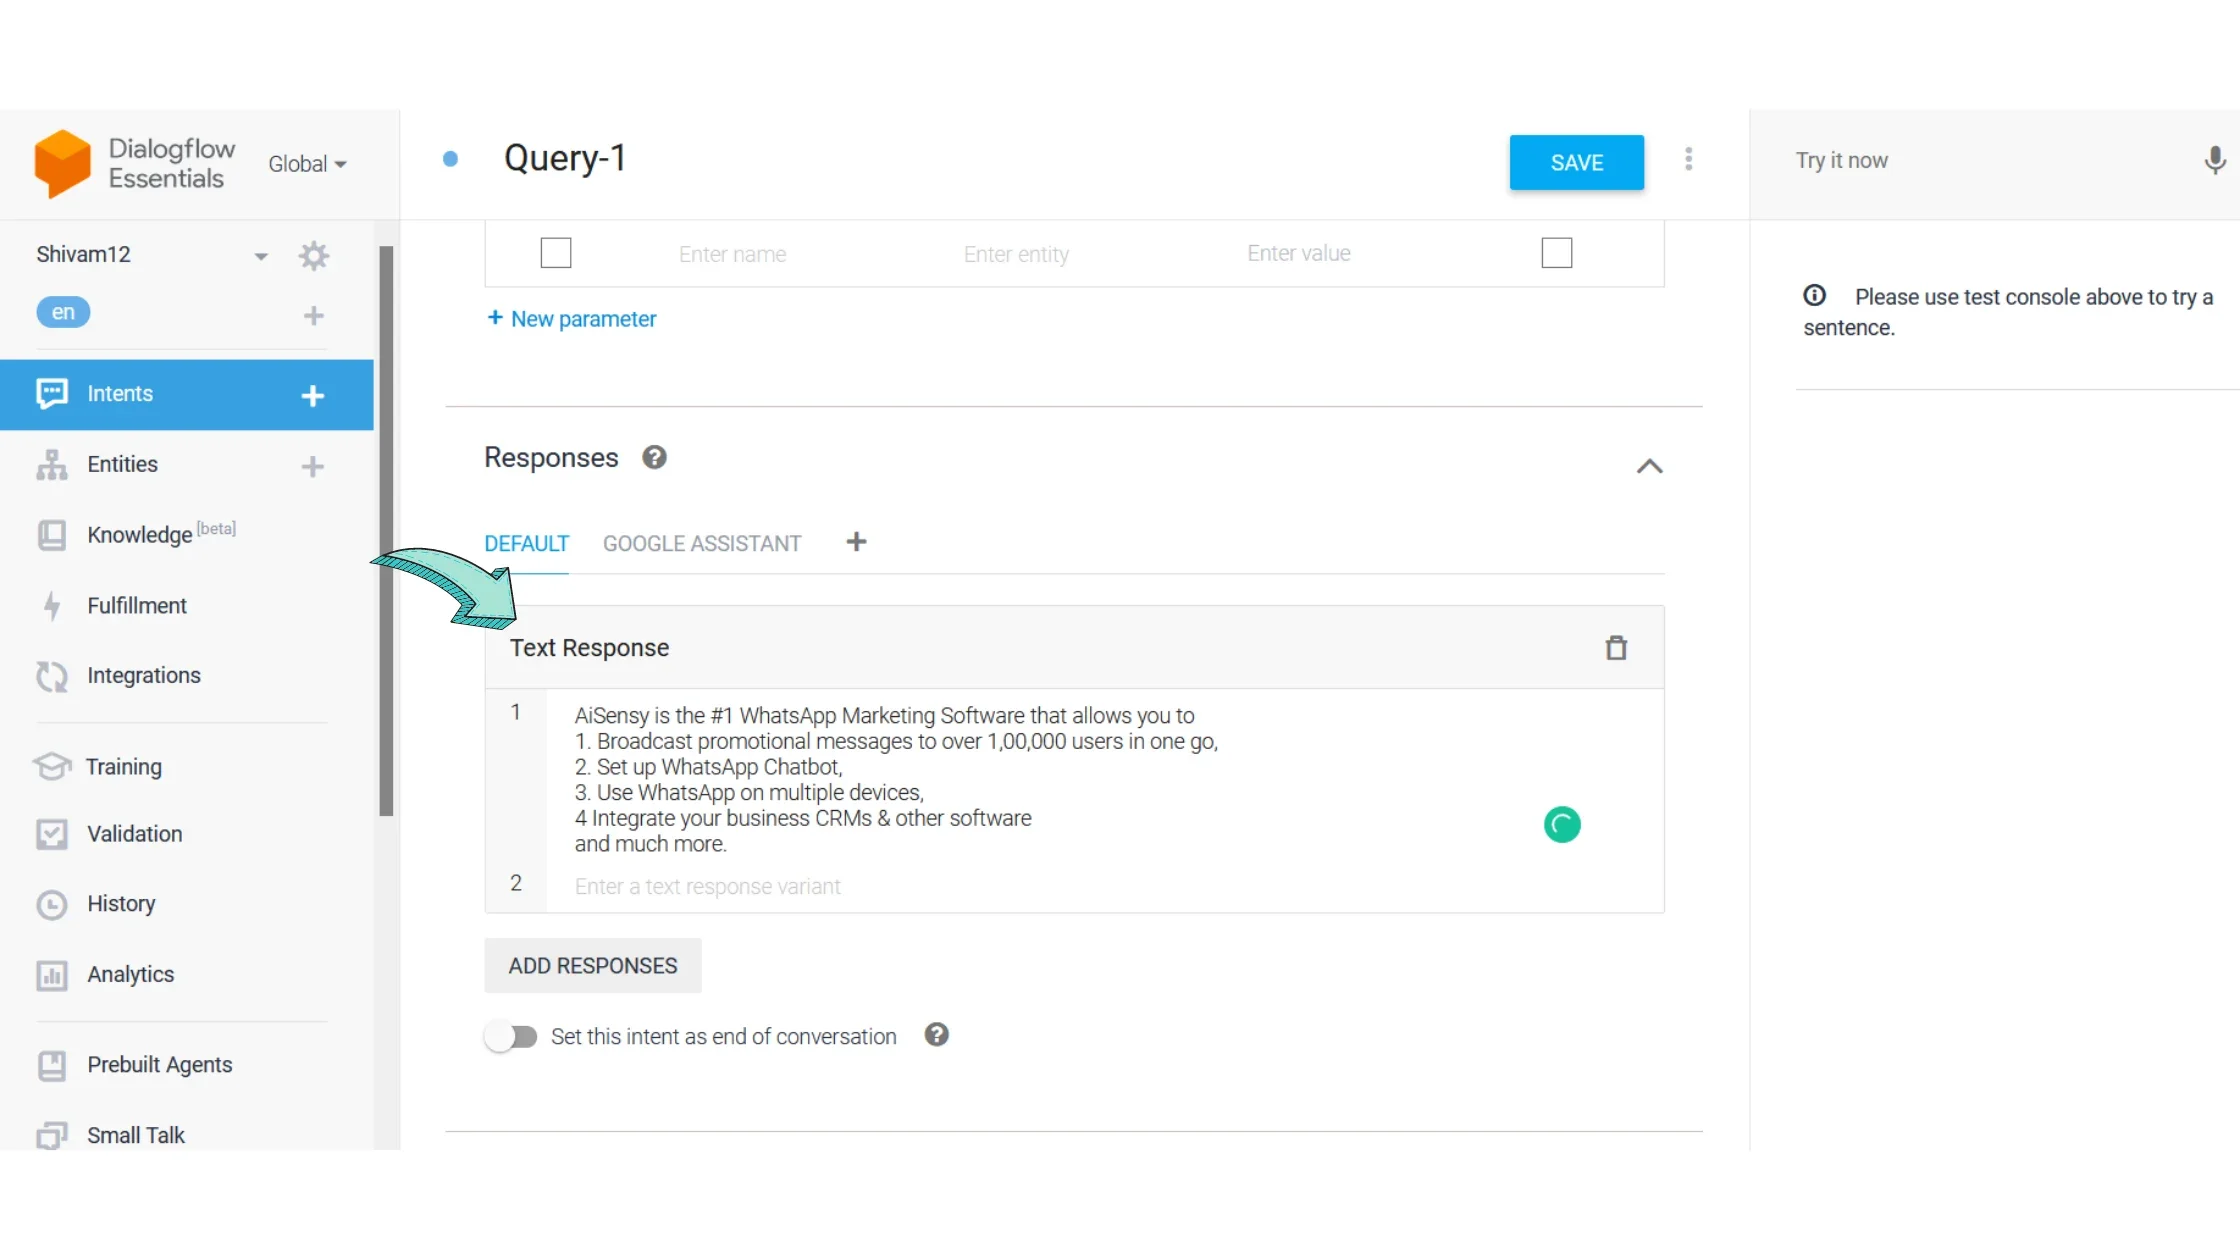
    2. Queries- Queries refer to the general queries your user might have. You have to add the queries & their respective answers in this section. 

    Let's first set the default intent πŸ‘‡ 

    Setup default whatsapp chatbot intent
  • 8

    Setting up Default Welcome Intent

    While setting default welcome intent, you need to think & fill in these two things:

    1. Training Phrases- These are the user phrases that will trigger the Chatbot's Welcome intent. It can be anything you think your customer will message you. It can be a simple 'Hi', 'hello', 'just saying hi' etc.

    2. Responses- This would be the message automated by the WhatsApp Chatbot, triggered upon receiving the training phrase. 

    Your user can then pick from any of the options, depending on their query. 

    Setup default whatsapp chatbot intent
  • 9

    Setting up Queries

    In Queries, you need to set up the answers to the 1-9 FAQs one by one. 

    For each query, you need to add a separate answer that will be automated when the user asks a query. 

    E.g. If the user wants to know the answer to 'What is AiSensy?', they'll have to send '1' or ask 'What is AiSensy?" and the Chatbot will automate the answer to them. 

    Queries are character sensitive. One word out of the place and the Chatbot won't recognize the user's intent. 

    To set up queries, all you need to do is add the query number in the user expression (in this case '1') & add the answer to the query in 'Text Response'. 

    Press 'Save' & go back to intents & do the same for other queries. 

    Setup queries
  • 10

    Setting up Default Fallback Intent

    No matter how intelligent your WhatsApp Chatbot is, there will be times when it won't understand the user expressions. 

    It could be that the user sent a particular phrase in their native language that the Chatbot is unable to grasp. 

    In such cases, the default fallback intent is matched when your agent doesn't recognize an end-user expression. 

    The intent is further automatically configured with static responses such as, "I didn't get that. Can you say it again?"

    To set up Fallback Intent, go to 'Default Fallback Intent" & add a response that will be automatically triggered when the Chatbot doesn't understand the user's expression. 

    For a deep dive into fallback intent, check out this tutorial

    Setup queries
  • 11

    Creating JSON Key

    Check out this tutorial to understand how to create a JSON key to connect your Dialogflow WhatsApp Chatbot to AiSensy. 

    Or just follow the below-mentioned steps:

    1. In Agent settings, click the Project ID button. 

    2. Now, tap the three lines on the top left corner & choose 'Service Accounts' under 'IAM & Admin'.

    3. Create Service Account

    4. Add Service Account ID & press 'Continue'

    5. In roles, select 'Dialogflow API Client'& press 'Done'.

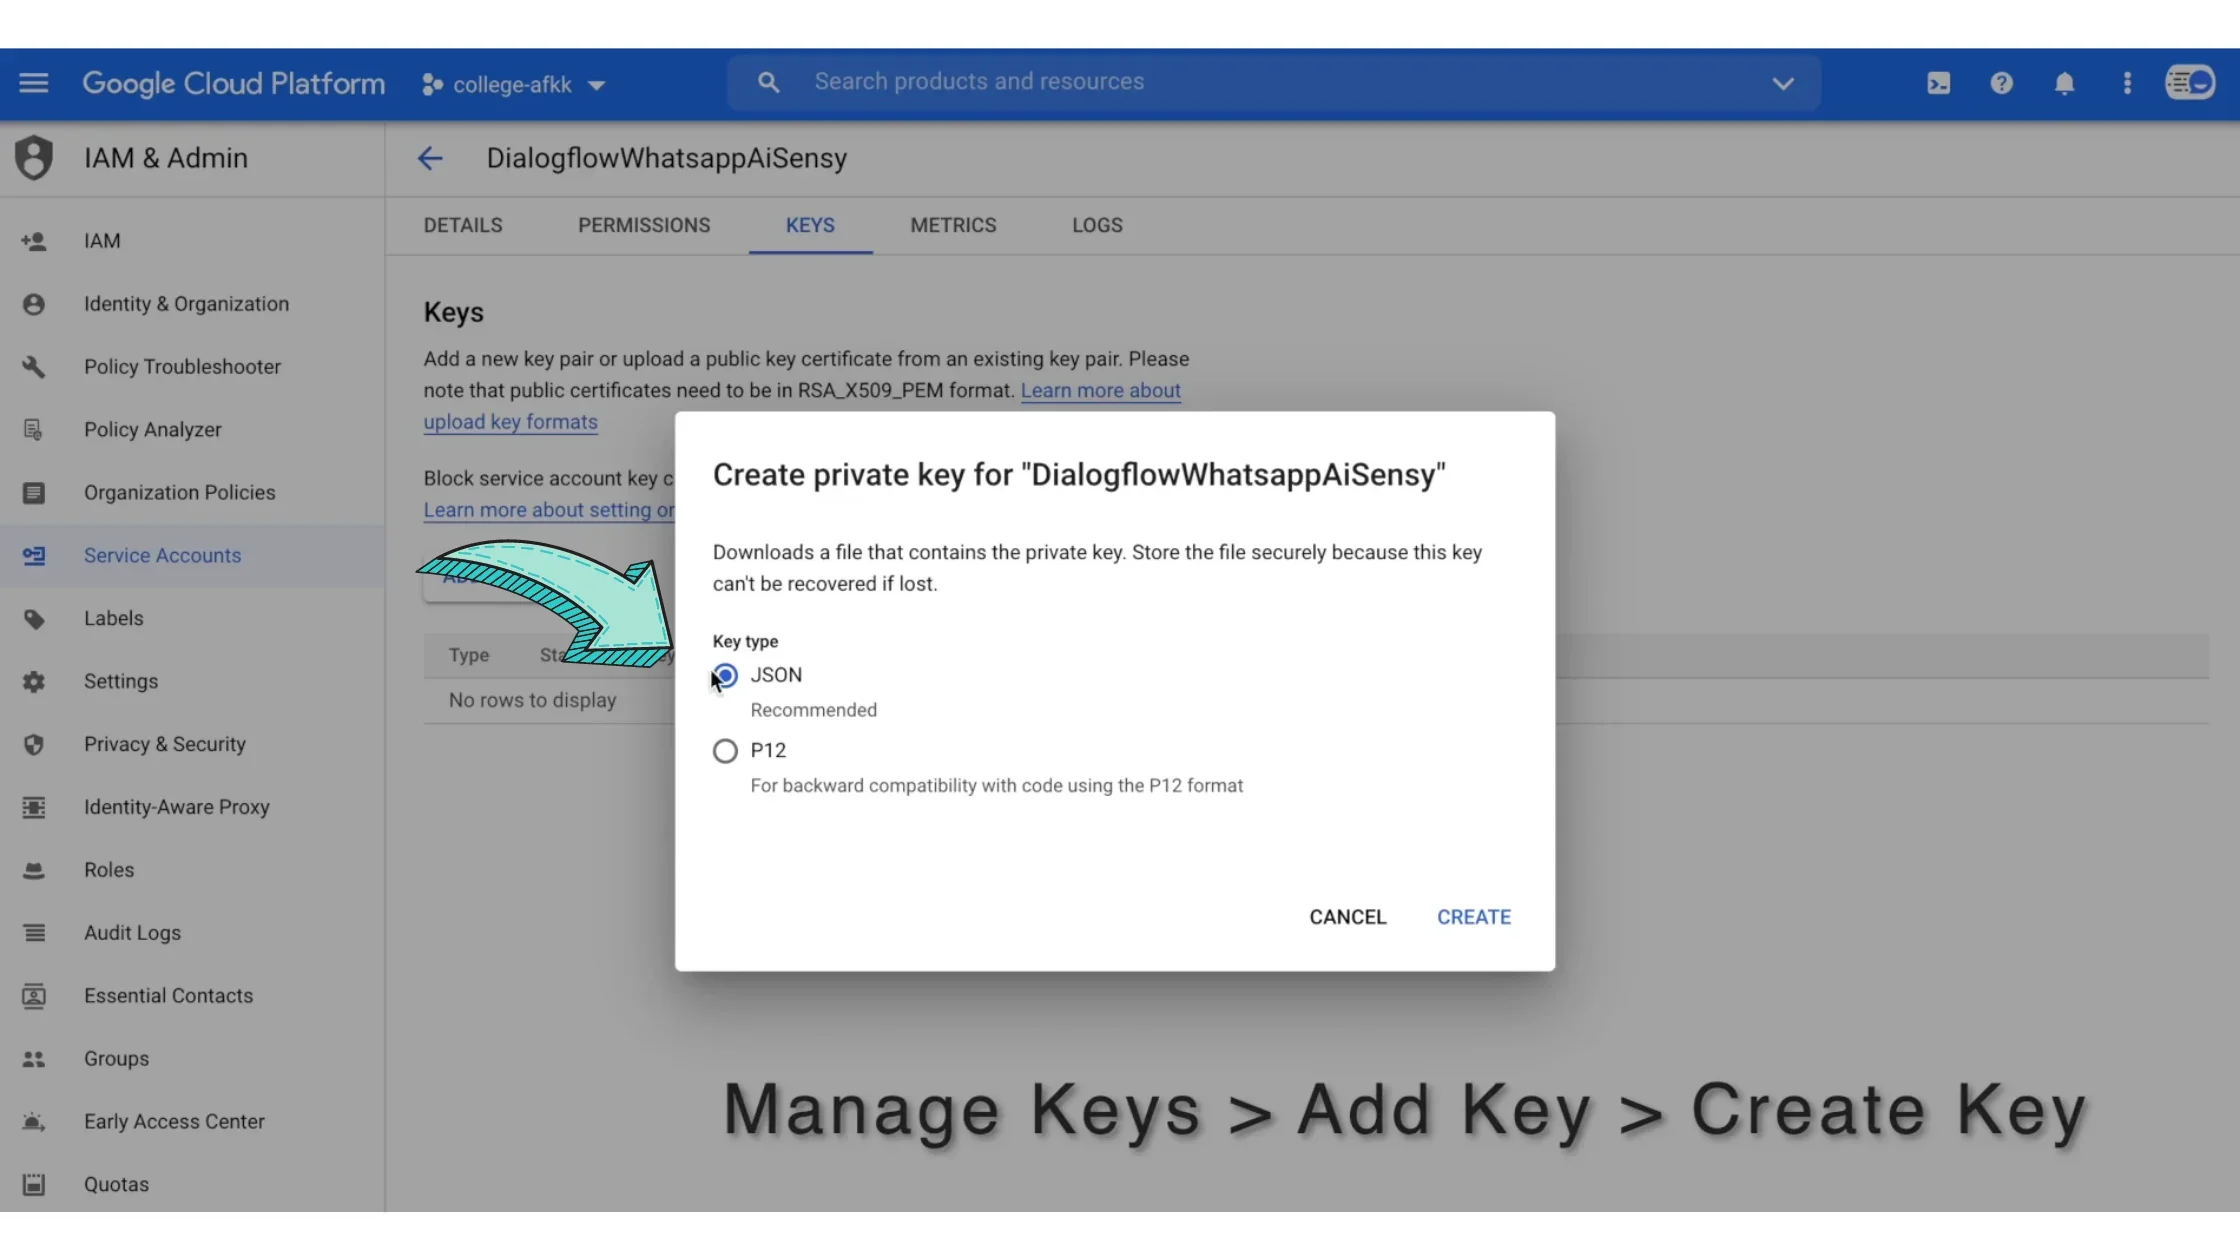
    6. Under actions, choose 'Manage Keys'.

    7. Create 'New Key' & make sure to choose "JSON'!!

    8. If all the above steps are performed correctly, the JSON Key will download on your device. 

    Now, let's discuss how to connect the JSON Key with AiSensy to activate your Dialogflow WhatsApp Chatbot. 

    Create json key
  • 12

    Connect JSON Key to AiSensy

    To connect your JSON Key, sign up on AiSensy & create your unique project if you haven't done it already. 

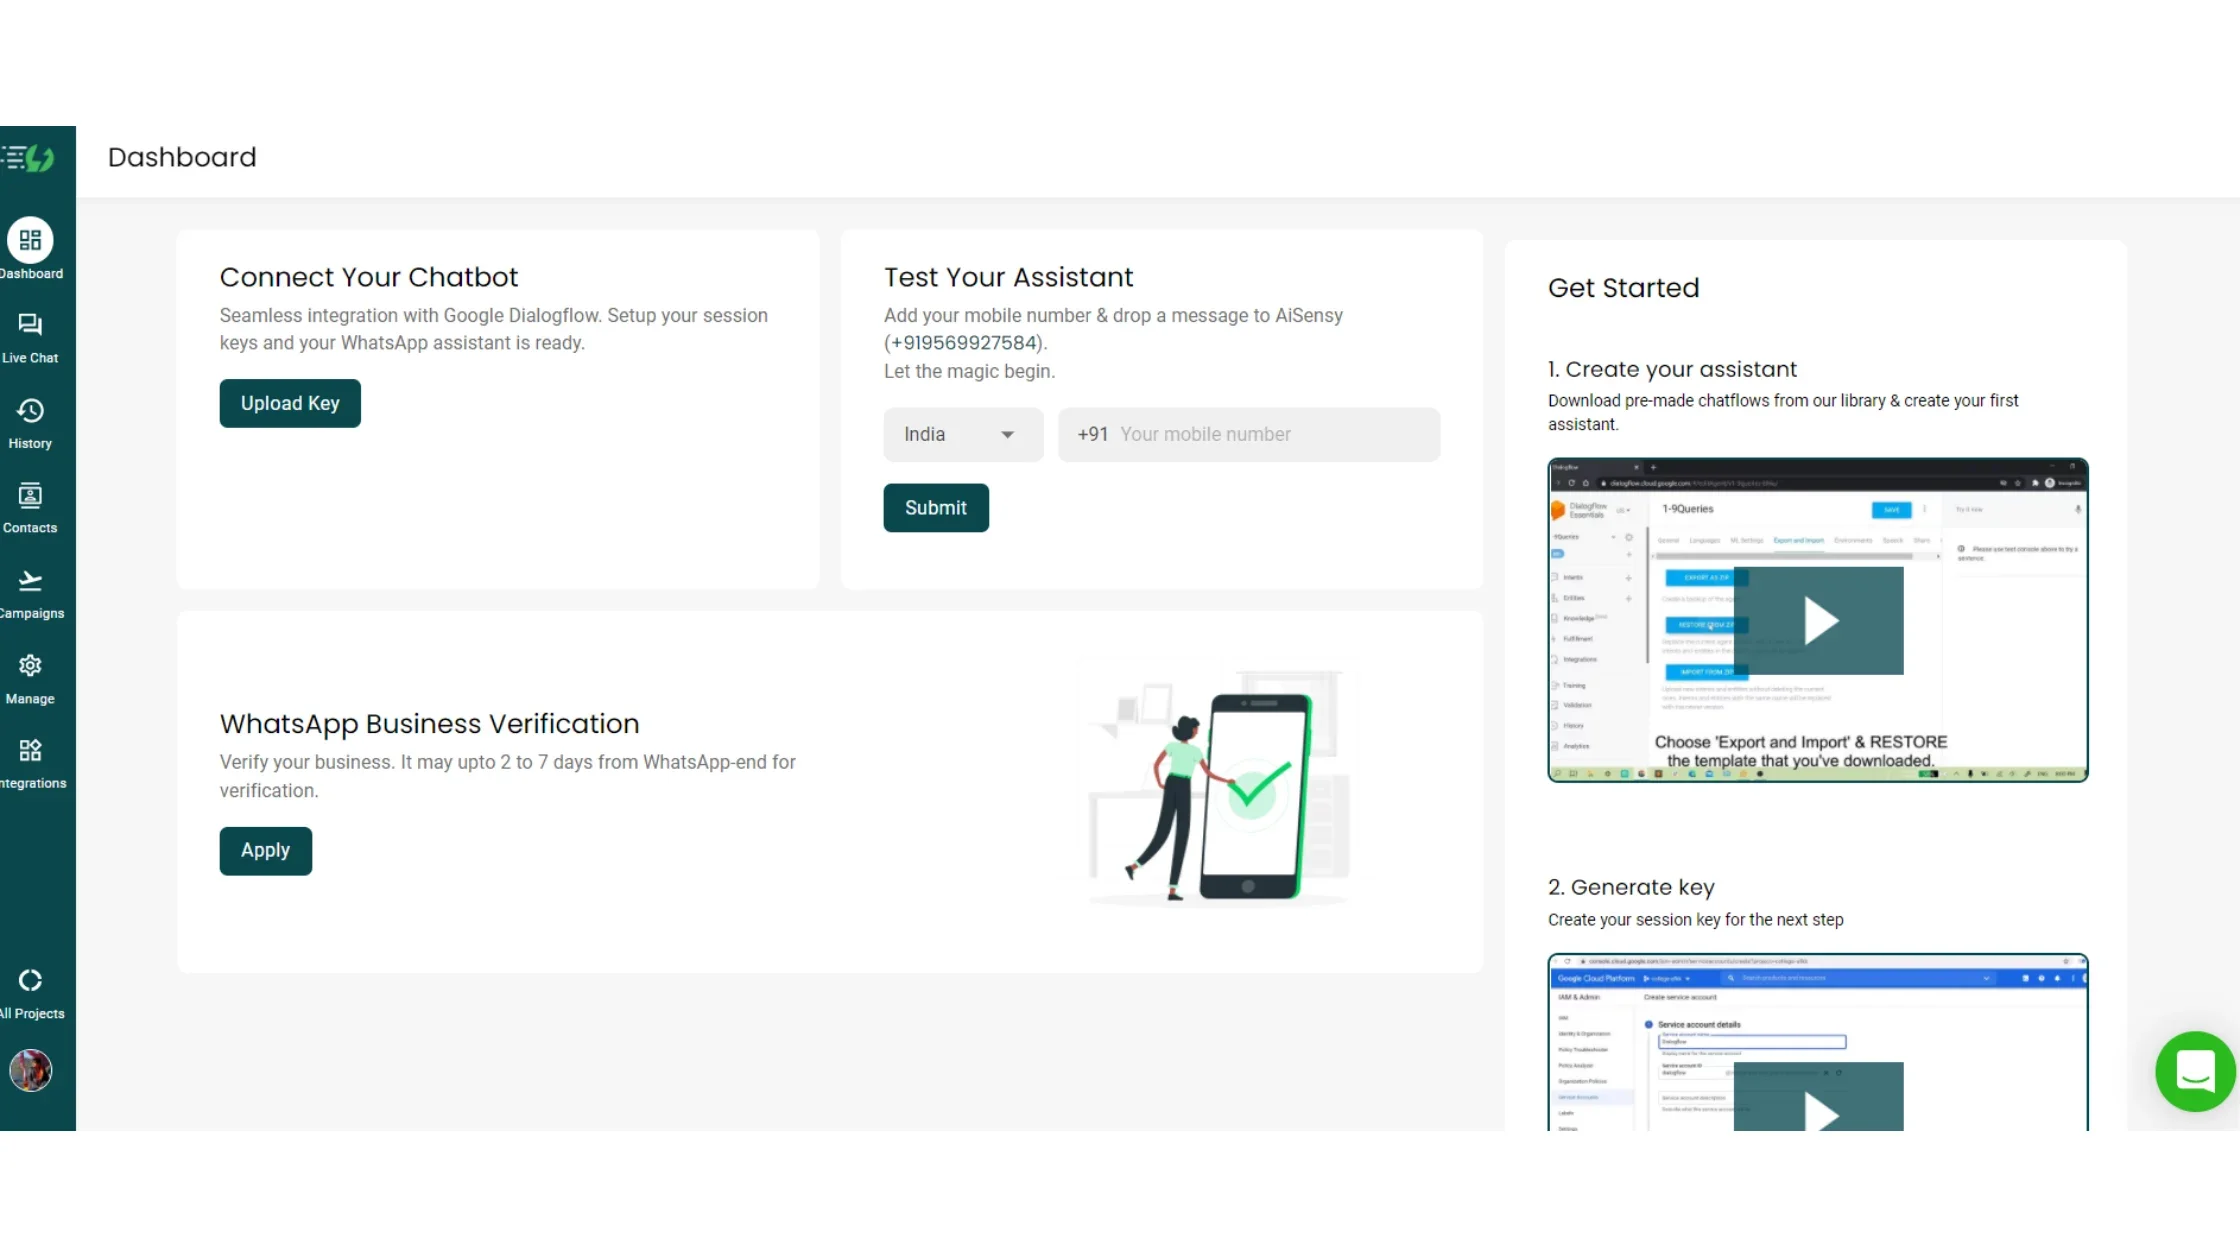
    In Dashboard, click on "Upload Key" & add the JSON Key to activate your WhatsApp Chatbot. 

    To test the assistant, add your number, send a 'Hi' & let the magic begin. 

    If you are stuck on any step, Check out this tutorial to know how to connect JSON Key to AiSensy. 

    Connect json key
English πŸ‡ΊπŸ‡ΈπŸ‡¬πŸ‡§