How to enable 'Start Verification Button if it's greyed out/isn't visble during Facebook Business Verification?

Facebook

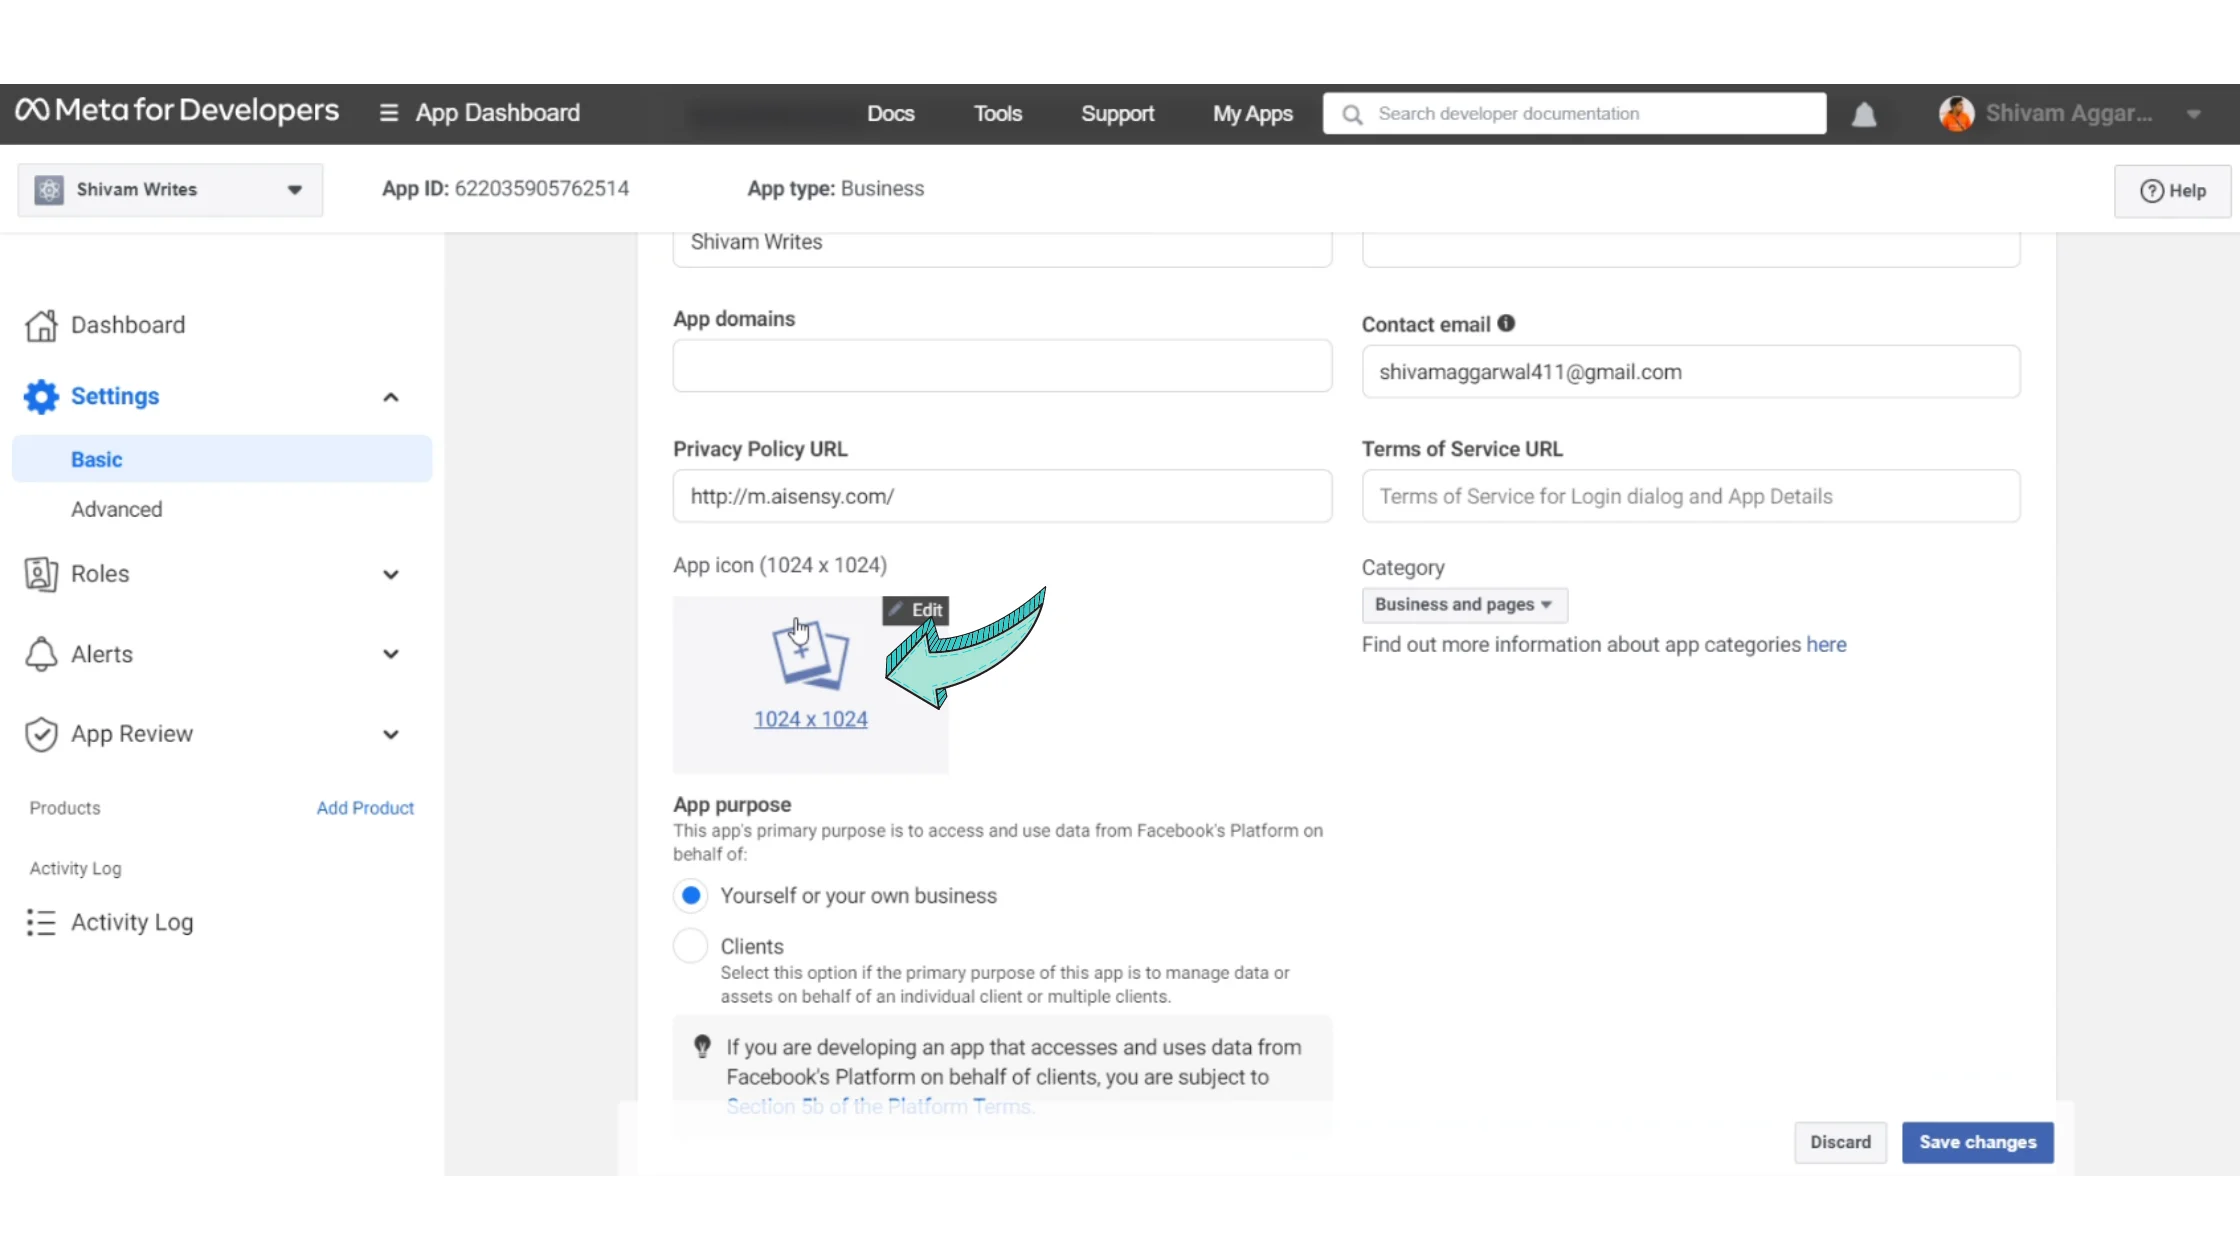
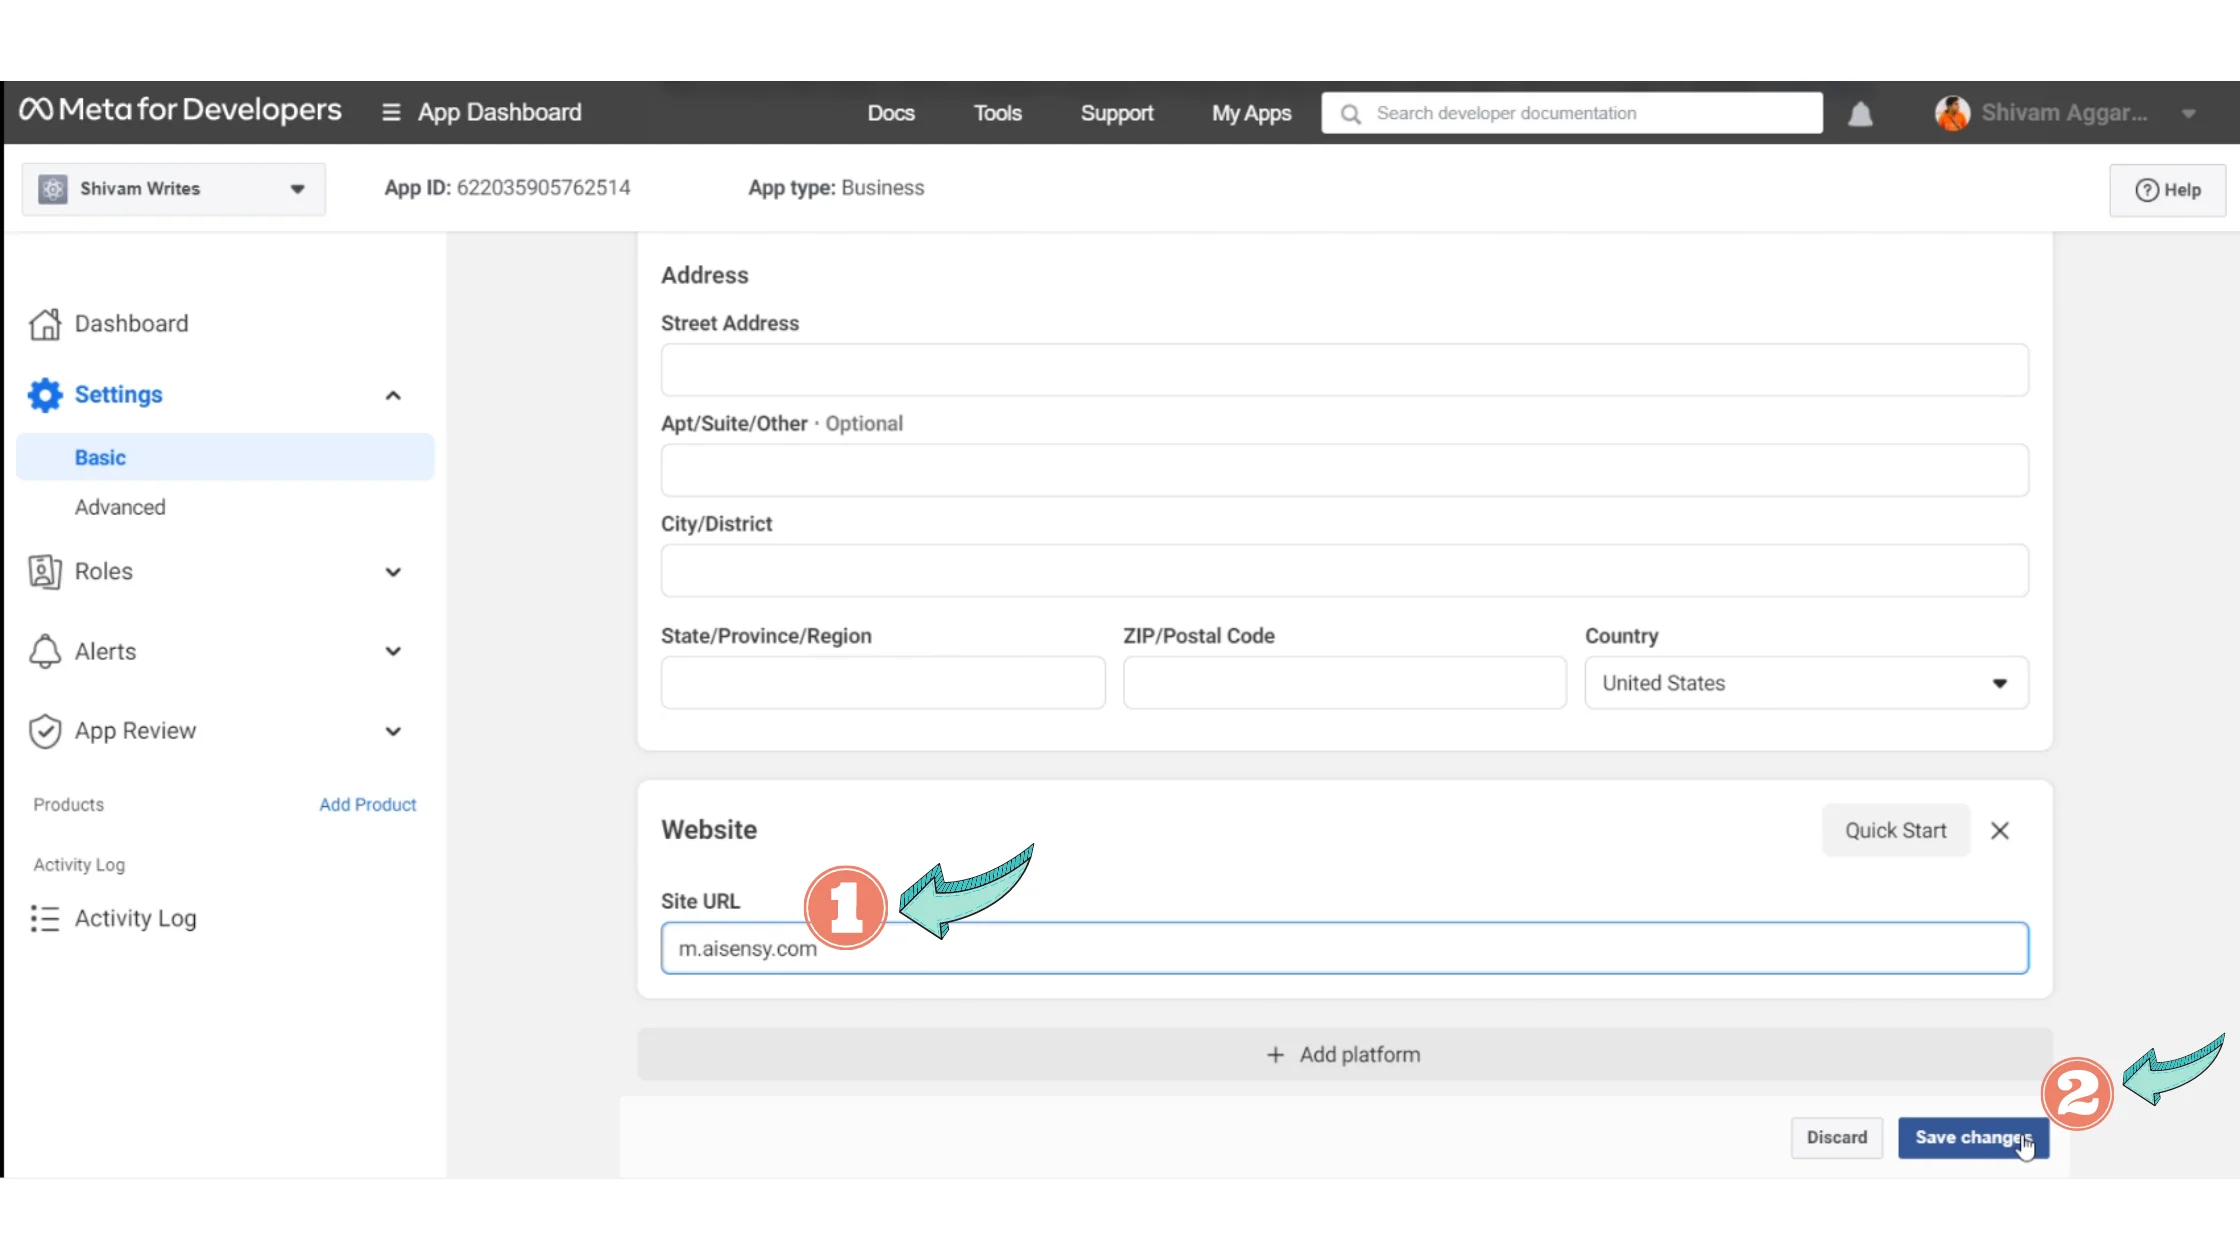
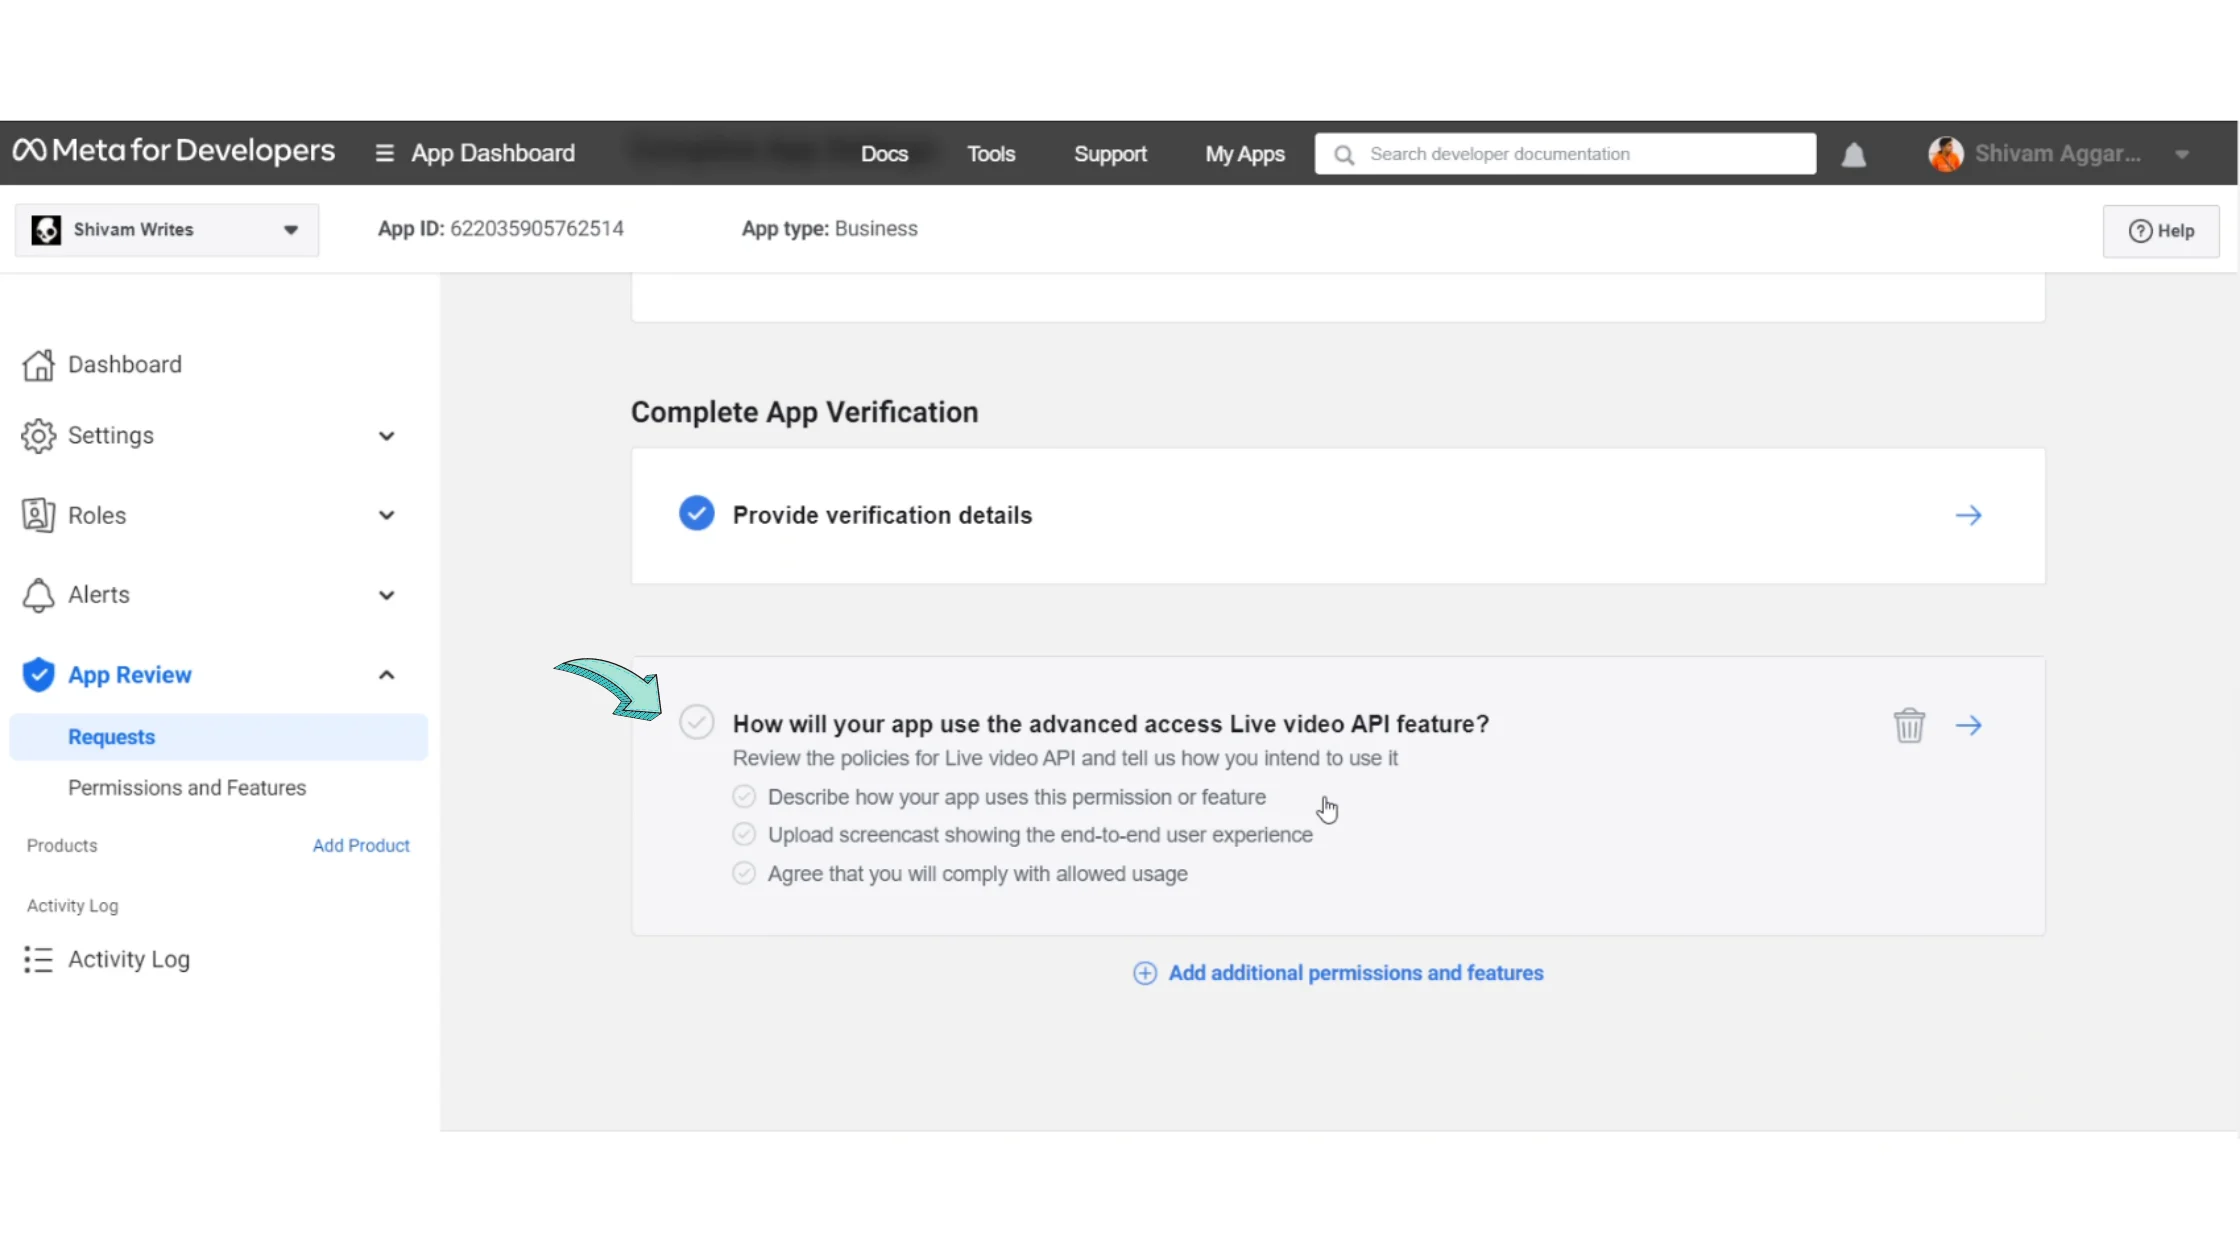
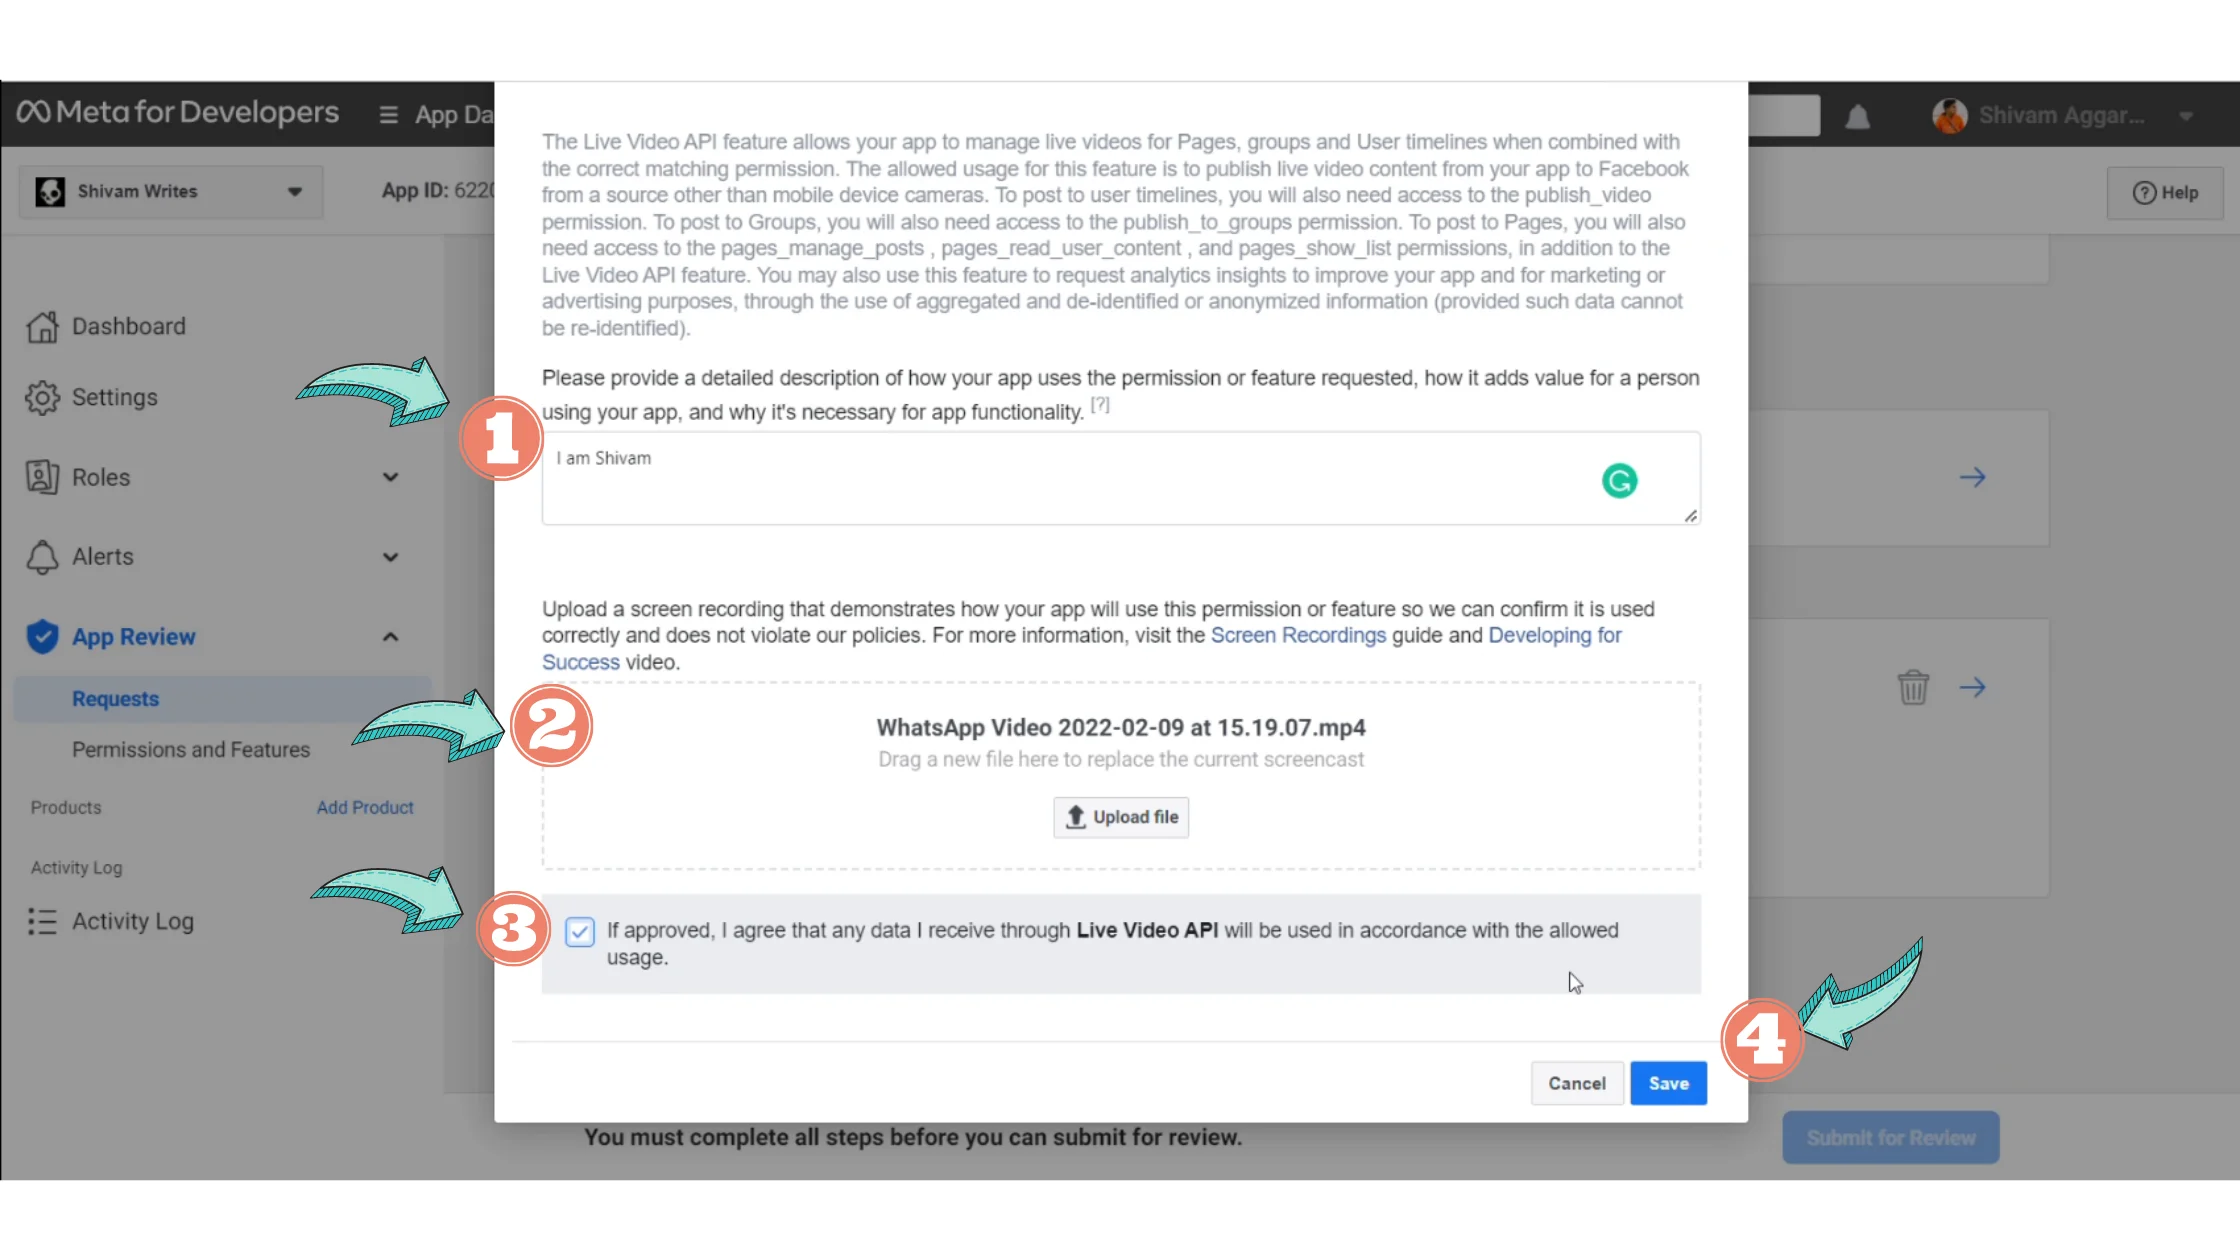
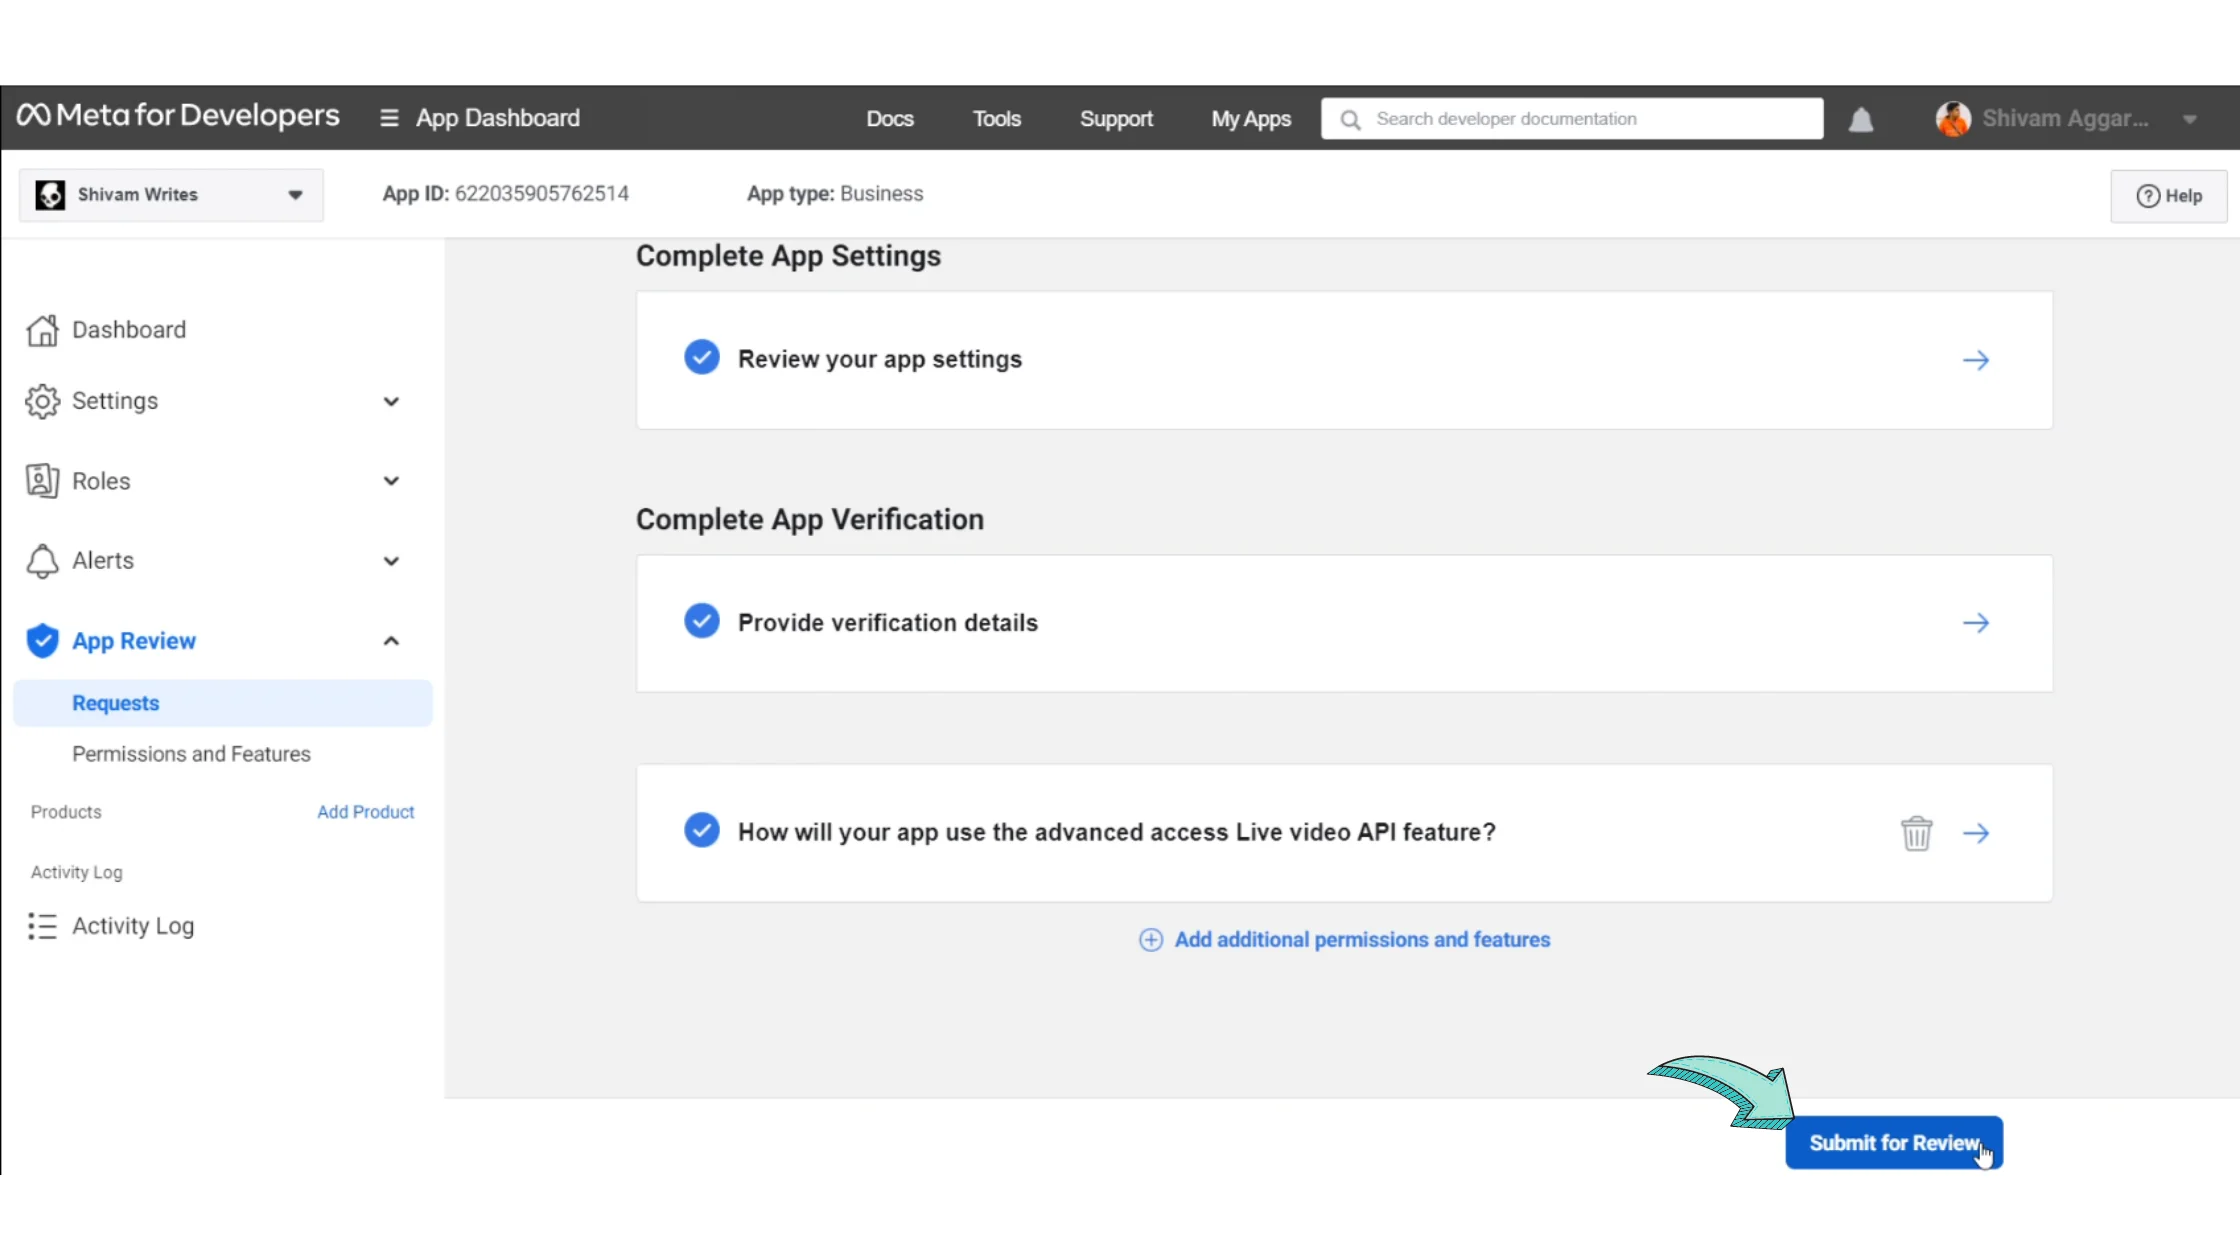
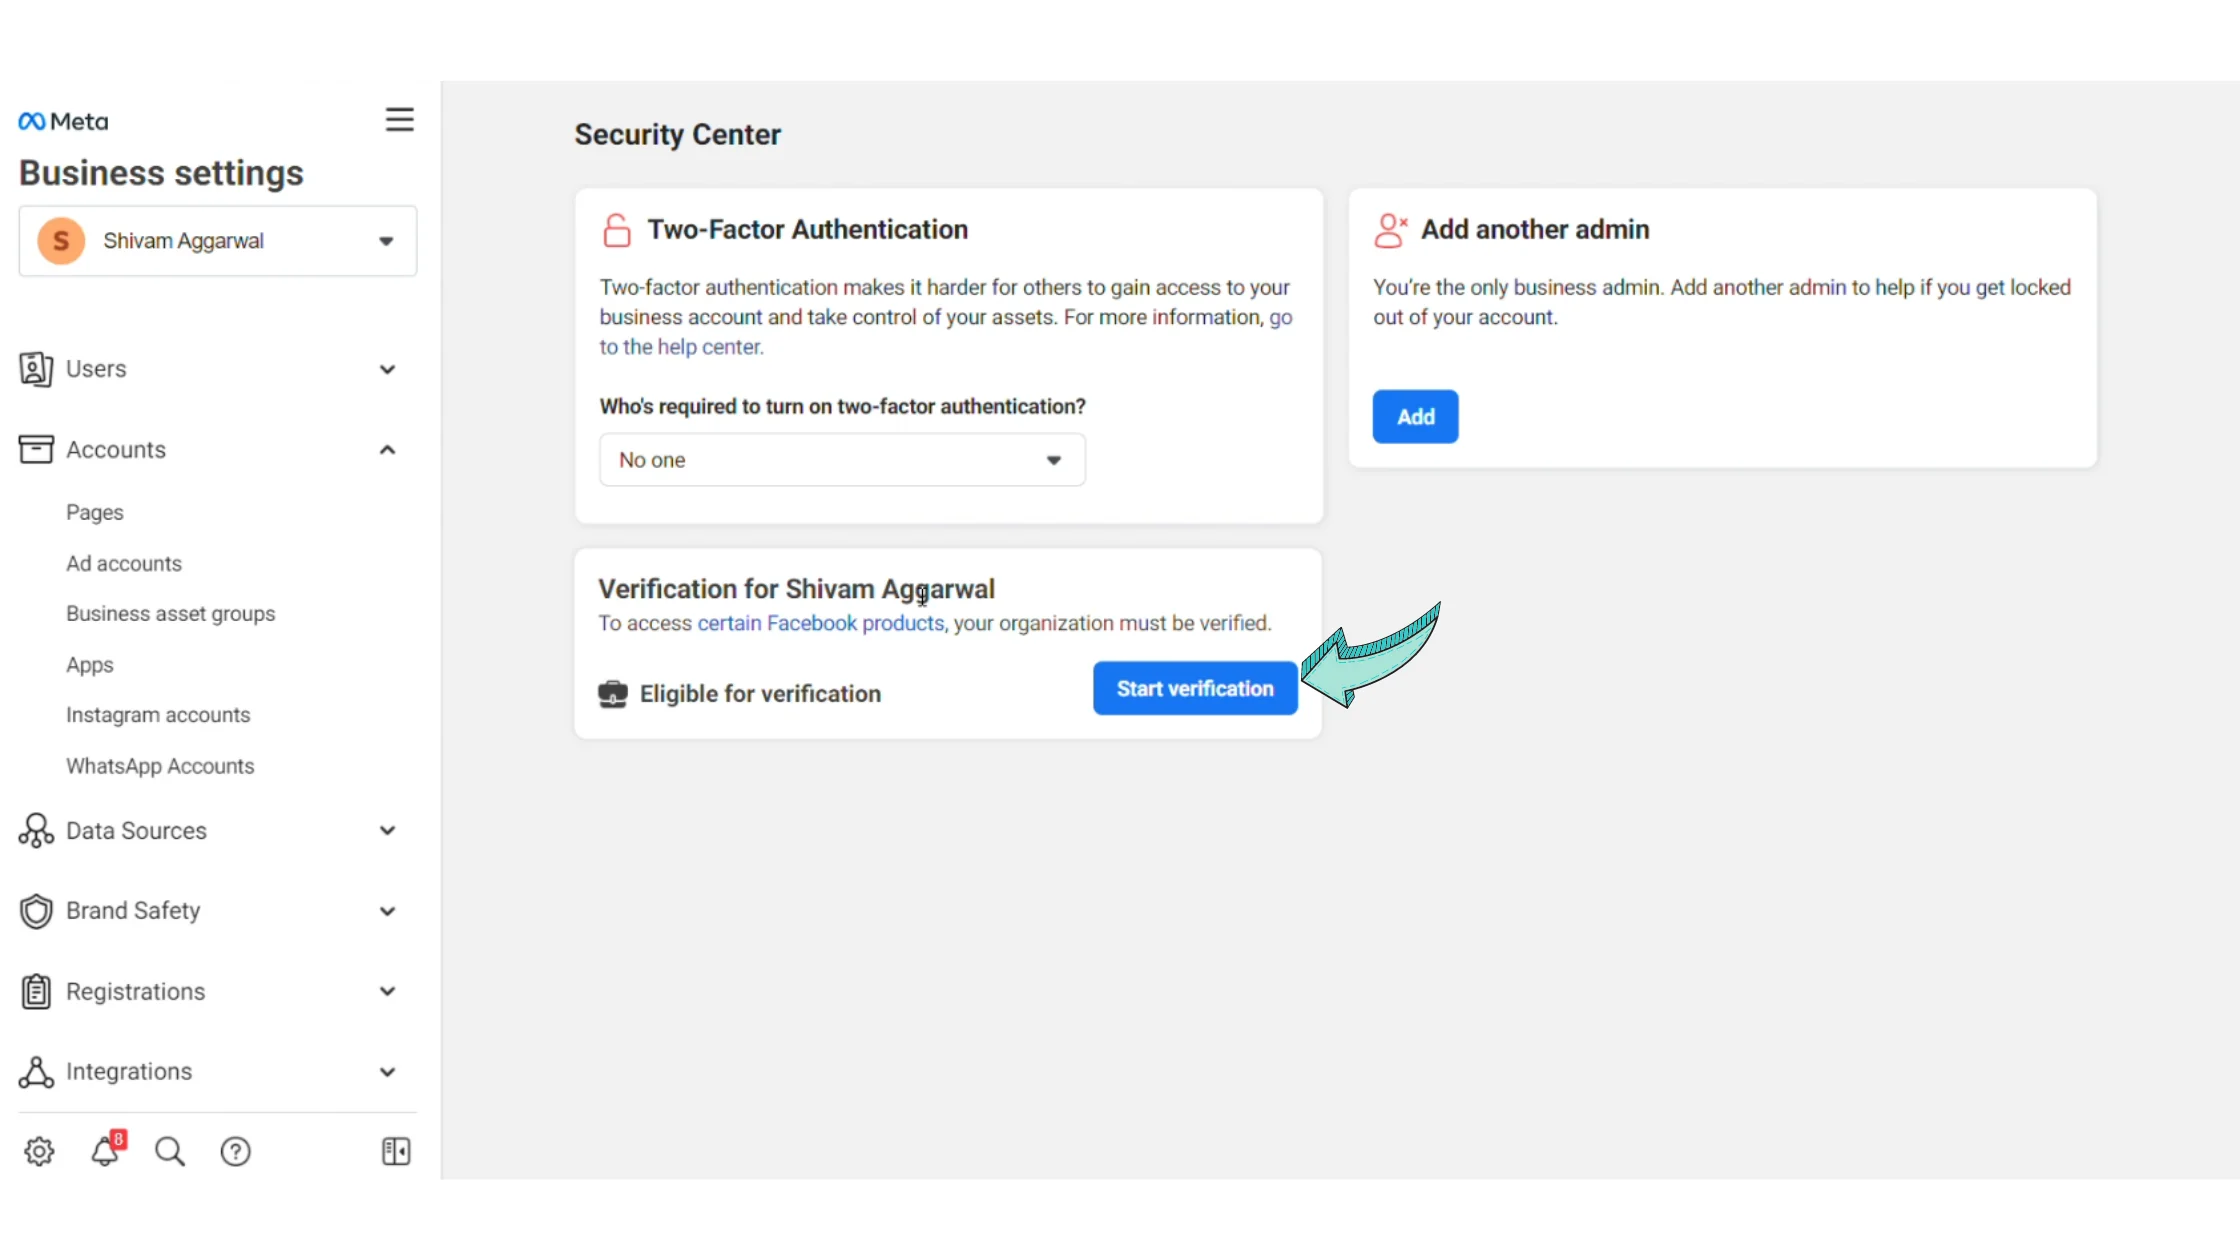
If you haven't completely added your 'Business Information' to your Facebook Business Manager Account, chances are:

1. When you apply for Facebook Business Verification, the business is greyed out & isn't clickable

or 

2. The button isn't visible.

Don't worry, it's very common and you can enable it by filling out your Business information. 

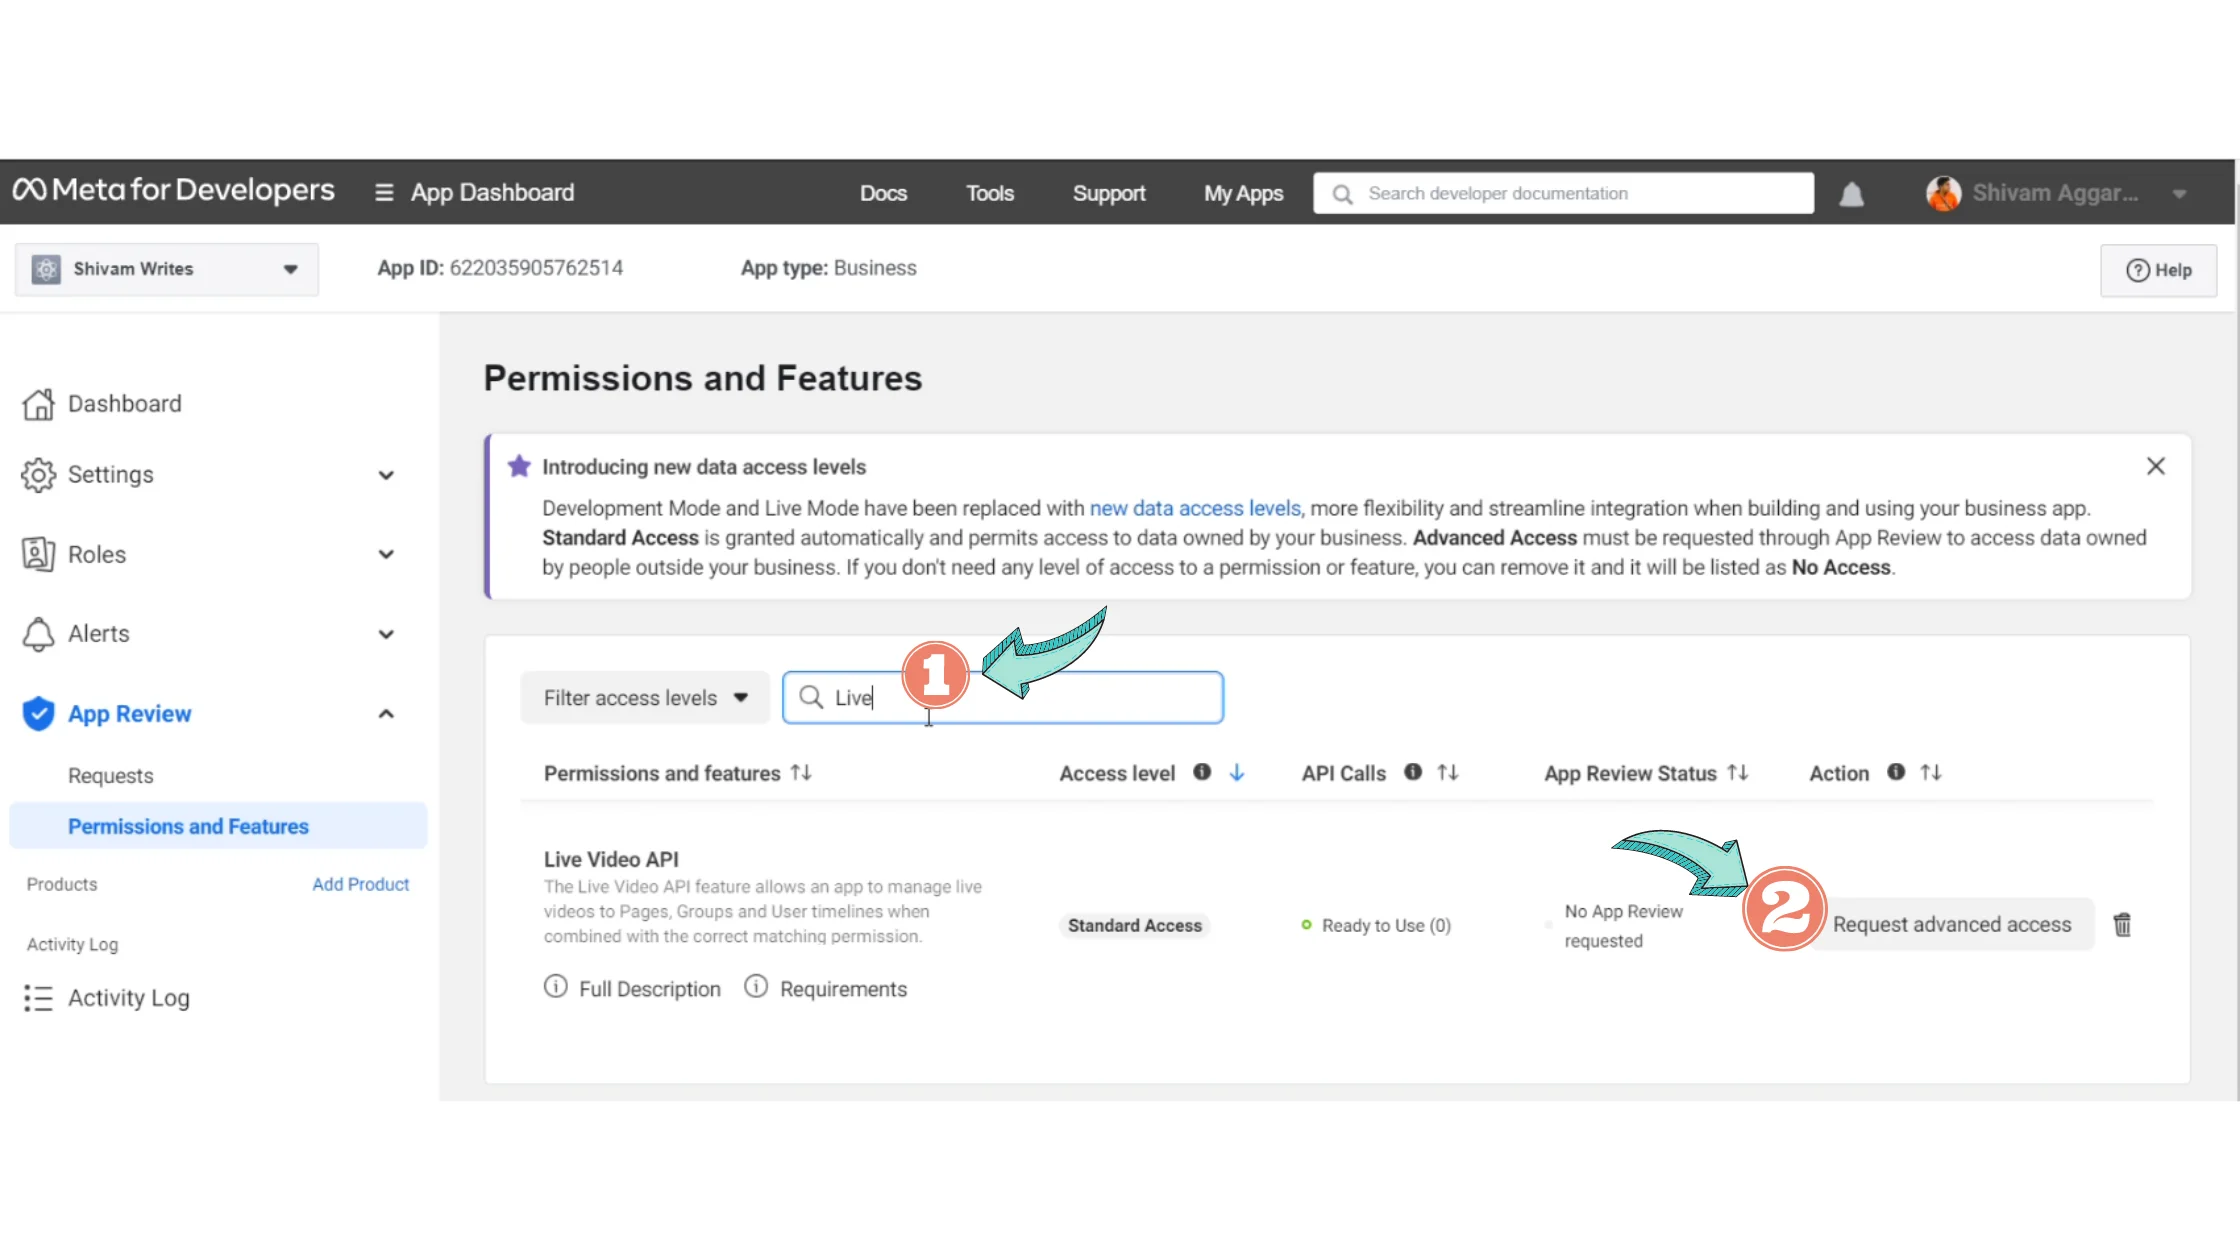
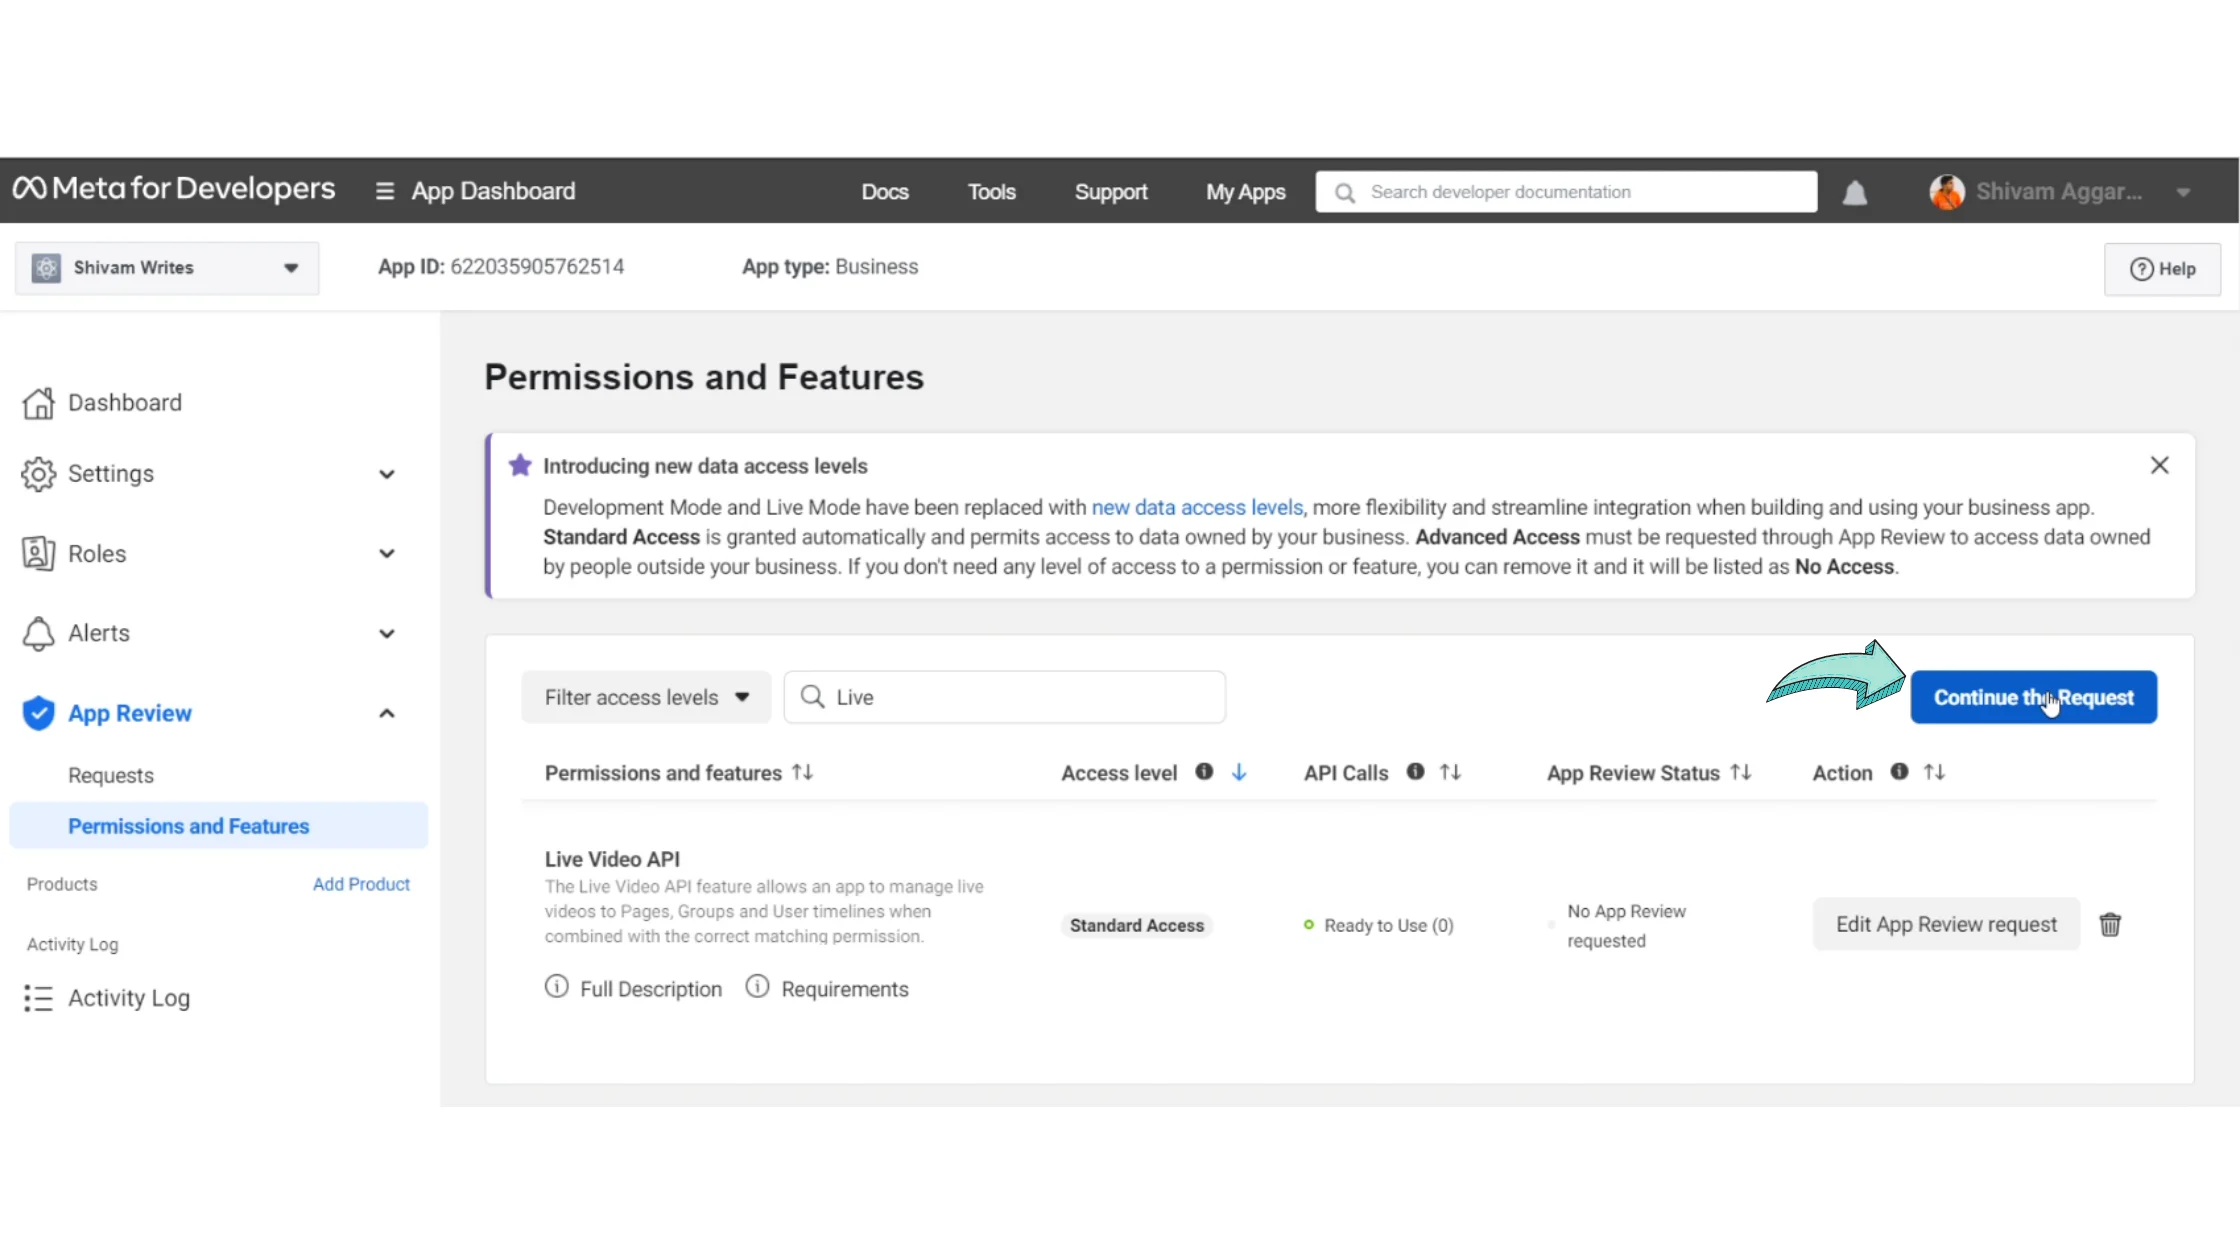
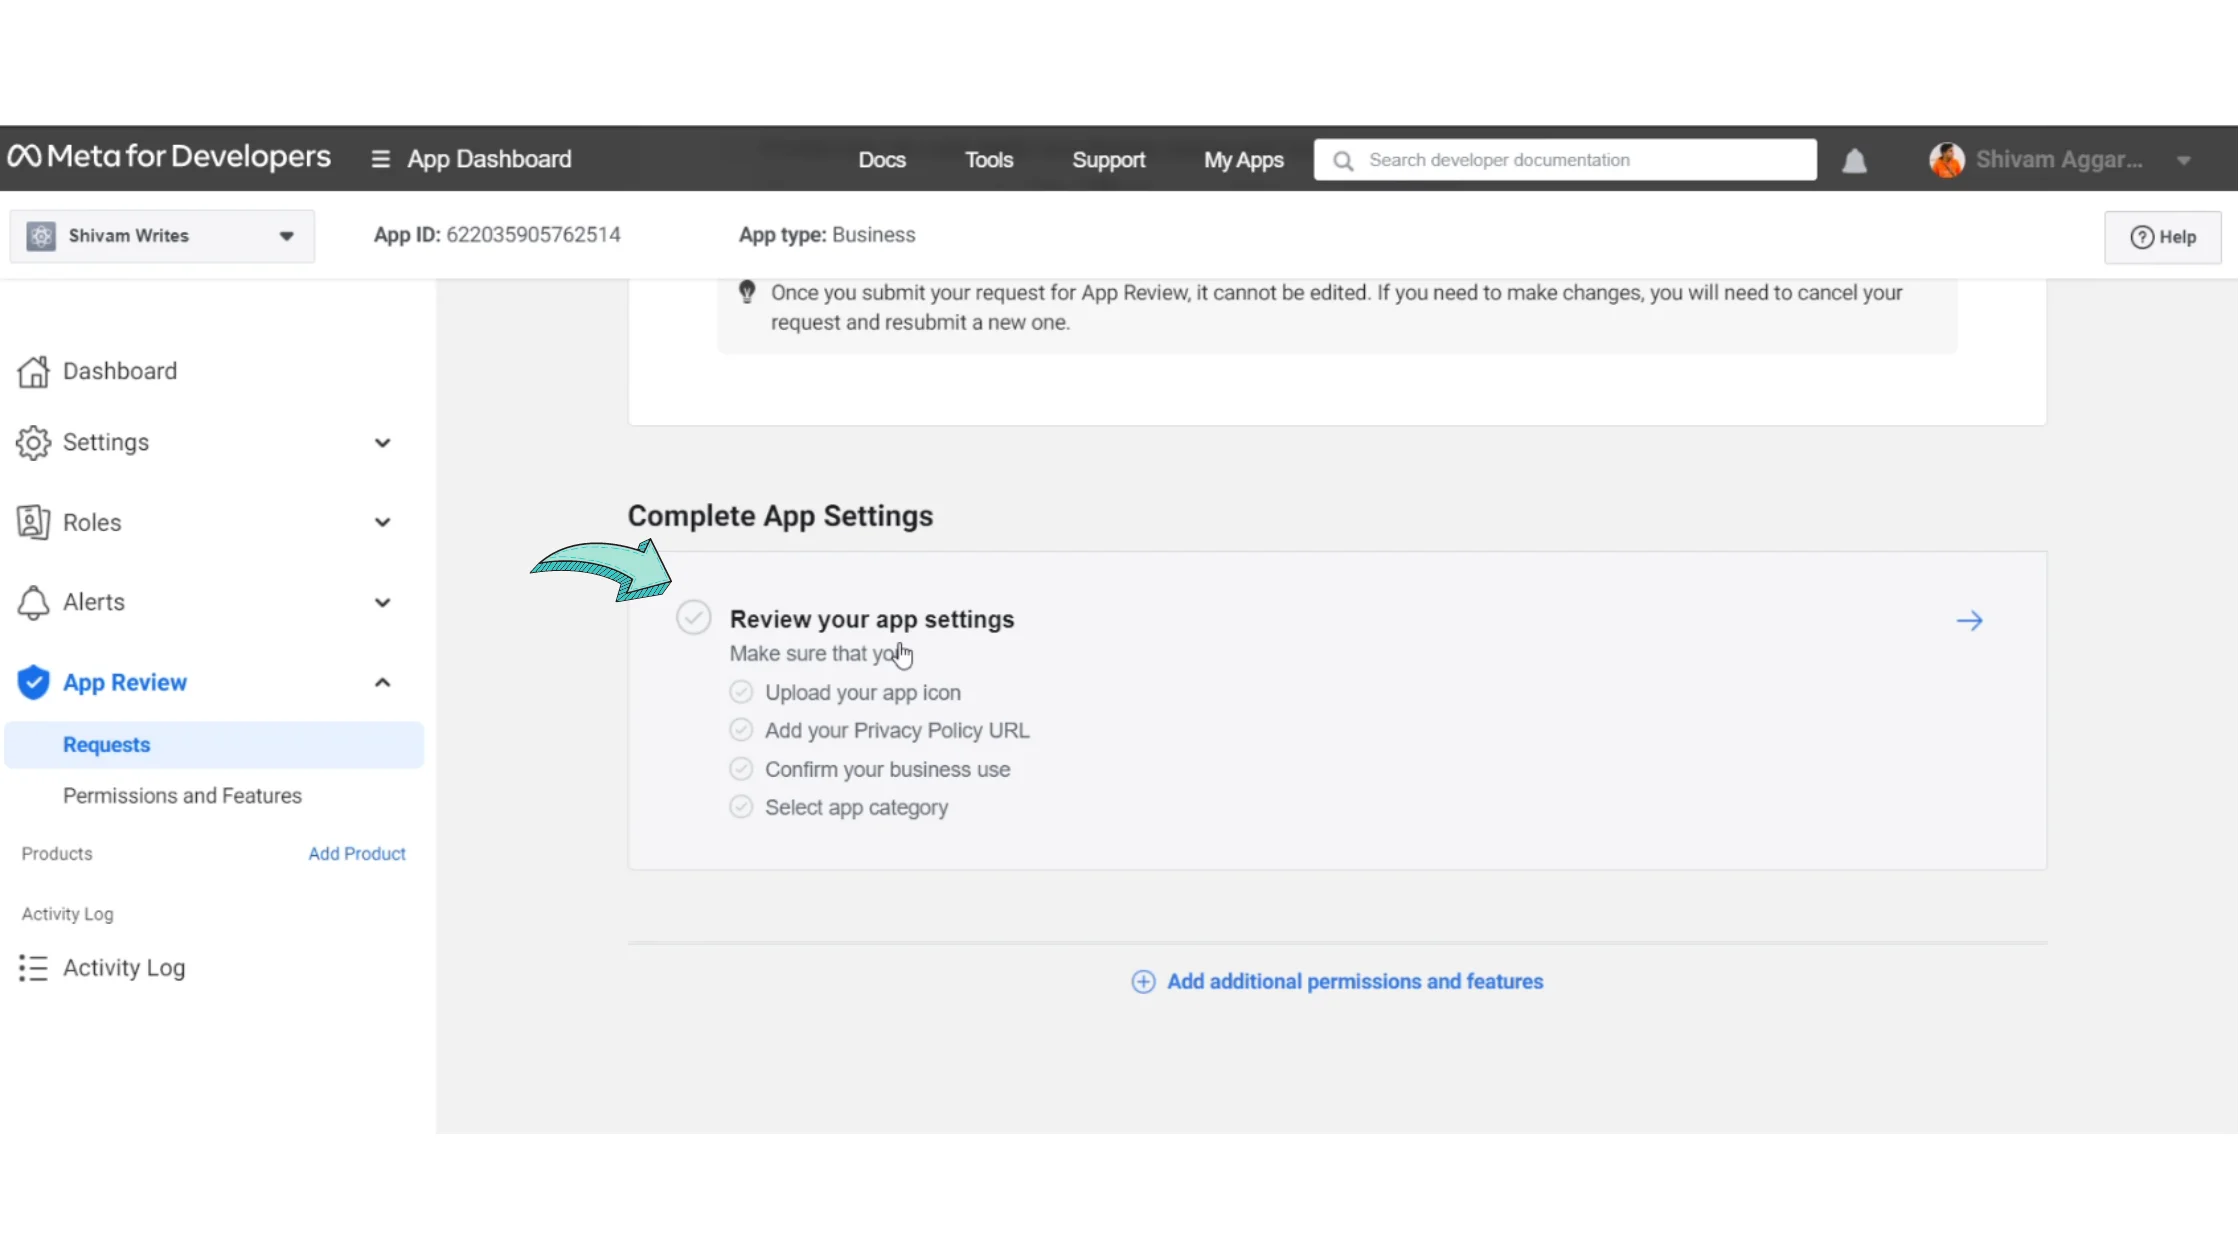
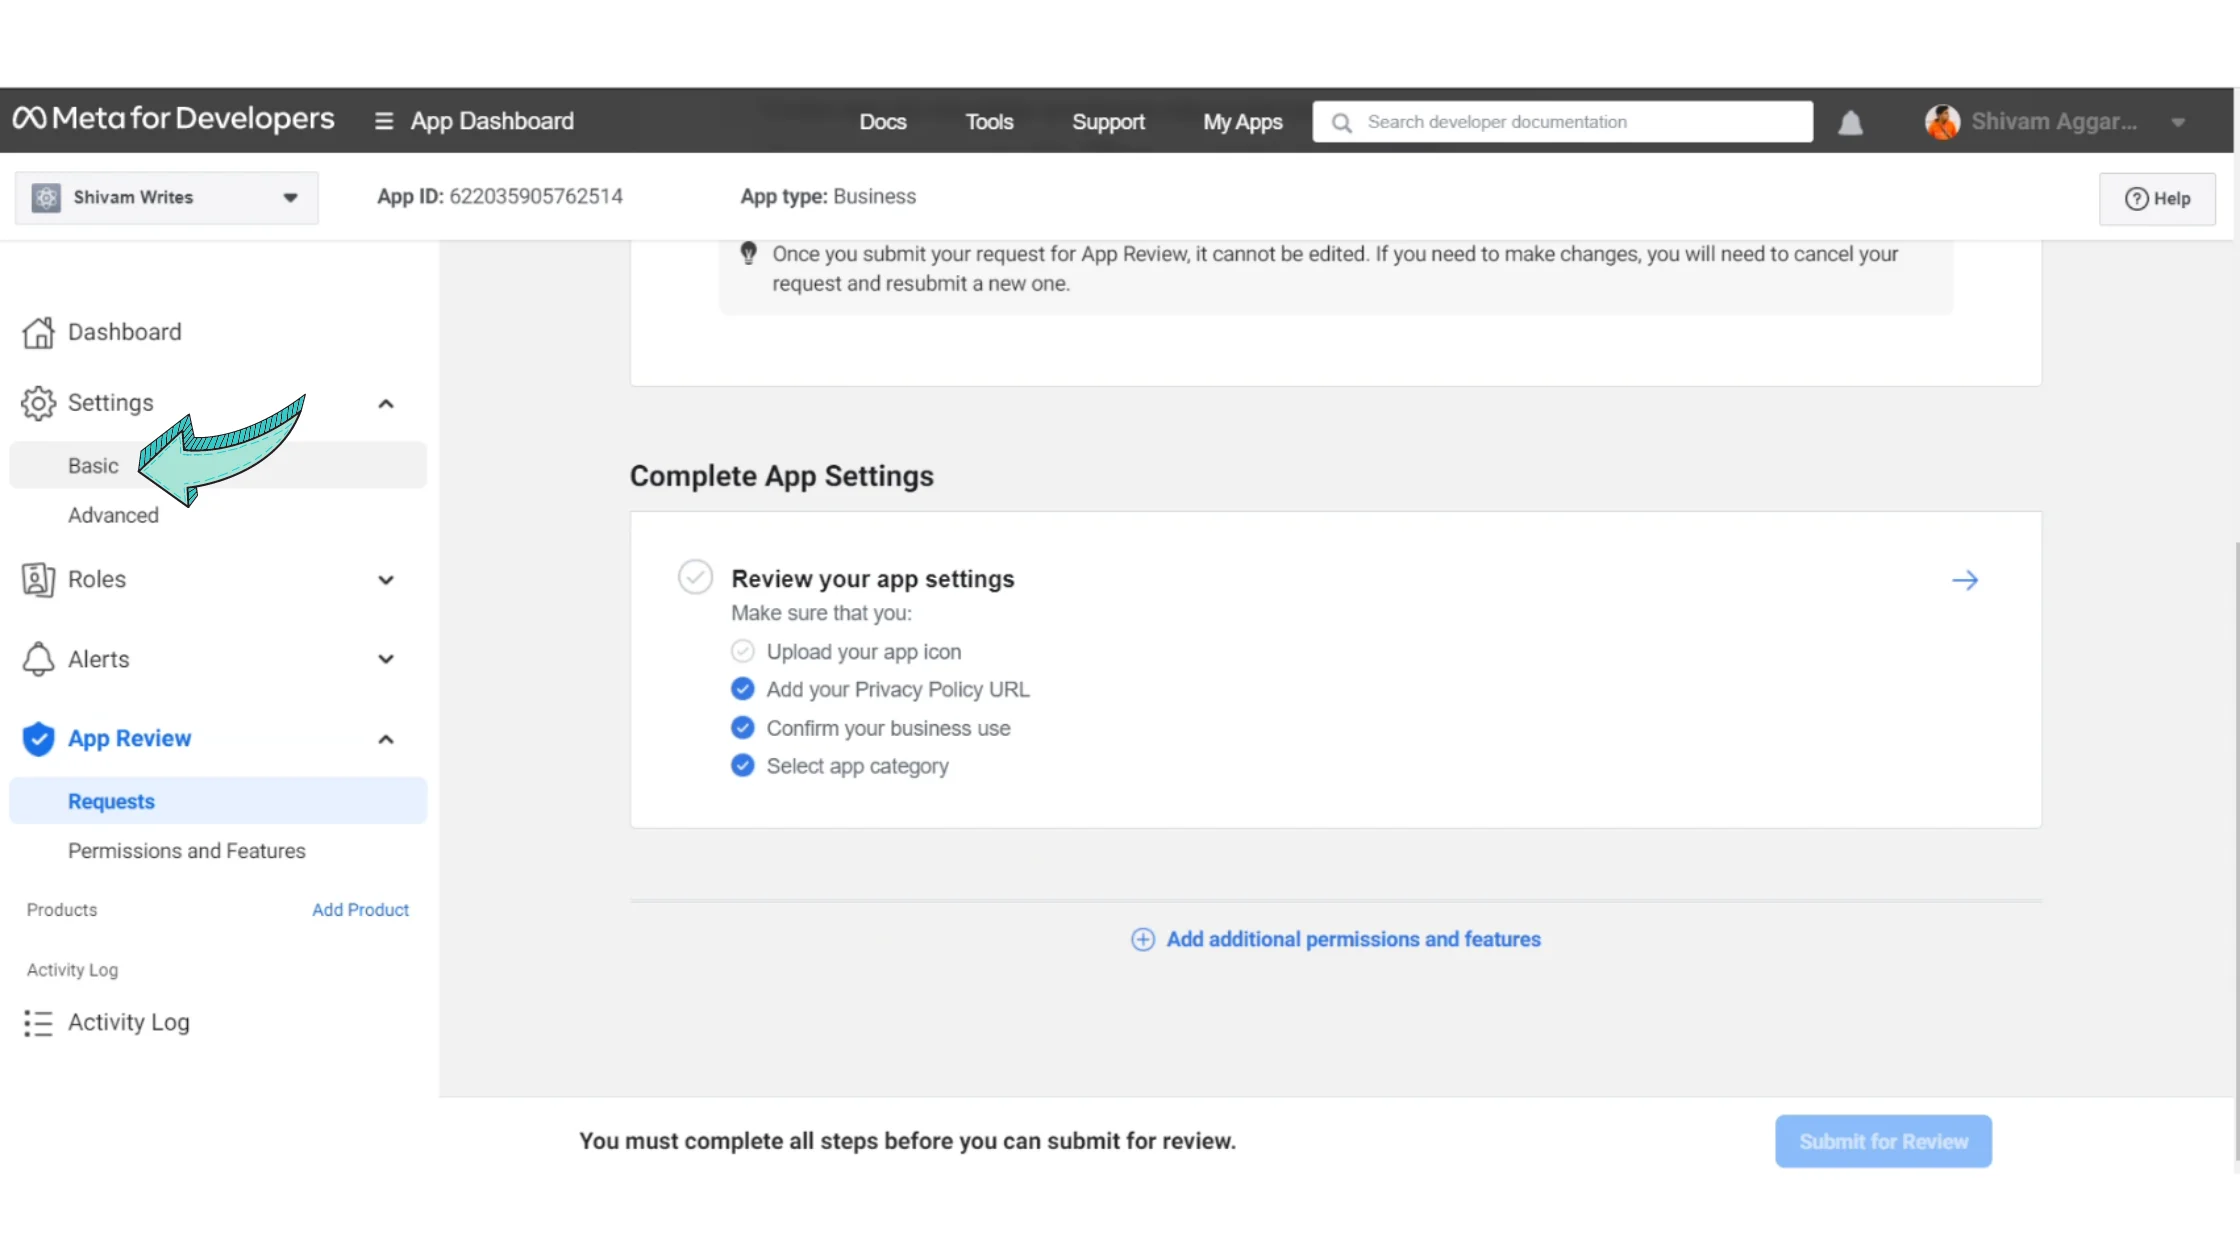
Here's what you need to do to enable the 'Start Verification' Button for Facebook Business Verification👇‍

Steps to enable Start Verification Button for Facebook Business Manager Verification

  • 1

    Go to Facebook Business Security Center

    Click here to go to Facebook Business Security Center.

    As you can see in the image on the right, the 'Start Verification' Button currently does not show

    👇‍Below are the steps you need to do to enable the 'Start Verification' Button.
     

    Note: Follow the same steps to resolve Start Verification Button greyed out/not visible

    Updated image of Facebook Business Center
  • 2

    Attach Facebook Page with Business Manager Account

    First, go to 'Pages' & add the Facebook Page of your business. 

    If you already have a Facebook Page setup, skip to the next step. 

    You should only add/ choose a page of which you are a current admin. 

    Otherwise, you wouldn't be able to apply for the Facebook Business Verification. 

    Add fb page to business manager account
  • 3

    Go to Apps

    Now, go to Apps and click the 'Add' button. 

    If you find the 'Create a new App ID' button to be locked, do this👇‍

    Hover the cursor over it & press the 'Confirm Account' Button to unlock it. 

    Clicking the 'Confirm Account' button will open a new tab👇‍

    Go to apps
  • 4

    Confirm your Account

    Press 'Continue' to confirm the account. 

    This will open another screen where you need to check the 'I agree' box and confirm your email ID. 

    Add your business email ID where you want to receive communication from the Facebook team. 

    Last, choose the best option that describes you. You can choose, "Owner & Founder", if you're the founder and press, "Complete Registration". 

    Confirm your account
  • 5

    Create App

    Clicking the 'Confirm Application' Button will redirect you to a new page as shown in the image to the left. 

    Click, 'Create App' & follow the next step👇‍

    Create new app
  • 6

    Choose App

    In this step, choose the App type that fits your business. 

    We've chosen 'Business' (recommended). Once you choose the app type, click 'Next'. 

    Choose app
  • 7

    Add Business Display Name

    Here, add the Business Display name.

    This isn't the final Display Name of your Business. It's the app name associated with your App ID.

    Once you do this, add your email address & press 'Create App'.

    You'll be asked to add your Facebook Password. Confirm it & you'll be redirected to another screen. 

    Add business display name
  • 8

    Go to App Review

    In the next screen, choose 'App Review' & click 'Permissions and Features

    Go to app review
  • 9

    Request Advanced Access

    Next, type 'Live Video API' in the search box & click 'Request Advanced Access'.

    Request advanced access
  • 10

    Continue the Request

    Click 'Continue the request' as shown in the image to the right.  

    Continue the request
  • 11

    Review App Settings

    In the next screen, scroll down & click on 'Review App Settings'. 

    Review app settings
  • 12

    Fill the necessary fields to submit your Application

    Next, you'll be asked to fill in a few fields to submit your application. 

    You can skip adding the icon of your website in this form.  

    In the Privacy Policy URL, add the URL of your website as shown in the image on the right. 

    In the app category, choose 'Business and Pages'.

    Last, click 'Save' & submit. 

    Fill the necessary fields
  • 13

    Go to Basic Settings

    Next up, go to settings & choose 'Basic'

    Go to basic settings in fb manager
  • 14

    Add App Icon

    In Basic Settings, scroll down & add your App Icon. 

    You can add any app icon. Make sure the dimensions match the requirement (Between 512x512 to 1024x1024). 

    You can change the app icon later on as well. 

    Add your app
  • 15

    Select the desired platform

    After adding the 'App Icon', scroll down & choose 'Add Platform'.

    Select 'Website' & press 'Next'

    Select desired platform
  • 16

    Add your Website URL

    If you chose 'Website' as your desired platform, add the URL of your website & press 'Save Changes'. 

    Add website url
  • 17

    Under App Review, click 'Requests'

    Next, go to App Review and click 'Requests'

    In app review click request
  • 18

    Edit App Review Requests

    Click 'edit' in App review requests as shown in the image on the right. 

    Edit app review requests
  • 19

    Click 'Provide Verification Details'

    Scroll down and click on 'Provide Verification details'.

    Click provide verification details
  • 20

    Add One-liner for your business

    Add information about your website in one line as shown in the above image. 

    The above text is a sample one🙂. Add a unique text that matches your company profile. 

    Copy it for the next step & press 'Save'

    Add one liner for your business
  • 21

    Click the field below 'Provide Verification details'

    Click on the field below 'Provide verification details' as shown in the image on the left. 

    Click field below provide verification details
  • 22

    Fill your Business Information

    Copy-paste the exact one-line description of your business you added in the above step. 

    Next, add a small video (around 10 seconds) as a demo of your business. 

    The video need not be related to your business. But, keep it short so that it uploads fast. 

    Next, check the 'If Approved' field and press 'Save'

    Fill business information
  • 23

    Click "Submit for Review"

    Last, click 'Submit for review' in the next screen. It will ask for your Facebook Password. Confirm and press 'Submit'. 

    Click submit for review
  • 24

    Magic Done🙂

    Go back to 'Facebook Business Security Settings' by clicking here

    In the beginning, the 'Start Verification' button was not there. 

    Now, you'll now see that the 'Start Verification' appears & is clickable. Click it to begin your Facebook Business Manager Verification process. 

    Click here to know how to submit Facebook Business Manager Application. 

    Start verification button now appears

We Have Answered Almost All Your Questions

English 🇺🇸🇬🇧